Showing posts with label Pickup Winder. Show all posts

Saturday, 13 June 2015

Pickup Winder: Wire Caddy

Procrastination is getting the better of me with this pickup winding deal. In the the packaging for the wire, it advises that the wire should slide off the side of the spool (perpendicular to the spool wind) whilst winding your pickups. I couldn't think of a way to nicely achieve this without some kind of caddy to point the wire spool towards the winder. And so, an hour today was spent building just such a caddy.

42 AWG wire spool sitting on the wire caddy.
So basically, there's now now excuse for me not starting to wind my first set of Stratocaster pickups. I have everything I need now in place. I just have to sit down and do it!

Everything is now ready to start winding my strat pickups.
Stay tuned, it's gonna happen any day now ;).

Tuesday, 9 June 2015

Pickup Winder: Strat Pickups Part 2

After a successful trip to Jaycar in search of rare-earth magnets, I'm ready for the second step in the winding of a set of single coil Stratocaster pickups - magnetising the pole pieces. To do this, two magnets are needed with opposing poles. The magnets are mounted with opposing poles facing each other and the pickup is passed between them.

Using my son's orienteering compass, I determined the polarity of each magnet and stuck them to the jaws of my nut-making vise with just enough room for the pickup bobbin to slide comfortably between them (nothing like wrestling some strong rare-earth magnets!).

Testing the polarity of my rare-earth magnets
Using my nut vice to hold both the opposing magnets
Once the magnets were in place, I took each bobbin in turn and passed them through the gap. It was pretty damn hard keeping the pole pieces from sticking to the magnets! I did 40 passes with each bobbin to (hopefully) fully magnetise each Alnico V pole piece.

Magnetising the neck and bridge pickups as north-facing.
To allow for noise cancelling when the middle pickup is used in parallel with either the neck or bridge pickup, the middle pickup needs to be RWRP - or "reverse wind, reverse polarity". Half of this equation means that the polarity of the pole pieces for the middle pickup need to be the opposite of the others. Therefore, having passed the bridge and neck pickups through the magnets in a "north facing" configuration, for the middle pickup I reversed the direction to create a "south facing" polarity.
 
Magnetising the middle pickup as south-facing.
After more struggling against the pull of the magnets, a quick polarity test of all three pickups showed that I had succeeded in creating a "reverse polarity" middle pickup.

The resulting polarity of all three pickups compared.
With the pole pieces magnetised, it's now time to crank up the winder and see if I can get some 42 AWG wire on these bad boys. Let's hope I don't break the wire first time out! I will be going quite slowly so fingers crossed for no mishaps. I will also be stopping every 500 winds or so to measure the resulting resistance of the coil. That should complicate the process quite nicely ;). Anyway, I need some nail polish before I continue on, so stay tuned for the next installment!

Monday, 8 June 2015

Pickup Winder: Strat Pickups Part 1

I finally got some time today to start wiring a set of 3 single coil pickups for my Ash Stratocaster build. The first step in getting the pickups wound is to assemble the pole pieces into the flatwork, and that's what I ended up tackling. The pickup kit that I purchased from aliexpress.com came complete with the flatwork (with eyelets already inserted), alnico V polepieces (unmagnetised) and push back vintage wire to create all 3 pickups.

Strat pickup kit and the tools to assemble the flatwork.

The pole pieces were already bevelled on one edge, removing one step in the process (phew). The pole pieces that came with the kit were the following sizes: 3x18.7mm, 1x18.3mm, 1x17.5mm and 1x19.8mm. Referring to the 
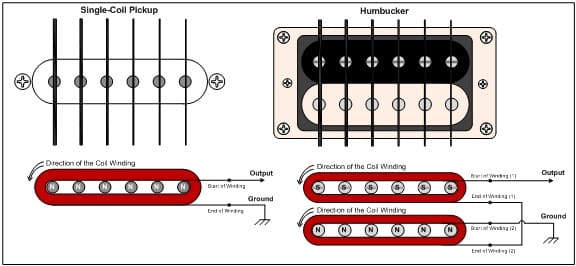
pickup winding guide from Stewmac as a rough tutorial, I assigned these pole sizes to the string positions as follows:

E: 18.3, A: 18.7, D:18.7, G: 19.8, B: 17.5, E:18.7
Using my regular hammer, I bashed the non-bevelled ends of the pole pieces into the bottom flatwork, making sure that the eyelets were facing up. In preparation for lacquering the completed bobbins, I also covered the eyelets with a little painters tape. It took more effort than I was expecting to get these pole pieces seated - the holes in the flatwork are quite a deal smaller than the diameter of the pole pieces themselves, and this combined with my sausage fingers meant that it took quite a bit of effort to get them hammered in.

Pole pieces finally bashed into the bottom flatwork.
With the pole pieces now in and standing, it was time to get the top flatwork installed. To make sure that it was installed at the correct height, I created two 11.5mm high guides out of plywood to sit either side of the pole pieces.

11.5mm high guides cut from plywood and held with a rubber band.
Held in place with a rubber band, these allowed the top flatwork to be hammered home without mishap. To help me, I created a small tool from a piece of perspex whose 55mm diameter hole fit over each pole piece and allowed me to lower the flatwork around it. This was another useful hint from the stewmac winding guide, and it really saved my arse.

A piece of perspex with a 55mm hole. A genius hint from Stewmac.
Although it took a little bit of fiddling to get all the pole pieces lined up with the holes in the top flatwork (especially the lowest B string pole piece) I soon had all the pole pieces hammered through and looking great!

Pole pieces installed! This baby is almost ready for winding.
After the first bobbin was assembled, I went on to complete the remaining two. Yet again it took more time than I was expecting (most time was taken with the initial hammering pole pieces into the bottom flatwork) but finally I had all three bobbins assembled and ready for the last step in their assembly.

Three strat bobbins all assembled and ready for lacquer!
This last step is to spray the entire bobbin with lacquer to make sure there's no electrical conductivity. This was achieved using the dregs of my White Knight acrylic cans from a previous build. I used a piece of hookup wire through the screw hole to hold each pickup for spraying and later hanging to dry. The painters tape hopefully stopped any lacquer from coating the eyelets!

Bobbins sprayed with Lacquer and hanging to dry.
So there you have it! 3 assembled strat pickup bobbins ready for step 2 in the process - magnetising the poles. I need to source some rare earth magnets from Jaycar during the week so that I can get this done and be ready for winding. Exciting times!

Saturday, 25 April 2015

Pickup Winder: Wire Guide

I finally received the last parts for my DIY pickup winder today - a 30cm piece of 6mm brass tubing to act as a wire rest and two more Aluminium Hubs from Jaycar to act as guides.


Brass tubing with Aluminium Hubs to limit horizontal wire travel.
I've also received some cheap pickups kits from China (via Aliexpress) and hope to do some winding soon. I've got a couple of strat sets and a telecaster set.

Pickup kits: one Stratocaster and two Telecaster sets.

All I need to get started is a spool of 42 AWG wire. That's going to have to wait until the finances are a little stronger!

Wednesday, 1 April 2015

Pickup Winder: She's Spinning

Well, today I put the finishing touches on the enclosure and the spindle for the custom pickup winder. She's a little dodgy - accurate woodwork has never been my forte - but she will server the purpose for which she's intended.


In the case that a fault develops, or I want to enhance its  functionality, the lid has been hinged to allow easy access, and I've installed a big fuck-off knob on the speed pot so that my sausage fingers can use it easily. I was also able to replace the existing forward/off/reverse switch on the motor controller with a much more enclosure friendly option. It seems that the switch just reverses the DC voltage across the motor.

So anyway, I'm pretty happy with how she's turned out. Here's my new toy in action - it's rivetting stuff...


All I need now are a few supplies. I'm waiting on a brass rod to make a wire guide on the right hand side just below the line of the spindle. I also need to pick up some wire and pickup kits so that I can get winding! My first aim is to get a set of hot strat pickups wound for my recent stratocaster build.

Tuesday, 31 March 2015

Pickups: Pole Polarity and Phase

Every pickup coil has two properties that affect how they will sound when they are combined with others. These properties are called phase and polarity. Phase is the direction current travels through the pickup. Polarity is the direction of the magnetic field in the polepiece magnets. With both properties, there are only two options:

Phase: can either be "top coming" or "top going", where "going" in this sense refers to the direction of the current traveling towards ground.

Polarity: can either be south or north, and refers to the magnetic polarity of the polepiece magnets closest to the strings.


The phase of each coil is indicated by connections to "output" and "ground"
when the direction of wind is constant. The polarity is indicated by the magnetic
pole indicators on the top of the polepieces.

A typical application of these principles is with single coil pickups. One interesting property of single coils is that depending on their phase and polarity, it may be possible for them to be hum cancelling when combined. The key to a strong, full tone with hum cancelling is to combine single coil pickups that have both opposite phase and opposite polarity. If one pickup is north polarity, top going, the other must be south polarity, top coming. That is to say, the secobd pickup must be what is known as reverse wind - reverse polarity, or RWRP for short.

Humbuckers all operate on this same principle. The two coils have opposite wind and opposite polarity. When combined, the hum is cancelled out. Splitting a humbucker will, of course, bring the hum back!

For two single coil pickups to be in phase, both the magnet polarity and the wind direction have to either be identical, or opposite. In other words, two pickups with the same wind and polarity will be in phase, and so will two pickups that have opposite polarity and wind. If the two pickups have the same wind but different polarity, or the same polarity but different wind, they will be out of phase with each other.

The most common reason for two single coils to be out of phase is that one of them is wired backwards. The lead that was supposed to be connected to ground is connected to the output, and vise versa. This wiring error effectively changes a top coming pickup into a top going.

Monday, 30 March 2015

Pickup Winder: Power Supply & Counter

I little progress on the custom pickup winder today. I was able to install the electric motor into its mount, and also screw the magnetic switch into position above it. Thankfully, the mount seems to work very well and the motor is steady as a rock. Take that year 7 woodworking!!

Motor mount is sturdy and working well.
Motor and Magnetic Switch are mounted and ready to rock!

Over the weekend I was also able to glued some small pieces of wood in to the corner of the enclosure to create a bullpen for the 240V -> 12V power supply. With the glue dry, I was able to mount the power supply in its pen, and proceed to wire the 240V input into the end of an extension chord that I dismembered. The 240V is coming directly into the power supply without a fuse, so maybe I'll burn down my house first time out...

The power supply sitting in its bullpen away from fragile fingers

The dismembered extension chord providing 240V sans fuse.
To test the output voltage (24V) I wired it up to the power lugs of the counter. It worked! The counter lit up with 000000. I couldn't resist then hooking my magnetic switch up to the counter as well. Hmm no counting? WTF? Turns out you also need to supply a voltage to the switch so that the counter is actually receiving a signal with each blip. Doh - dunkopf! A couple more wires later though and I had the success I sought.

The counter is working nicely!
The power supply is now humming and the counter is counting quite happily as the magnet passes the magnetic switch! The next step is to get the electric motor controller connected to the 24V power and then its output lines to the electric motor to test the forward, backwards and speed controls. Fun, fun!

Friday, 27 March 2015

Pickup Winder: Electric Motor Mount

A little more progress today on the custom pickup winder. I cut the top off the enclosure to bring the height down to a half what I started with. It is looking much better now. The lower center of gravity will make the winder much more practical.

I also built the mount for the electric motor using two pieces joined by long bolts. I got the mount cut down to size, installed the securing bolts, and glued the bottom of the mount to the inside wall of the enclosure.

The two sections of the electric motor mount ready to install.
Gluing one half of the mount to the inside of the enclosure.
I also drilled a few holes in the back to let heat escape as I was too cheap to buy a prewired power supply. Unfortunately these holes have made the enclosure look like a rabbit hutch, but at least they are on the back where I (hopefully) wont be seeing them!

Holes for heat. The enclosure now looks like a rabbit hutch.
Over the weekend I should be able to get the components wired up to test that I understand the confusing Chinese labelling scheme and the way the bits and bobs fit together. With this done, it will be a relatively simple matter of finishing the woodworking so the enclosure is ready to accept them. I still have the control face and the lid of the enclosure to build, so that should keep me busy for a few more days at least!

Thursday, 26 March 2015

Pickup Winder: Building a Custom Winder

Not many people know this, but building your own pickup winder is both cheap and easy. After endlessly reading and re-reading Gavin Bramley's thread on the Build Your Own Guitar forum concerning building your own pickup winder, I resolved that this was something that I absolutely, positively had to do!

Electrical components - It's a very simple mechanism really.
I ordered all the parts from aliexpress some months ago and have been waiting for a suitable time to get started on it. In terms of internal parts, all you need is:
  • 240V AC -> 24V DC power supply
  • 24V electric motor
  • 24V electric motor controller with reverse
  • Electric counter
  • magnetic switch and magnet
All in all these parts set me back approximately $50USD.

I still have a couple of parts to source before I can complete the project, but that is a little way off:
  • 240V wall socket wire (i'll probably butcher a cheap extension chord)
  • internal hookup wire
  • brackets to mount the spindle to the pickup loom
  • a guide for the wire as it winds
I am also thinking of incorporating an Arduino circuit to measure the resistance of the pickup as it is being wound. I know that it's quite easy to build a resistance meter with Arduino (I have all the parts), but the only trick will be a mechanism to actually keep contact with the end of the wire that first attaches to the pickup and is spinning with the spool. I've still to find a solution to this problem.

Anyway, today I (finally) got in and started to build an enclosure. My base dimensions look good, (I made sure I could accommodate the power supply and the controller easily on the floor of the enclosure) but the height looks way off. It looks way too top heavy to me - the way it is now it will shake itself to pieces when the motor gets going.

First steps in building a plywood enclosure.
I reckon I'll take the height down by half before I put the rest together. I've built a motor holder as Gav suggested in his thread (two pieces of oak with a hole through the center) and am just waiting for the glue to dry before adding some adjustment bolts and installing it on the inside wall.

Once I've done this I can get a mock up of the wiring completed. Hopefully I won't electrocute myself in the process! Stay tuned for more progress in the coming days!