Showing posts with label RM Olson. Show all posts

Wednesday, 30 October 2013

ES175 Hollowbody - It's a Psychobilly Freakout!

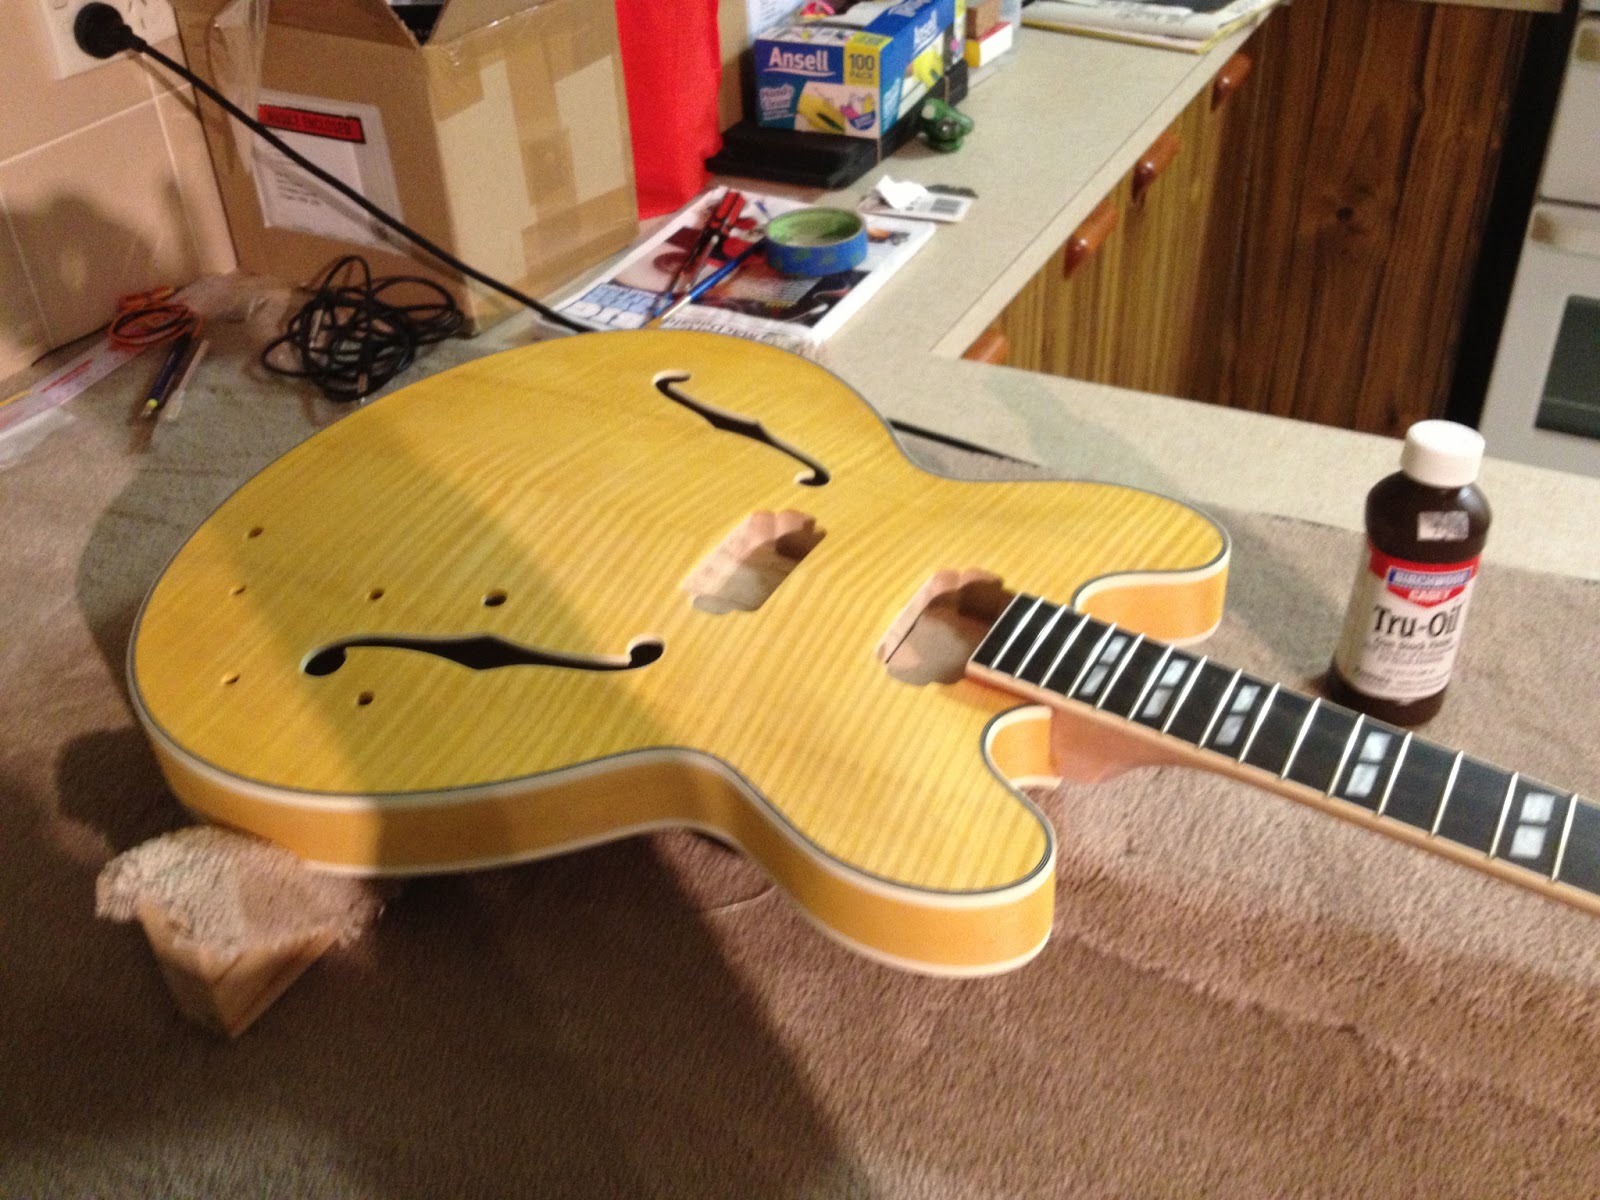
Well, I finally finished the orange ES175 Psychobilly beast today. It came out pretty damn nice all told. I made a couple of schoolboy errors right at the end there - scoring the headstock with the nut file - but nothing the truss rod cover won't hide. The flame maple has popped very nicely and the orange colour looks great.


The GFS Retrotron Nashville pickups are clear and twangy (remarkably so) giving the guitar a real rockabilly sound. Wailing on the B70 also sounds awesome, and with the overdrive cranked these pickups really are the business, especially in single-coil mode. The headstock is also nice, with the faux inlay flowers working quite well with the overall look of the guitar.


The freeway switch works well, and both humbucker and single coil options sound great. When you hit the overdrive those single coils sound especially sweet! Another great kit from RM Olson that has turned out better than I ever expected. Anyway, enough from me - I'm going off to play the mother.

Wednesday, 16 October 2013

ES175 Hollowbody - The Hardware is Here!

Today I received the hardware for my ES175 build. The excitement is really building now - you can see how this beast is going to come together. I have a Bigsby B70, Bigsby small bridge, and a set of Nashville Retrotron pickups from Guitar Fetish. I'm considering going to chrome knobs as well - just like Gretsch's Orange 6120. What do you guys think of the choice? It isn't Gibson standard I know, but I think it looks awesome with the orange.


I think that this bad boy is really looking the business now. This is going to be one psychobilly beast! The chrome humbucker surrounds and the Bigsby bridge need a little bending to more closely fit the archtop (see the gaps?) but that should be a reasonably straightforward fix. I have only applied the Medium Stewmac ColorTone Polishing Compound to the Tru-Oil at the moment (after wet-sanding to 2000 grit), so that leaves Fine and Swirl Remover to go before I can put this baby together. Oh, and there's the small matter of a wiring harness to build. I better get rubbing and soldering!!

Monday, 16 September 2013

ES175 Hollowbody - Tru-Oil, Tru-Oil, Wet-sand, Repeat..

The ES175 is coming along nicely. During the last few weeks I have been applying successive thin coats of Tru-Oil to all surfaces. After 12 initial coats of Tru-Oil, it was time for wet sanding. During the dying process I managed to get all surfaces of the body sanded to 600 grit, so my wet sanding couls start at 800 grit. I always wet-sand the Tru-Oil with boiled linseed oil. I find that wet-sanding with Tru-Oil itself can lead to problems when it dries too fast, leaving messy marks on the surface if you dont get the excess cleaned off in time. Typically I apply 5 or so coats of Tru-Oil between each wet-sanding grit, moving from 800 to 1200, 1500 and 2000.

If you don't want to sand with oil as a lubricant, I have found another technique on this build that works equally well 'dry' if you are careful - especially for the coarser grades. Take your sandpaper and sand very lightly with the grain in small strokes over the entire surface. When you are satisfied with the smoothness of the finish, wipe the surface with a rag soaked in methylated spirits to make sure all the fine grains are removed from the new scratches you've made. Remember that wet-sanding is a technique that reduces the chance of creating deep scratches in the finish. If you are working 'dry', like this, then you run a much higher risk of marring your final finish!

After sanding to 1500 grit, this baby is really staring to look awesome. The flame maple figure is really popping, and although I would have liked a deeper orange colour on the front of the guitar, the whole look is really coming together.


Sweet huh? I have hardware ordered, including GFS Retrotron pickups and a B70 bigsby. I just can't wait to get this bad boy assembled - it's going to be a rockabilly beast!!

Tuesday, 27 August 2013

12 String 335 - It's a Thing of Beauty!

The 335 is finally finished. All agree that the Colortone Amber stain + Tru-oil looks spectacular, as does my choice of tailpiece and GFS Surf-90 pickups. You be the judge!


12 String 335 - Wiring It Up

Finally got to installing the wiring harness on my 12 string 335 today, and let me tell you it was a mammoth effort. Anyone who has tried to do this will tell you that it's a bugger of a job to get a set of connected pots through the F-hole and into place with anything less than a childish tantrum or two.


In the end I sucessfully used the "fish-tank 5mm pipe" method to complete the task. This involves threading pipe through the holes and onto the tops of the pots (and output jack) and then drawing them carefully through the body until they are seated and can be affixed. It takes alot of fiddling as the wires can easily become tangled or trapped between pots and the guitar body, and the pipe can be easily detached from the pots, but finally after 5 attepts and re-starts the components were seated and finger-tightened - job done!


All that was left to do was to add the glorious gold top-hat knobs from Stewmac and then it was off to the ball Cinderella.

Tuesday, 20 August 2013

ES175 Hollowbody - New kit started from RM Olson

With the 335 12 string all but completed, I now feel justified in starting the other kit that I ordered from RM Olson Guitars (www.rmolsonguitars.com) in the USA. The kit is a full hollow body ES175 kit in flamed maple. Out of the box the kit looks well made and sports the flamed maple veneer top and bottom - a detail often overlooked by other kit makers. Like the 335, the fixed neck also came pre-assembled - something that I am very thankful of Robert (Olson) for. All in all, a great kit and I couldn't wait to get started.


I'm planning to go with an orange dye job with this one, in the hope of emulating the classic  look of the Gretsch orange hollowbody guitars. Initially, I hit the kit with the 240 and 360 grit sand paper to remove any glue and machnn marks. With these initial sandings were complete, I decided to do a trace dye - a step I was not able to complete with the 335. The aim of the trace dye is twofold. Firstly it enables you to detect any patches of glue that were missed by the initial sanding, and it also allows colour to soak deep into the figured parts of the maple veneer.


Using Colortone orange from Stewmac, the initial trace dying did indeed highlighted a couple of regions where glue had squeezed out around the bindings, and in particular where the fixed neck was attached.  I was able to concentrate on a couple of these glue spots (mainly at the top and bottom of the veneer-join) as I took the majority of the dyeoff again with 360 grit.

The trace dye seems to have done its job and the figure is standing out nicely. Now for more sanding, from 400 to 600 grit, to smooth the surfaces before the final dye job is done.

Friday, 9 August 2013

12 String 335 - Polishing and Shielding

Great progress today - i *finally* got the polishing finished on my 335 12 string, and I also managed to shield the pickup cavities ready to receive their glorious GFS Surf 90s!

I started the polishing process after having wet-sanding with 1500 grit paper and applying a final coat of tru-oil thinned to 50% with turps. Polishing proceeded in 4 stages, with the first stage being a wet-sand with 2000 grit wet-and-dry using boiled linseed oil as the lubricant. I wet-sanded until the surface felt smooth and sanding marks covered the majority of the surface. The surface wasn't as dull as it probably should have been, but this wasn't unexpected given that I didn't leave all my wet-sanding until the last coat of Tru-oil was applied.

After the 2000 grade wet-sand, I then applied sucessive Stewmac polishing compounds - starting with Medium, then moving to Fine and Swirl Remover to remove the sanding scratches and bring out the shine.


I applied each successive compound using my electric drill and some small (3cm) foam polishing pads I purchased from Aussie site polish-up.com.au.  The shine that resulted was surprising, with the Tru-oil displaying a satisfyingly reflective gloss finish, and a deep translucency that unfortunately shows up every little mistake I made when applying each layer of oil. The flame maple has really popped, and the 3d or "chatoyance" effect as you move around the guitar is fantastic. In short, I'm very happy with how the finish has turned out!


With polishing complete, it was time to turn my attention to preparing the guitar for wiring - notably, shielding the pickup cavities with some dual-sided conductive copper foil. This stuff is great - it comes with stickum on the back and simply lays down like tape (if a little harder to handle). Each strip lays over the strip next to it and the whole thing forms a wonderfully conductive sheet (resistance is effectively negligable).


"chatoyance"
You can even solder onto it! I was able to easily solder wire from the neck cavity to the bridge cavity without any trouble at all. When the bridge is finally installed, i will be able to solder the bridge ground wire to the shielding around the bridge pickup,  and then run another wire from the shielding out to the wiring harness. Exciting times ahead!

Thursday, 8 August 2013

12 String 335 - Vintage 50s Wiring Harness

I got the wiring harness for the 335 wired up today based on the "Vintage 50s Wiring" scheme used by Gibson in the (unsurprisingly) 50s and 60s. This wiring scheme attaches the tone capacitor (and therefore tone pot) to the output of the volume pot rather than the input as is the case for so-called "Gibson Modern Wiring" that is used in all 335, Les Pauls and SGs today.


I'm hoping that this wiring scheme, in combination with my GFS Surf-90 pickups, will lend the guitar a very 50s jangly sound.

Everything went together fairly easily using 500K CTS pots and 0.022 uF orange caps from Stewmac. Because my push-pull CTS pots wont fit through the f-hole in the 335 body, my planned series/parallel and coil tap modifications had to be scrapped for this build. Hopefully in a later build I will be able to explore the plethora of wiring modification possibilities.


At present I satisfied myself with a simple modification to the 50s Vintage wiring scheme to allow the volume pots to operate independently. The problem with both 50s Vintage and Modern wiring is that when both pickups are selected, turning one one of the pickup volume pots to zero grounds out the entire signal from the 3-way switch (including any signal generated from the other pickup). A simple modification swaps the volume pot input and output lugs, placing the pickup input wire onto the pot's swing arm.  When the pot is turned to zero, only the hot wire from the pickup in question is grounded rather than the whole circuit, allowing the other pickup to continue to supply signal to the 3-way switch as normal.

A second simple modification I am considering is the addition of a "treble-bleed" circuit to each of the volume pots so that the high-end jangle is not muddied as the volume is turned down. This simple circuit involves a resistor and capacitor wired in parallel across the volume pot "hot path" to allow high signal frequencies to bypass the increasing resistance as the volume is turned down.


As the pot is turned and the resistance increases, the resulting signal, while attentuated for the majority of the frequency range, is not reduced for the higher frequencies. These higher frequencies stay in the signal and the resulting output retains the high jangly tones even as the volume is rolled off.

Monday, 15 July 2013

12 String 335 - The Hardware has Arrived!

My hardware arrived for the 335 build today; pickups, solid metal humbucker mounting rings, and a trapeze tailpiece all in beautiful shiny chromey goodness.


The pickups are Surf 90's from Guitarfetish (GFS). These have received rave reviews from all quarters, and I'm expecting them to really bring the jangle. These pickups were specifically recommended for a 12 string application by the guys at GFS. Suffice to say I have high hopes for the sound. The humbucker mounting rings are also from GFS, and will require some bending to fit the archtop of the guitar. I love the low profile look to them much better than the bulk of the regular humbucker rings, and it's always better to have real metal rather than chrome plated plastic. I'm going to use them on all my builds in the future!


The 12 string trapeze tailpiece is from Allparts and completes the setup. It's not the flashiest tailpiece around, but it was really hard to find any 12 string tailpieces at all! I do like the simple lines it provides however - it compliments the lines of the flamed maple finish. It's going to look awesome with the strings on.

Once I complete the True-Oil finish (only a final wet sand and a polish to go now!), I have only to drill the holes for the bridge posts, and then all these badboys will find themselves installed. I have ordered a set of Brad-Point drill bits from StewMac, so hopefully they will arrive soon. This build is really nearing the finishing line now, and excitement is growing!

Monday, 10 June 2013

12 String 335 - Wet Sanding Tru-Oil

So, I'm 6 coats of Tru-Oil in and the guitar body and neck are really starting to look nice. The Tru-Oil has darkened the vintage amber (phew!) and is enhancing the flamed figure in the maple very nicely indeed. Seems that I have followed the directions from Bill at Canadianbreed pretty well, and I'm really happy with the results I'm seeing so far.


Only trouble is, as you may remember, I only sanded my guitar top to 360 grit before the dye and oil went on. As a result, the top and bottom of the guitar really don't feel smooth at all yet, despite a slowly building layer of Tru-Oil. Seems wet-sanding is called for, and plenty of it!

And so, it's Youtube to rescue again. Here you will find is a plethora of advice dispensed on the subject of wet-sanding oil finishes, and Tru-Oil in particular. I hesitate however. Every Youtube article I can find concerning wet sanding Tru-Oil, refers to cases involving natural (ie. undyed) guitar bodies. I was worried that the wet-sanding techniques themselves were somehow smoothing the wood underneath as well as the layers of oil when applied to the guitar. If applied to a dyed guitar body, could they damage the underlying dye job?

Nothing for it but to bite the bullet and plunge on! My first step was to wet-sand to 400 grit (with wet-sanding also planned at 600, 800 and 1200 grits). The process involves a copious amount of oil being applied to the body and to the wet/dry sandpaper and then sanding as per standard established wet-sanding techniques (small circular movements, not staying too long in one place). The difference is that you don't have to keep wetting/rinsing your paper; it just keeps ploughing through the oily slurry that is built up on the surface of the guitar. You sand until this slurry becomes rather too thick to be manageable, and then you wipe the whole guitar clean with a soft cloth.


The results of my first foray into this art were pretty satisfactory. Most importantly, the underlying dye was not disturbed by the sanding and the surfaces feel much, much smoother than before (which is great). Holding the surfaces up to the light, however, I can notice a few marks in the finish  which I think I have caused by not using a block to sand. Looks like the grinding of the sand paper edge (at those moments when the paper got a mind of its own) has made some marks. Fortunately, a subsequent coat of oil seems to cover these. Next time I'll be sure and use a sanding block.

Now for further coats of oil to allow for finer and finer wet-sanding. I'm being rather cautious as I absolutely don't want to sand through at this stage. Although the wet-sanding is done using the oil itself (and you would therefore think that the whole process may actually build the finish rather than taking it away) I am going to assume that the wet-sanding process has taken away most of the build that I started with. Consequently, I'll be applying another 5-6 coats at least before I wet-sand with 600 grit. That's another week of oil application folks!

Sunday, 26 May 2013

12 String 335 - Tru Oil to the Rescue!

With the guitar top, back and sides now dyed using ColorTone Vintage Amber dye, the second phase of finishing can now start in earnest. This phase involves the application of Tru-Oil to the entire guitar - including the natural mahogany neck. Tru-Oil is a product primarily aimed at the finishing of gun stocks, and is produced by Birchwood-Casey out of the USA. I managed to find the stuff in several places here in Australia (all of them gun shops) and it was easy to get it shipped to my door. The collective wisdom of the internet seems to be that this stuff does not keep very well after the bottle is open (it slowly reacts with any air allowed into the bottle), so the best idea seems to buy only enough to finish one project at a time.The 250mL bottle (8 oz) seems to fit the bill nicely for me.


Anyway, application of the oil is basically idiot proof. To begin with a 'soak coat' is recommended in which a liberal amount of oil is applied to the wood, saturating it. A little rubbing works the oil down into the surface, after which it is allowed to soak in for about 10 minutes. After this, all the excess is wiped off and the guitar is left to dry for at least 24 hours. As I said, pretty idiot proof and even I managed to get this done without incident. I must say, even whilst applying this first coat of the oil it was obvious what a difference the oil makes to the figure in the maple; the grain stands out spectacularly after just this one application.


Subsequent coats require much less oil. With these coats, a little Tru-Oil on a clean scrap of t-shirt is wiped over the surface leaving a thin film that is then allowed to dry hard. The surface can be handled typically after 2 to 3 hours. I am applied the oil to all surfaces on the guitar equally, including binding. The oil does seem to dry on the binding, but overall it's not very even and i can see small splotches of slightly darker colour here and there. I think that before my last few coats of oil (in the very distant future) I'll scrape the binding clean again.


Even after the third coat of oil, the top of my guitar is still feeling rather rough. I have about 5 coats of oil to apply before I start wet sanding - so another 2 or 3. The oil is going on easily, and I am able to get one coat onto the entire guitar each day (top in the morning, back and sides in the afternoon). To allow the Tru-oil as long as possible a shelf-life, I am trying to squeeze out all the air from the bottle before I replace the cap, and the storing it upside down in between uses. Who knows - it might make a difference.

Tuesday, 7 May 2013

12 String 335 - Vintage Amber Staining

Ok, so no more sanding - the body and headstock remain sanded to 360 grit, and that's how they will stay for the conceivable future. I have managed to sand the neck and the sides of the guitar to 400 grit. Hmm. Well, time to put the wise teachings from Bill at Canadianbreed to the test. Today I am dying my maple headstock and body with Vintage Amber ColorTone Dye from Stewmac.

Following Bill's advice I set up two concentrations, one with 8 drops of Vintage Amber in 25mL of water, and another with 20 drips in 25mL. Contrary to most internet lore, I taped off the bindings so that they were saved the majority of the stain. Many seem to believe that this is a waste of time and that the bindings can be scraped after the fact, but what the hell - it's just time right?

Here are the steps i followed:
  1. First thing was to lightly wet the guitar with a damp rag so that the dye is accepted evenly. This worked a charm - i cannot recommend this highly enough. 
  2. Second went on the low concentration dye across the entire guitar top. The damp top accepted the stain wonderfully and I managed to achieve a very even colour across the entire piece. Luckily there were no glue marks or other issues brought to light by the stain! 
  3. Thirdly, I lightly applied successive passes with the more concentrated colour, while the original (less concentrated dye) was still wet.

The idea is to get the figure in the maple to accept more of the darker stain than the non-figured areas. The key here is that the wood is still wet from the first wash, and therefore the non-figured parts of the wood are less apt to accept more colour from the concentrated passes. Anyway, I didn't push it too much, basically for fear of some noob mistake, but the technique seemed to work quite well.


The figure could definitely be seen to accept more darker stain than the non-figured wood. The depth of the effect was not quite as distinct as I expected (based on Bill's results), but I think that a better result could have been achieved if I used a much greater difference in concentrations. In particular, I believe that my more concentrated dye solution should have been twice the strength than that which I used. Anyway, no prob - I am still happy with the effect I have achieved and am looking forward to moving on to step 2 in the process - the use of Tru-Oil as a lacquering agent to enhance the figure yet further.

Wednesday, 1 May 2013

12 String 335 - Sanding Woes

So, being the ever enthusiastic, noob guitar finisher that I am, I almost ruined my 335 project before it even got started. I've been at it for a couple of weeks now inbetween work commitments. Started sanding with 260 grade wet and dry paper, and after one session progressed up to 360. All was going well, but (regular) work started to get in the way. For 10 minutes here and there I would pick up the sanding block, throw the 360 grit on there and just slough away. This went on for some days, actually kinda some weeks. I never kept track of just how many times I had 'completely' sanded the thing with 360 grit but it was a few let me tell you.

And then one day I noticed a few small flaws creeping into the front surface of the guitar. On the headstock, a dark, uneven ridge appeared. On the guitar top towards the base of the veneer panel join (running the length of the top where the matched veneer halves join) the glue seam was looking like it was thinning and opening. All evidence seemed to point to the fact that I was about to sand through the maple veneer on both the top and the headstock.

And so my sanding efforts came to a grinding halt. My finishing plan, at least the sanding and dying part of it, went straight out the window. I was planning a trace dye and sand-back to pop the grain before moving on to 400 and 600 grits. No such possibility now. Instead I looked for alternative methods to pop the grain that would not involve any more sanding. Fortunately i came across this youtube video from Bill of Canadianbreed Guitars.

This method uses only one dye pass, but pops the grain by applying a darker concentration of dye over the top of a lighter concentration while the first wash is still wet. The aim is to get the more concentrated dye into the figured grain whilst the non-figured wood, still wet from the less concentrated wash, accepts no more colour. Bill applies his method with vintage amber, and then deepens the effect using Tru-Oil. The oil essentially soaks into the figure to enhance the visual effect. His results look impressive and I was convinced to follow in his footsteps...

Wednesday, 17 April 2013

12 String 335 - New Kit arrives from RM Olsen

After much research and much agonizing, my first semi-hollow body guitar kit arrived today from RM Olsen Guitars. The 12-string 335 kit landed here in Australia in perfect condition thanks to double boxing, bubble wrap and a metric fuck-load of squishy packing beans added to the box. Suffice to say I was very happy with the condition of the guitar.

Unboxing the Kit

The guitar came with the set-neck already installed. For me this is awesome. Setting and gluing the neck was the major worry of the only 2 worries I have with regards to finishing process. The other is the drilling of the bridge post holes, but that is some fun I can postpone to much later. One downside to not setting the neck myself, apart from not knowing whether the neck has been set correctly to allow a good setup (i can only assume it has for now, and I have no reason not to trust the abilities of Robert Olsen) is that there is some glue soaked into the neck from where the binding and ends of the cutaways merge into it. Sanding should remove most of this, but one side is a little rough. Having said all this, I have to admit that the job done in setting the neck is much better than anything I could have achieved with my limited tool-set and limited woodworking skills.


A little glue has soaked into the neck where the cutaway meets it.
In terms of the wood used, Robert Olsen is known for providing some of the best wood for his kits in the price range. Having requested flamed maple, the kit arrived with a gorgeous flamed maple veneer front and back. The veneer is flawless with a nice deep figure. It looks like it will come up beautifully when finished. The neck has trapezoidal inlays into a rosewood fretboard and could not look better. The body is finished top and bottom in multi-layer binding, and the junction between the binding and the wood has no gaps or glue squeeze out all the way round.

All in all I'm very happy with the craftsmanship offered by Robert Olsen, and I'm itching to get started on the finishing for this baby! I have only attempted one build previously, that being a solid-body Jackson-style Flying V that I received as a present. In comparison, this build will be a much more challenging undertaking and I'm looking forward it!