Showing posts with label Guitar Kit. Show all posts

Monday, 12 June 2017

Ricky 4001 Bass - Well, She's Dead.

I got a little time today to go through some of the fallout from the fire and try to salvage the one remaining build-in-progress. Unfortunately, Looks like this one is ded as well. If there was any doubt about the caustic nature of electronics smoke/soot then here's all the evidence you need. I started sanding down the body with 360 grit to see if I could get it clean. The wood was actually coming up OK until I saw that the binding on the heel of the body had bubbled very badly as a result of soot exposure. I tried for 20 minutes to sand the bubbles out, but here's what I ended up with. The soot has eaten huge holes out. right down to the wood underneath.

Electrical soot is cautic shit. It even eats through plastic binding.
Looks like this build, along with its brothers, will be going into the rubbish. Someone with more skills could probaby replace the binding, but sadly that isn't me. Of all the builds I thought this one might survive as I'd planned a full body paint. But sadly it isn't to be.

Monday, 27 February 2017

Bareknuckle Super-Strat

Well, it's a couple of weeks since the man-cave fire incident. I dried my tears, collected together a few tools, and have managed to clean out a spot in the shed to create a new workspace, I bought a replacement electric drill and I'm now in a position to actually start building again.

A week after the accident, I found a box on my doorstep - an Ash super strat kit sent to me by Andy in the Pitbull Guitars forum as a pick-me-up after all the fire hassles. It was an amazing act, completely unexpected, and really choked me up. They really are an amazing bunch of guys and gals over there in the forum. The kit is actually a special order (not an off-the-shelf kit by any means), with no front cavity and only pickup and bridge routes.

A Pitbull Guitars Special-Order, Ash Super-Strat
Since it arrived I've been itching to get going on the kit, and today I managed to get a simple mock build together. I loosely positioned the bridge, ran the outside strings to test for neck straightness, and used my new electric drill to bolt the neck into place.

Neck looks straight in the pocket.
It all took less than 10 minutes with the new drill. Do you know I've never tightened neck bolts with the drill until today? Such a time saving, and no stripped screws! Anyway she's looking pretty sweet.

Neck bolted into place and looking good.
Given that the top of the guitar is so clean, I'm planning on leaving her a bare-knuckle build with no rings around the pickups and just bare wood as far as the eye can see. A real no-nonsense shredder.

The Ash grain on this 2 piece body is pretty good and should look great with some grain filling and stain. For a finish I was thinking ebony or walnut Timbermate in the grain, and a trans-black dye job over the top. I was also thinking it might be cool to add some "natural wood colour" hot-rod flames. As with my previous builds sporting hot-rod flames, the idea would be to mask off the flame sections with artists frisket. Then the stain would be applied, hoping that the masked off wood remains clean and untouched. Another option might be to mask off everything *except* the flames and seal those up good with Tru-Oil before trying to stain the rest of the body. Hmm, as this is completely new territory, I might have to actually spend some time testing these techniques!

First draft - hotrod flames.
Anyway, as you can, see I dummied up some flames to try to get a feel for how it would look on the body. I think the black/natural contrast could really work with this design and I'm really excited to give it a try. I must say, I do like how the flames look on the body. Time to start some testing while I get the body sanded and the grain filled. Stay tuned for test results!

Wednesday, 4 January 2017

Jazz Bass: Bringing the Shine

Finally got an hour or two to myself after the chaos of the Christmas season. I put it to good use, polishing the body of my Jazz Bass build and getting more Tru-Oil on the neck. Polishing started with 1500 grit, then moving on to 2000 grit and finally Meguiars Ultimate Compound. After two rounds of compound the shine is finally starting to come out. It may need a third!

Ultimate Compound for polishing.
Once I'm happy with the surface after the Ultimate Compound, I'll hit it with one round of Meguiars ScratchX 2.0 just for good measure. In the past I haven't been able to see a noticeable difference with the ScratchX but hey - why not.

In addition to polishing the body, I have managed to get a few more coats of Tru-Oil on the neck. It's definitely starting to look and feel great!

Tru-Oil almost complete on the neck.
This build is coming down the home straight now. Once the polishing is done I'll be able to line the control cavity with copper tape, get the pickups screwed in and soldered and she'll be ready to rock. Not long now!

Wednesday, 30 November 2016

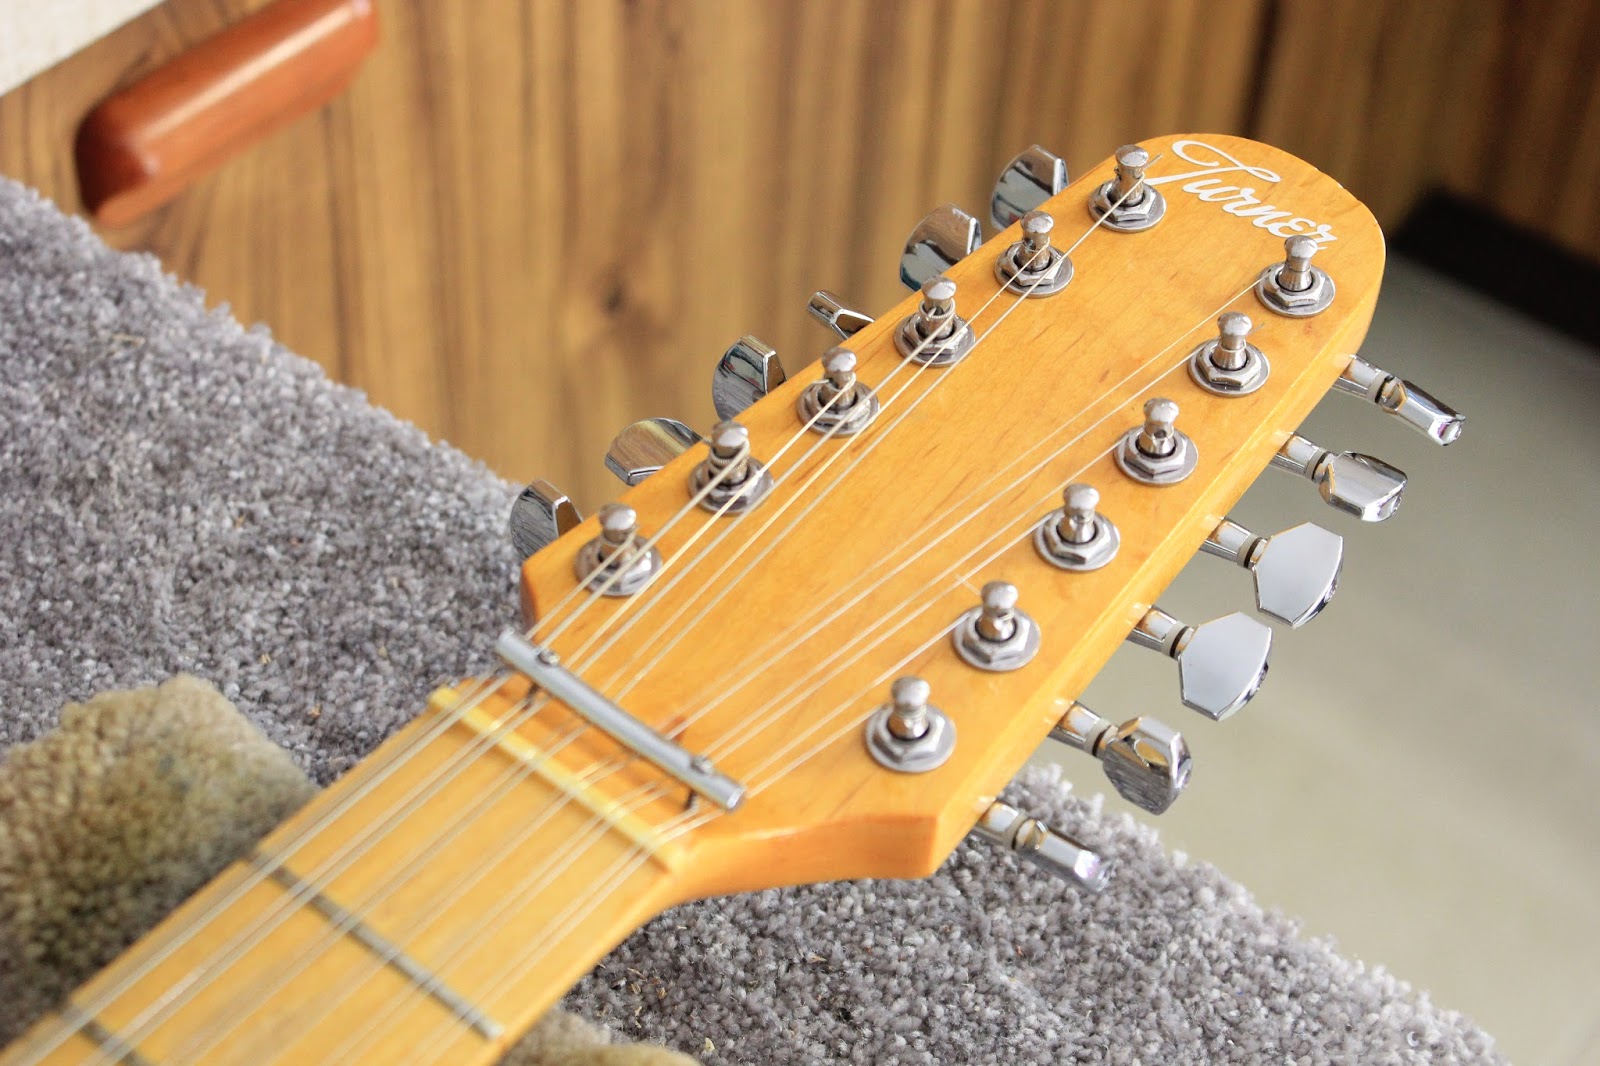
12 String Telecaster - Jangles a Go-Go

Well, she's been finished for a month or two now, but today I finally had time to take some photos of my trans-black 12-string Telecaster.. I reckon she looks amazing! I've always had a thing for black and white Telecasters, and for a 12-string she is surprisingly comfortable to play.

Now admittedly I'm not the best guitar player that ever lived (far from it) and the 12-string is a challenge to play compared to the traditional 6, but god I love picking this bad boy up. Thanks to a nut height that needed no adjusting and a super straight neck, the action is low and very little finger pressure is needed to fret the strings. It's just so comfortable that even I can bust out a tune with just a little extra practice.


Already some scuffs on the back - tough love!

Despite taking half a day to get in tune, once the neck settled down the tuning stability is really quite good. Some locking mini-tuners would make this even better, but I can live with it for now. Some of the strings do need a little tuning tweak now and again and that's ok (as I said, for now). Unfortunately, just checking each and every each string with the electronic tuner is a major undertaking ;).


Trans-black flame maple with a deep Acrylic gloss.
The guitar's single coils deliver a beautiful jangly tone, especially with a clean channel. Open chords are especially nice and the sustain (even accounting for my bad finger placement) is great. Time to channel Marty Wilson Piper and belt out a few tunes by The Church.

Tune me please. Please?

All in all a very satisfying build and a great end result. I can't stop picking this thing up and strumming it. DIYGuitars did a good job with the kit, especially the dialed in nut height and I'm really impressed with the kit quality. I highly recommend you all to get out there and build your own 12 string Telecaster. There aren't many of them out in the wild (compared to other models) and that makes it all the more satisfying to own one.

Monday, 28 November 2016

Jeremy's Mahogany Les Paul: Neck Re-radius and Re-fret

Hi ho everybody, I'm continuing my run of posts with an update on my Les Paul build for Jeremy over at http://guitargas.com. Unfortunately, with the build nearing the home straight, I somehow messed up the fret levelling and ended up with frets that were all over the place. I have subsequently found out that there was a very subtle twist in the neck that I could not see, but hey- no excuses pal!

Anyway, with the frets munged beyond repair (well, by me that is ;) ), I enlisted the help of luthier extraordinaire Dingobass at Pitbull Guitars to bring the neck back from the dead. I commissioned a fret replacement and sent the neck to WA for DB to work on. By the time DB received the neck, however, it was in an even worse state than even I could have put it in. Even with a metric fuckload of bubble wrap, good old Australia Post managed to break the corner off the fretboard. Grrrr - you fuckers!!!

Why Australia Post? Why do you suck so fucking hard??
To my relief, DB assured me that he could reverse this travesty and set to work weaving his magic on the fretboard. The results were nothing short of spectacular.


With a wave of his wand, DB restores the fretboard.
With the fretboard repaired to better then new, DB set about doing a re-fret, level and re-crown on the entire neck. The results speak for themselves. An infinitely better result than muggins here could achieve with his two hands full of thumbs. Thanks DB, you're the real deal and you saved my ass.

With DB's re-fret the fretboard looks superb!
With the neck back in my hot little hands, it was time to get it set and finally move ahead with this bad boy. With some Titebond, some clamps and some prayer (all hail the Flying Spagetti Monster) the neck was soon attached and the axe was finally looking like something.

It's a guitar Jim!
To be honest with you, I'm really loving how this baby is looking. This just could be my nicest looking build to date. I think Jeremy will be pleased (I hope so anyway). Hardware assembly is next on the list, so cross fingers for no more issues!

Friday, 24 June 2016

Flamed Starcaster: Side Finish

With the burst looking great on the front and back of the Starcaster build, the more I looked at it, the less pleased I was with how the dyed sides looked. It was time to make a tough decision. If you remember from my last update on this project, the dye didn't take on the sides in a number of places where the craftsmanship was exceedingly average. Looking at it again, I decided to apply a solid colour to the sides to cover over these patches. I re-filled the entire surface with Timbermate, applied some primer, and sprayed two coats of MTN94 "RV-99 Marron Glace" over it all. Thankfully my masking was good and none of the primer or colour made it onto the front or back.

Stain would have been better, but MTN94 has covered the bad workmanship.
I'm really glad that I made the decision. The end result is pretty damn good I reckon - much better than the stain over those shoddy patches. I'm really liking how this baby is now shaping up. I'm in a bit of a quandry about what colour to stain the neck, as I usually go with a colour to match the sides. That's not going to happen in this case - there's no way I'm going to spray the neck a solid colour as well. Maybe Amber with a bit of a dirty Tobacco burst, but I'm still thinking.

Jazz Bass: Surf Green it is

Well, another basswood build, another dye attempt, and another clear-coat fail. There seems to be a curse on the Holgate man-cave. This build has now become the second (or is it third?) dyed basswood body to receive dye and then end up being a solid colour. The black was looking good for a while, but in my haste pre-coffee one morning I didn't look too closely at the can and sprayed a jet of white primer over the body instead of clear vinyl. Complete noob mistake and a bloody shame.

Anyway, after a few tears I threw my hands up in the air, sanded what I had flat again, and set about covering the whole thing in primer. Looking at what MTN94 colours I had in the cupboard, I decided on a surf-green finish (a bit of a default for me it must be said). The MTN94 Bali Green was dutifully extracted and a couple of coats applied. This is how she ended up.

Bass gets two coats of MTN94 Bali Green
I must say, I do like the colour, and it'll look great under some gloss clear. Once the colour has had tie to cure I'll start back on the clean vinyl in earnest. Fingers crossed.

Saturday, 30 April 2016

Flamed Starcaster: Dying the Burst

I have found myself with a little time away from work this week, and therefore with some time for the Starcaster build - sanding the body and getting some Colortone dye onto this beast. With these semi-hollow kits there's usually precious little sanding required for the body. Unfortunately this kit was a second that I picked up in last years Pitbull Guitars birthday sale and with it came some pretty gnarly problem areas on the top veneer and the sides.

The top veneer has some very deep scratches at the bottom of the guitar, something that I can't do anything at all about. They are so deep that I suspect any attempt to sand them out would remove the veneer altogether. I could have done a solid paint job to hide them, but that flame maple veneer is just too damn beautiful to hide, even with the scratches. There were also a few very large glue marks around the edge near the binding, but a couple of applcations of Goof-Off put pay to them.

To test whether I had properly removed the glue, I applied a weak dye solution (Lemon Yellow) to the entire front and back to make sure it was taking colour. Thankfully no remaining glue spots were evident.

Weak Colortone Lemon Yellow shows no glue spots.
On the sides, there are two large areas where the factory has needed to extend the side veneer piece to fit around the entire circumference. Pretty shoddy craftsmanship all told, but that's why it was a second! I sanded the sides with 240 and 320 to try to get rid of as much of the joins in these extensions as I could, and then filled all the remaining grain and join marks with a slurry of Timbermate. After sanding back with 400 grit the surface felt nice and smooth but didn't look any better. In my eagerness to continue with the burst I didn't do a dye test on the sides, something I would rue later on down the track. Naughty, naughty!

I let the body dry over night, wiped it all over with water a final time to remove any remaining dust from the Tmbermate, and got on with creating a burst using Colortone dyes. I actually used 5 colours this time to try to achieve a burst that gradually becomes much darker on the sides than my normal "Honey Burst". I started with Lemon Yellow all over (applied a second time) and then a little further out with a feathered ring of Vintage Amber. This was followed by a further feathered ring of Red Mahogany, and yet again by Tobacco Brown. To darken up the edge even further I got out the Colortone Black and kept applying colour to the edge, all the while blending each transition back towards the centre with the other colours.

All in all I'm pretty stoked with the result, although the aforementioned scratches are standing out vividly down towards the bottom of the body.

5 Colour Burst from Lemon Yellow to Black (sort of)
Unfortunately, when I hit the sides with a combination of Tobacco Brown and Black, my haste in preparation became immediately apparent. In addition to the sections where the wood has been joined (the glue here was never going to adequately take stain) there magically appeared several nasty glue spots around the binding.

Letting the dyed body dry completely overnight, I resolved to fix-in the colour on the front and back of the guitar before trying to fix the glue spots on the sides. I had always planned on giving the dyed guitar several coats of Tru-Oil to really pop the flame and to deepen the chatoyance in the final finish. And so, on to the body went a first soak coat of Tru-Oil and boy did the colour of the dye and the chatoyance in the maple pop. Magic!

First soak coat of Tru-Oil starts to add uber-chatoyance.
The next day I applied a second soak coat of oil to both sides and again hung it to dry. With each coat the grain is looking better and better, but the scratches are looking more and more prominent. Oh well, we can't have everything right? You can easily see the scratches in the front veneer in the photo below.

Second coat of Tru-Oil is on and soaking in.
After a third coat of Tru-Oil, I was satisfied that the dye job was protected enough to be able to tackle the glue spots on the sides of the body. It called for some more Goof-Off and a bit of a roughing up with the wire brushes; slowly working dye into the wood where it once resisted.


You can see what I was up against! In the end I got something I ws happy with, although those join lines really couldn't be hidden - no way they were going take any colour even with the wire brush treatment. Oh well, some Tru-Oil on the sides and thne it will be time for some Acrylic clear coats!

Tuesday, 12 April 2016

Flamed Starcaster: A New Semi-Hollow Build

With my build queue down to a single (bass) guitar at the moment, it was high time that I dive into the stack and start another! After the Burled 335 turned out to be the sweetest guitar ever, I've been itching to get another semi-hollow build going. Enter the FS-1 Starcaster kit - a kit that Adam from Pitbull Guitars practically gave away at last year's birthday special!

Unboxing the Starcaster. Flame figure is evident!
Unboxing the kit, and doing a simple mock assembly, the kit looks pretty good. The neck fit is nice and tight and the flame veneer on the top of the guitar looks really awesome. There's a few discoloured glue marks around the binding on the back and a few obvious glue spots on the front and sides, but hopefully so,me Goof-Off should take care of these.

Dry fit of the neck is tight and the body looks good.
Gorgeous flame figure just begging to be dyed.
There's a small issue with the neck at the moment, and that's a small gap between the neck and the end of the pocket. This may close up when the neck is clamped, but I'll have a look at the floor of the neck pocket just to make sure there aren't any obvious issues (lumps and bumps) in there.

Gap at the base of the neck. The neck pocket might need a little sanding.
When Adam offered this kit at a bargain basement price last September, it was with the understanding that there were actually a couple of flaws in the body.Those flaws are pretty evident on the side of the body with some patching in the side sheeting and a few deep marks.

Patching in the side sheeting.
Some not so awesome stuff on the side, but I'll cope.

These don't worry me too much. To cover them over I plan to do a dark burst fading to black on the top and back so that the sides can be stained black. If these problem areas don't take the black stain then I'm not above hitting the sides with some black spray acrylic. Whatever it takes!


All in all I'm pretty darn excited about this build. I think I'll be ordering another GFS xTrem and Wilkinson roller bridge for this, as well as GFS pickups of some description. Since I love them so much in my 175 build, I'm thinking of using Nashville Retrotron pickups, but given the bad Aussie dollar I might fallback to Entwistle or Tonerider pickups from Pitbull. Decisions to come!

Burley 335: Finally Complete

Well, the Burled Maple 335 is finally complete and I couldn't be happier with it. The finish, being a combination of Tru-Oil to both pop the grain and provide a subtle amber colouring and Acrylic gloss for a deep shine works really, really well. That burled veneer from DIY Guitars is so freaking amazing! Obviously the secret for combining these two finishes is not to go too far with the Tru-Oil; making sure that you leave enough tooth in the surface for the Acrylic to bind to.

Tru-Oil + Acrylic Gloss - a god damn winner for beautiful wood.
IMO the chrome hardware works really well with the natural colouring, much better than gold would have done, and the chrome humbuckers with chrome surrounds are a great replacement for the original cream dogear P90s.

Chrome GFS parts really complete the perfect picture.
Speaking of the humbuckers, all the GFS hardware here works extremely well and really looks the part. The full chrome Dream 180 pickups sound awesome - from a crystal clean tone to a punchy growl when needed.  The roller bridge combined with the XTrem tremolo system provides a great tremolo solution, keeps the guitar is tune (even with heavy tremolo usage) and really looks the part.

Glamour shots in the daylight
But with all that said, it is as a playing instrument that this guitar really comes into its own. It is light, has great tone, and the resonance that this thing produces is be felt to be believed. Even unplugged the guitar generates a beautiful acoustic tone that is a feast fro the ears. Either plugged or unplugged, you can really feel the chambers vibrating as you strum a note. And all this with the stock plastic nut! Interestingly I haven't had to adjust a thing at the nut end of the fretboard. The string height at the 1st fret was perfect with the supplied plastic nut (unheard of) and so I haven't had the courage to change it out yet.

With this project completed, I am now officially in love with 335 guitars again. I can't find the words to describe how amazing this thing is to play. I have another 335 kit in the stack and now I'm itching to get it started!