Showing posts with label Shielding. Show all posts

Wednesday, 12 November 2014

Black Ash Telecaster: Shielding for Slugs

Sitting at home today, willing the postman to deliver unto me some shielding tape so that my raft of current builds could continue, I remembered something that I had read in one of the guitar building forums around the place. It was postulated that copper tape sold as "slug barrier" tape could be used just as efffectively to shield a guitar as "sold for purpose" copper shielding. That couldn't be true could it??

Well, with this in mind, and with no postman in sight, I decided to head to my local Masters (big-chain hardware) and see if there was any truth to it - if slug barrier tape could indeed be the answer to my short-term shielding woes. Luckily I managed to find some - 10 metres for 8 bucks. It seemed like a bargain, but would it serve for shielding?


Well, I got the stuff home and proceeded to run a few quick tests to see how it performed. What I really needed to know was:

1. Do overlapping pieces form a continuous conductive surface?
Well, yes they do! I used three lengths stuck down to a piece of pine with a 0.5cm overlap. The surface did indeed register conductivity on my multimeter with a resistance of 0 Ohms. Great so far!

2. Can I solder directly to the tape and does the solder joint conduct?
Well, yes absolutely! The solder went straight on to the tape without any problems at all. A little flux was all that was needed (I use flux-cored solder) and the solder stuck fast with a nice clean joint.

In summary, the barrier tape performed identically to the tape I've been buying from ebay and other suppliers as "double sided conductive" shielding tape. Amazing!

With my 10 metres of tape in hand I dove straight into shielding the pickup and control cavities of the Black Ash Telecaster. The tape went on without any problems at all. Ground wires were easily soldered to the cavity walls to join all the cavities electrically, and then the bridge cavity was joined to the bridge using an underside bare wire.


To wire this beasty I'm using 250K Bournes mini-pots, an Orange Drop capacitor and a 4-way Oak-Grigsby switch. First time I've tried a 4-way switch on a Telecaster, but that's not surprising given it's only the second one I've ever built ;). I'm hoping it will extend the range of tones she will be able to produce - especially the new "series" setting. The circuit for the 4-way wiring scheme can be found on DIYGuitarMods and is shown below.


As it stands, the wiring of the control plate is all but completed (you can see it in the photo above) following the schema in the diagram. All that remains is for me to attach the pickups to the switch and to connect the output jack to its wires. This will be tomorrow's job, in addition to looking at the neck angle. With the bridge now in place it looks suspiciously like a shim is going to be needed - bummer.

Wednesday, 3 September 2014

Johnny Ramone Mosrite: Shielding & Wiring


With the body all polished up it was time to consider all things electrical. And even though I still have to wait for my DiMarzio FS-1 to arrive, there's a shitload I can do in the meantime! First thing was the shielding - both the entire cavity and the back of the pickguard.


It's a huge swimming pool of a cavity and it took a great deal of copper tape to shield, but hopefully the results will be worth it. I still have to run a thin strip of copper tape along the top entire edge of the cavity so that the walls make contact with the back of the pickguard. I'll do that just before final assembly as I might want to hit the body with a little more polish between now and then.

With the shielding done, it was time to look at the wiring. I love wiring these simple 1 Volume, 1 Tone kits, especially with all the electronics mounted there on the pickguard. There's nothing to stress about, just whack it together. Two pickups enter the switch, one wire leaves and it's straight shooting to the output jack from then on. In no time I had the neck pickup wired in and could do a tap-test to check the volume and tone circuits.


Tappity-tap - volume, tone, it all works perfectly! Now just waiting on that awesome bridge pickup and everthing will be sweet. She's already looking cool, just one little hole to fill.


Next up is a fret level. I'm in a quandry about how to deal with the 0th fret. My options are to level it with all the rest or to leave it a little higher than the others. I'm leaning towards leaving it a little higher just like a nut would be. Still some thinking to do there..

Thursday, 24 July 2014

Stone Roses Tribute: Shielding

The neck clamp came off today and everything looks good. Time to get going with the electrical side of things! Before I could start on the wiring proper, the cavities and pickguard needed to be shielded and grounded to protect the guitar from noise generating EM interference.

Using double-sided conductive copper shielding tape, I coated the walls and floors of both the pickup and control cavities. Similarly I coated the inside surface of the pickguard, and overlapped some tape over the edge of the control cavity to make contact with the pickguard. The idea is to create a complete 3D Faraday cage around the important signal carrying wires.


After the copper tape was in place, each of the 3 cavities was joined to the others using wires soldered between them. I love this copper tape because it's so easy to work with - just being able to solder wires directly to it  - awesome. I used some small pieces of copper tape to keep the soldered wires out of the way, and used my multimeter to make sure that I had a complete conductive surface between all points on all cavities.


Next I took the ground wire from the bridge and soldered this wire to the wall of the control cavity. The result is that all shielding now conducts noise to ground. This was also tested with a multimeter to make sure there was an electrically conductive path from the bridge to the shielding.


Finally, a new ground wire was soldered to the control cavity wall. This wire will be used to connect to the back of one of the pots to provide a ground signal for the control circuit. With this in place, every thing is ready to chuck the pots and switch into the pickguard and commence soldering up the control wiring!

Tuesday, 13 May 2014

Solid Body PRS: Shielding and Pickups

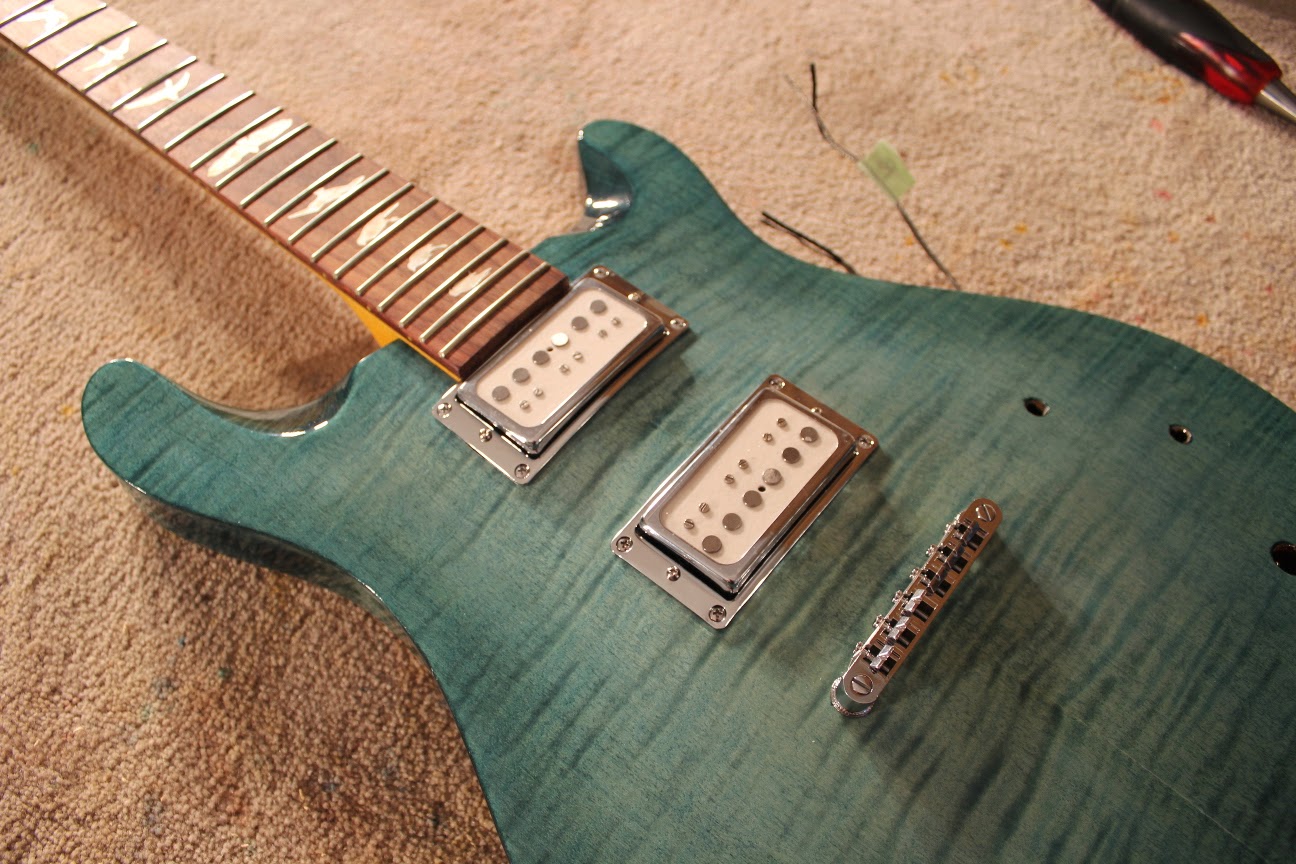
Well the PRS is in the home straight now. I have gotten all the cavities shielded with copper shielding tape and soldered wires between them to make them electrically conductive. With the ground wire from the bridge post now soldered to the wall of the bridge pickup cavity, this means all my shielding will be nicely grounded. All I will need to do to ground the rest of the circuit come wiring time is to run a wire from the control cavity wall to the back of the tone pot. Simple, easy.


The GFS Surf-90s were next to be installed. I put a slight bend in the thin (but tough!) chrome humbucker rings using just my fingers, and it was enough to allow the screws to pull the corners of each surround all the way down to the body.


As usual, the wire conduit hole drilled from the bridge pickup into the control cavity was directly under one of the pickup mounting screws. When will kit manufacturers realise that the bottom right corner is the worst place for this conduit? I had a few stressful minutes wondering whether the pickup screw would break the wires from either the ground or the 2 humbuckers (it was getting pretty crowded in there), but a quick tap-test on the pickups after screwing down the surround seemed to suggest that everything is OK. Seems like I was able to keep the pickup wires more or less out of the way as the screw went in.


With the pickups in and the neck strung up, this baby is really starting to look like something special. I must say I wasn't that fond of the black headstock when I first did the paint job, but it really does suit ths body shape. In spite of the trapeze tailpiece (I do love a trapeze tailpiece!!) she is looking like a real shredder. With just a simple set-up I was able to achieve quite a comfortable and low action, so I can't wait to get the rest of the wiring in there and take her for a spin.

I'm waiting on CTS 500k pots and an orange drop cap before I can finish the wiring, but that should be here in the next day or so. Hopefully she'll be screaming by the end of the week!

Monday, 30 December 2013

Les Paul Jnr Double Cut: Polishing & Cavity Shielding

After a lovely christmas break, I finally got back to the Les Paul Junior today. First task was to polish the Minwax wipe-on poly finish using Colortone swirl-remover now that it's had time to fully cure. This process didn't actually add any more shine to the surface, but took away the 'plastic' feeling from the poly; making it beautful and smooth to the touch.

Once the poly had been polished, it was time to get the cavities shielded using adhesive copper foil. The pickup cavity and control cavity were completed with no issues. I also got the grounding wire from the bridge post installed, and soldered it to the control cavity.


All that is required to do now is to solder up the electronics and get the hardware installed. Should be well worth the wait!

Tuesday, 22 October 2013

Siena's Stratocaster - Cavity Shielding

After leaving the guitar a few days to cure, I got the cavity shielding done today on Siena's stratocaster. It was quite a big job - that swimming pool under the strat scratch plate is a doozy. After testing Stewmac's shielding paint and finding it wanting, I fell back to using good old copper foil with conductive adhesive - the exact same stuff that I used for the back of the scratch plate.


Once both the swimming pool and the output jack cavity had been lined top to bottom in foil, i ran a wire between the two sections and soldered it in place to make sure there was a conductive bridge between them. The wire is held in place against the wall of the cavity with another piece of conductive foil. This should hopefully keep it out of harms way.


I'm still not quite finished with the copper foil. I still have to add tape around the top edge of both cavities so that they can contact the scratch plate/output jack cover to create a gap-free faraday cage. I'm going to wait until the final polishing has been done on the body first though, since the foil will just collect the polishing compound and generally get in the way.

Monday, 14 October 2013

Evaluation: Stewmac Shielding Paint

So, how many coats of Stewmac Shielding Paint does it take to create a decent shield for your guitar cavities? Good question. Stewmac say to use at least 3 coats of paint, and there's a decent number of people leaving glowing reviews of the product on their web-site. Well, fair enough. But personally, I have my doubts. Hey, all props to Stewmac - their products are of a consistently high quality, a lot of thought goes into them, and many world-class luthiers swear by them.


However, the way I like to wire my guitars is to chain the cavity as part of the ground wire from the bridge to the output. For this to work effectively, a very low resistance is required for this ground connection, and that includes the resistance introduced by the cavity shielding.

So I set up a little experiment to see the effect of incrementally building up layers of shielding paint on the resistance of the shield. Resistance measurements were taken on a square of untreated pine, using a multimeter with probes separated by a distance of approximately 8cm.


The results are given below. As you can see, the resistance decreases as the number of coats increases (as expected). However what is interesting is that the decrease is logarithmic, with each coat having less and less of a cumulative effect.


Remember, this is over a distance of just 8cm. This is similar to the diameter of a Les Paul control cavity, but nowhere near the maximum diameter of the Stratocaster cavity. With the cavity shield wired in series to my ground wire, I would expect a resistance of less than an Ohm anywhere along the ground. Unfortunately (at least for my purposes) the Stewmac paint does not seem to fit the bill. When shielding my current Stratocaster project, looks like I'll stick with adhesive copper foil.

Friday, 27 September 2013

Siena's Stratocaster - Shielding the Pickguard

Today I shielded the back of the new perloid pickguard I bought for Siena's stratocaster. For this I used adhesive copper foil purchased from eBay. I gotta say, I love this stuff! It's awesome to shield both flat surfaces like this, and pickup/control cavities. If you are buying this stuff from eBay or whereever, it is very important that you make sure it uses conductive adhesive. If you don't, the overlapping strips of foil won't form an electrical connection and your shielding will be useless. The whole surface you create must be one large ground conductor!


The secret to effective shielding is to create a complete Faraday cage around your hot (signal) wiring. The faraday cage is grounded so that any estraneous EM radiation in the playing environent is collected by the cage and directed to ground rather than being accepted and transmitted as noise by your guitar wiring.

To create an effective faraday cage, a good conductive surface must be created above, below and encasing the whole cavity, with as few gaps as possible. This means that the shielding from the walls of cavity must overlap the edge to make sure the top shielding (ie on the back of the pickguard) is electrically joined to it. Also, the shielding must be electircally connected to your circuit's ground (along with the grounded bridge, output jack, and control casings). What I love most about this copper foil though, is that it makes this job much easier by allowing ground wires to be soldered directly to it!

The next job I need to do is to work on shielding the walls and floor of the cavity itself. In the next few days I'm going to trial some Stewmac Conductive Shielding Paint to see whether this can do as good a job as the foil. With a cavity as big as the one on this strat, it's pretty expensive to foil the entire thing. The question I have though, is just how many coats of conductive paint do I need to create a good shielding surface? If it's more than 3 coats, then I'm not sure the paint will be an effective solution.

I will attempt to answer this question before deciding whether to use the paint or not, so stay tuned for trial results!

Sunday, 25 August 2013

BC Rich Avenge - Shielding & Pickups

A little more progress on the BC Rich Avenge build with my son Eben this weekend. We managed to get the top and back wet sanded and buffed (although not as nicely as I would have liked - this poly is not behaving itself, and patience is not a 9 year old's virtue) and also got the pickup cavities shielded.


After shielding, we grounded the bridge and installed the pickups with their chrome surrounds. The pickups are the Entwistle HVX which I have read rave reviews about. I was looking at some Entwistle soapbars for another project a few weeks ago, and my son saw the HVX's and had to have them (go figure). Anyway they look great and I'm sure will sound awesome. I would have preferred Entwistle Darkstar pickups on this particular project (given the thrasher motif) but I was overruled.


Anyway, things are nearing completion. Just the neck to go on and the control cavity to do. We have already had plenty of fun soldering up the wiring harness, so that can just drop in now. Sounds like next weekend's project!

Friday, 9 August 2013

12 String 335 - Polishing and Shielding

Great progress today - i *finally* got the polishing finished on my 335 12 string, and I also managed to shield the pickup cavities ready to receive their glorious GFS Surf 90s!

I started the polishing process after having wet-sanding with 1500 grit paper and applying a final coat of tru-oil thinned to 50% with turps. Polishing proceeded in 4 stages, with the first stage being a wet-sand with 2000 grit wet-and-dry using boiled linseed oil as the lubricant. I wet-sanded until the surface felt smooth and sanding marks covered the majority of the surface. The surface wasn't as dull as it probably should have been, but this wasn't unexpected given that I didn't leave all my wet-sanding until the last coat of Tru-oil was applied.

After the 2000 grade wet-sand, I then applied sucessive Stewmac polishing compounds - starting with Medium, then moving to Fine and Swirl Remover to remove the sanding scratches and bring out the shine.


I applied each successive compound using my electric drill and some small (3cm) foam polishing pads I purchased from Aussie site polish-up.com.au.  The shine that resulted was surprising, with the Tru-oil displaying a satisfyingly reflective gloss finish, and a deep translucency that unfortunately shows up every little mistake I made when applying each layer of oil. The flame maple has really popped, and the 3d or "chatoyance" effect as you move around the guitar is fantastic. In short, I'm very happy with how the finish has turned out!


With polishing complete, it was time to turn my attention to preparing the guitar for wiring - notably, shielding the pickup cavities with some dual-sided conductive copper foil. This stuff is great - it comes with stickum on the back and simply lays down like tape (if a little harder to handle). Each strip lays over the strip next to it and the whole thing forms a wonderfully conductive sheet (resistance is effectively negligable).


"chatoyance"
You can even solder onto it! I was able to easily solder wire from the neck cavity to the bridge cavity without any trouble at all. When the bridge is finally installed, i will be able to solder the bridge ground wire to the shielding around the bridge pickup,  and then run another wire from the shielding out to the wiring harness. Exciting times ahead!