Showing posts with label Semi-hollowbody. Show all posts

Thursday, 12 November 2015

Burley 335: New Hardware & Clear Coats

Was finally able to get back into a little building today. With travel for work followed by a couple of weeks holiday OS, there 's been precious little time for building of late. It's great to be back in the man cave, even if it is just finishing up some long overdue projects.

On the table today is my 335 kit with Ash Burl veneer that has been bumming around the man cave for about 12 months. In between bouts of coding the last few months, I've been able to get some White Knight acrylic clear coats on her, and my OS trip gave the coats plenty of time to cure. Today I rolled up my sleeves and with some 1500 grit, 2000 grit and Meguiars Ultimate Compound, polished the crap out of it. Pretty happy with the results - that White Knight sure is the easiest way to clear coat a build, and the results can't be argued with. Yes, it's a bit cheaper using you own spray equipment, but with no mixing and no cleanup I'm happy to spend a few extra bucks on the cans.

Acrylic clear coats. Very happy with the results.
I immediately followed up with the hardware. This time around I'm rocking a GFS xTrem similar to the one I used on the Thinline Cabronita build. To this I added a roller bridge and a set of GFS Mean 180s. I was very happy with their sound on the Les Paul Florentine build, so thought I'd use them again here for a little extra chrome, and a little extra punch. I gotta say, I'm very happy with how she's looking!

GFS hardware installed. Now for the electrics.
Just the electronics to go now. That's no simple task (at least the insertion) but hopefully I'm an old hand at it by this point. She's going to look really sweet hanging with my other 335s! I think I'll get back to Jeremy's Les Paul first though - that's a build that's long overdue (sorry Jeremy!) and the thought of getting the fish tank tubing out again is giving me the willies.

Saturday, 23 August 2014

Burley 335: Tru-Oil on the Neck

Well the clamps have come off the Burled Birdseye Maple 335 and the set neck looks good. It's a strong join and should serve nicely. With the glue dry, the application of Tru-Oil can now resume. I've gotten 5 coats on the back of the body now and it's starting to look great.


While there's no "figure" to speak of on the back or the sides, the maple grain has been highlighted nicely by the Tru-Oil. I must say I'm liking the natural colour for a change.

So too with the neck. I've now managed to get 2 coats of Tru-Oil on the neck and headstock. This is the first time I've done a rock maple neck completely natural - without dye of any sort - and I'm amazed at how dark the wood is becoming!


The Tru-Oil is picking up the grain very nicely, and I think the darker overall colour will contrast nicely with the natural body. There's still a shitload of coats to go, so I do expect it to "Amber up" quite a bit before I'm finished. It can only look better and better!

Monday, 4 August 2014

Burley 335: 1st Coat of Tru-Oil

Well, after finishing the sanding of the Burled Birdseye Maple 335, I debated long and hard about what colour to dye it. I was thinking of a dark walnut colour, and then an amber and red mahogany burst like my 335 Bass,  but just couldn't bring myself to pull the trigger on the dye job. I slept on it last night, and this morning decided to leave the top natural as I had originally intended.


With this decision made, the first "soak" coat of Tru-Oil went straight on the veneer. All I can say is wow! The Tru-Oil revealed details in the grain that I never knew existed, and the amount of chatoyance - even with a single coat - is amazing. I'm very pleased with how this is shaping up!

I still haven't decided what to do with the back and sides. My current thinking is to go natural just like the veneer. But hey, all that might change come tomorrow morning ;). A dark walnut colour could also contrast very nicely with the natural top!

Tuesday, 29 July 2014

Stone Roses Tribute: She's Finished & Couldn't be Better

Well, my oval jack-plate came in the mail yesterday, and that meant the finishing touches could be applied to the Stone Roses Tribute build and she could be released to the world. She is now finished and, in this builder's opinion, looks absolutely stunning. Dare I say a work of art? Fuck, it's the closest I'll ever come anyway.


In short, I think that this guitar looks amazing. The multicolored Pollock finish is beautiful and is contrasted nicely by the stark white scratch plate, black pickup surrounds and natural neck colour. The scratch-plate itself, with it's 4 black control knobs, retains the classic "Rickenbacker 330" look.


I even managed to source some grommets to raise the higher section of the scratch-plate off the under-plate, adding another layer of authenticity. The Rickenbacker look is also carried over into the awesomely awesome truss-rod cover with its custom decal that proudly proclaims this beastie as a genuine Stone Roses tribute, and does so in quintessential Rickenbacker style.


The choice of satin Nitrocellulose lacquer has been vindicated now that it has cured. It seems to be protecting the Pollock finish nicely with a hard outer shell, without highlighting the unevenness of the finish provided by the Pollock splatter.


Both front and back look balanced in terms of colour and design, and each compliments the other nicely. It remains to be seen whether the finish will stand up to belt buckles and other rigors of continuous playing, but that's a question for the future.


Most importantly the guitar plays very nicely. The custom bone nut has been filed so that the action at the first fret is low and comfortable, and the remaining action all the way down the neck is also nice and low. There's no fret buzz and the stock Pitbull Guitars pickups sound pretty good. They are meant to be humbuckers,  and I have no idea even what magnetic material they are made from, but these things growl like single coils. All in all quite a nice, vintage sound - at least to my ear.

All in all an amazingly satisfying build. The final guitar looks exactly as I intended it to look - even better if that's possible. I never imagined that the truss-rod cover would look even close to what is does, and credit for that sits squarely with Andy from City Signs an Print in Port Lincoln SA. The build has taken the better part of 7 months to complete, what with setbacks and so on, so I'm very glad it's over. Time to savor the results!

Friday, 25 July 2014

Stone Roses Tribute: Fret Level and Re-dressing

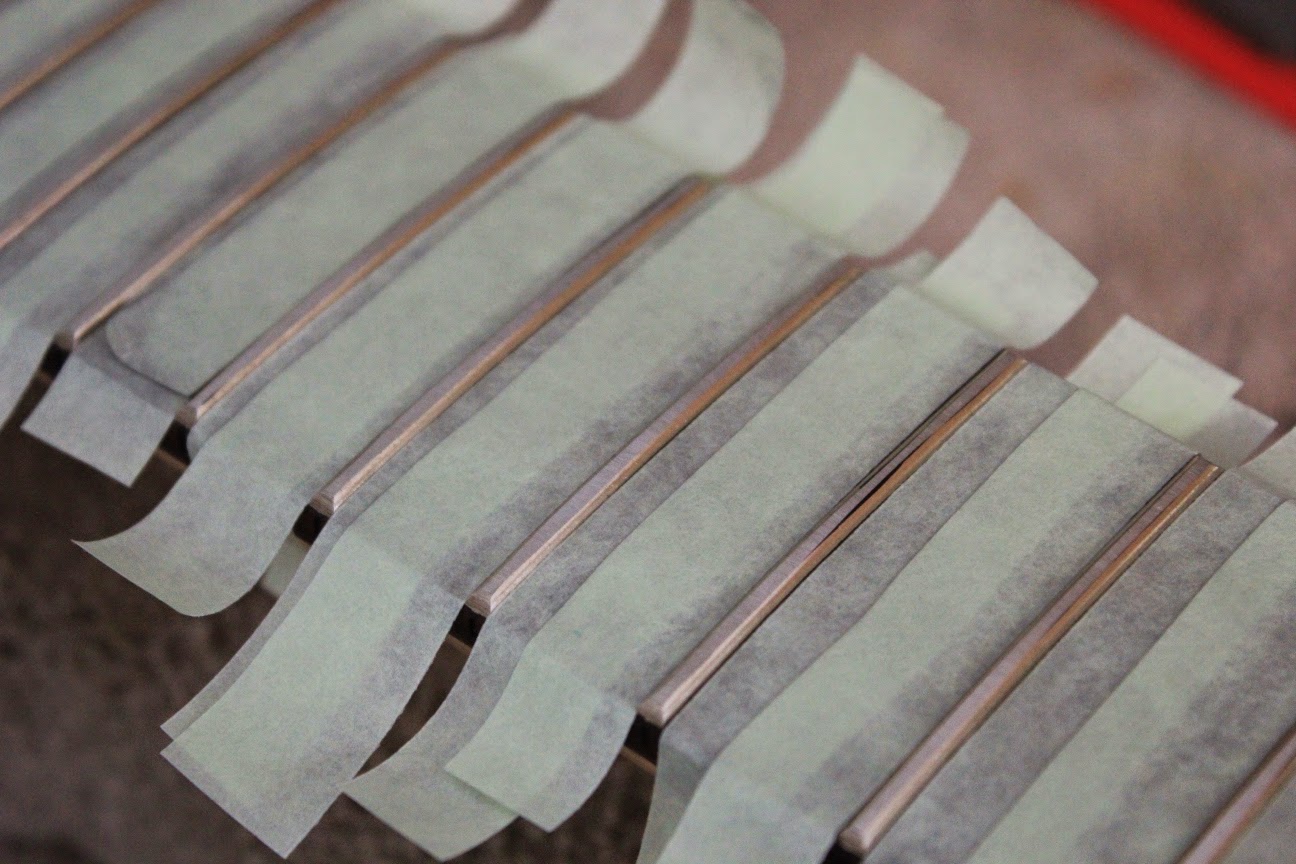
While I'm waiting for my oval jack plate and output jack to arrive in the mail, it's time I did a fret level on the Stone Roses Tribute build in readiness to string her up and let loose with some sweet tunes. After straightening the neck with the truss-rod, I protected the frets with some painters tape and marked the top of each fret with a sharpie.


I could then use my levelling beam - coated with 320 grit adhesive sandpaper - to sand all the frets until every fret had a strip of sharpie removed from its top edge. Some of the frets came right down let me tell you!


I then went on and did an additional level on the last 7 frets at an angle down towards the pickups. To do this I laid 3 pieces of tape across the 7th fret and used this as a rest for the end of my short levelling beam. Sanding this way creates a ramp down for the very last frets and allows a much lower action to be achieved.


With all the levelling done, I proceeded to use my trusty fret files to re-crown each of them. I use a combination of el-cheapo Double-edge Fret File from Stewmac and a Little Bone file from Rectify Master. Each has it's place depending on which fret you are re-crowning. The Stewmac files are useless down near the pickups if there are horns on the guitar as there are in this case. Before using the files to re-crown, I re-applied the sharpie to each fret as a guide to how much material I was taking off each side. You don't want to file so far that you change the height of the fret!

Anyway soon the frets were re-crowned and polished to a chrome lustre. Beautiful! I then gave the neck a soak of Dr Duck's Axe Wax and it looks spectacular.


Finally, the neck needed only a new bone nut to be perfect. With my trusty Stewmac nut files and my bench sander I soon made quick work of the new nut. The action at the nut is really nice now and the whole neck feels great.


With the nut superglued in place, it was time to string her up and apply my beautiful custom truss rod cover. I received the decal for the cover from Andy at City Signs and Print in SA yesterday and couldn't wait to apply it. It looks absolutely amazing and is the perfect cap to a wonderful


Now just that output jack to go and I can call this worthy tribute guitar finished! It's looking so awesome I'm lost for words. Can't wait to get her strapped on and noodle away!

Thursday, 24 July 2014

Stone Roses Tribute: Shielding

The neck clamp came off today and everything looks good. Time to get going with the electrical side of things! Before I could start on the wiring proper, the cavities and pickguard needed to be shielded and grounded to protect the guitar from noise generating EM interference.

Using double-sided conductive copper shielding tape, I coated the walls and floors of both the pickup and control cavities. Similarly I coated the inside surface of the pickguard, and overlapped some tape over the edge of the control cavity to make contact with the pickguard. The idea is to create a complete 3D Faraday cage around the important signal carrying wires.


After the copper tape was in place, each of the 3 cavities was joined to the others using wires soldered between them. I love this copper tape because it's so easy to work with - just being able to solder wires directly to it  - awesome. I used some small pieces of copper tape to keep the soldered wires out of the way, and used my multimeter to make sure that I had a complete conductive surface between all points on all cavities.


Next I took the ground wire from the bridge and soldered this wire to the wall of the control cavity. The result is that all shielding now conducts noise to ground. This was also tested with a multimeter to make sure there was an electrically conductive path from the bridge to the shielding.


Finally, a new ground wire was soldered to the control cavity wall. This wire will be used to connect to the back of one of the pots to provide a ground signal for the control circuit. With this in place, every thing is ready to chuck the pots and switch into the pickguard and commence soldering up the control wiring!

Tuesday, 8 July 2014

Stone Roses Tribute: Second Pollocking Complete

Well the last dollop of colour went onto the sides of the Stone Roses RC-1 today. It's looking pretty good - definitely different from the first Pollocking attempt - but good all the same. It's more colourful this time around, and that's not a bad thing. I'm thinking about changing out the black pickup surrounds for white. What do you guys reckon?


Now that the colour coats are done I need to clean off the side of the binding (a little acrylic still made it on there in places), and scrape the top of the binding to provide a border around the top. After that is done I can get started on the clear coats. I'm thinking of going with Behlen satin nitro, but I'm also going to check out some satin poly sprays to see how they look. I've done paintings before with the poly spray and it really brings the colours out, but I'm not sure how long it would last on a guitar. I guess a few experiments are in order..

Monday, 23 June 2014

335 Semi-hollow Bass: She's a Stunner!

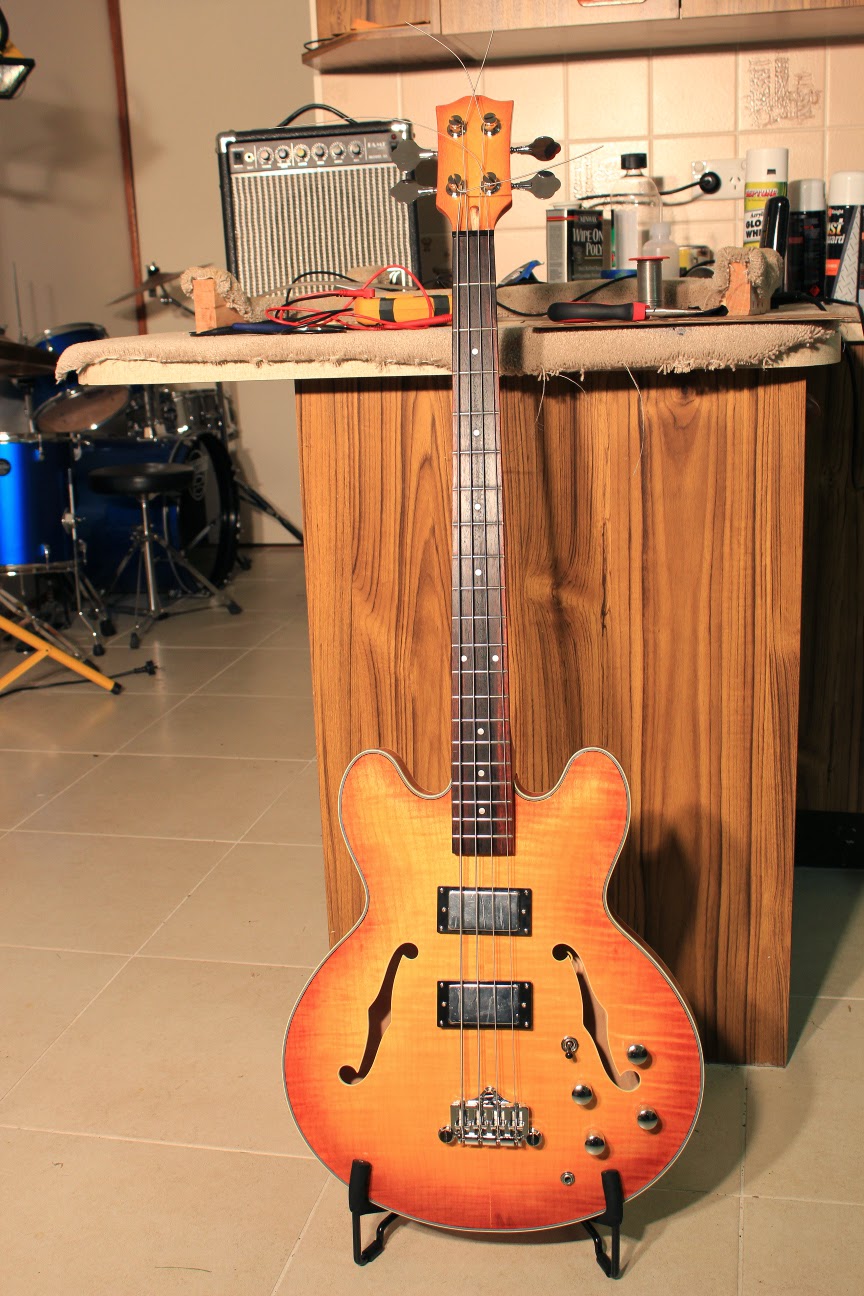
The 335 bass is now officially complete. The headstock decal went on this morning, and she finally got a fret level and re-dress. Nothing short of amazing now to play. What started out as an ESB-4 kit from Pitbull Guitars is now a rockin' instrument. Now all I have to do is learn a few more bass riffs!


I am so happy with how this kit came out, and oh-so happy with how she feels to play. So much so,  that I am seriously considering building another one. I can see this beauty in trans-black hanging on my wall. Sounds good doesn't it??

Postscript 8th July 2014:
I've just been informed by the good folks at Pitbull guitars that this little beastie has taken out Pitbull Guitar of the Month for July. Woohoo! Thanks guys!

Wednesday, 18 June 2014

335 Semi-hollow Bass: Sound Demo

OK, so for those of you interested in how this semi-hollow beast sounds, I have done a quick sound demo. Please excuse the crap playing. The bass is being played through a Fender Deluxe 112 guitar amplifier with no additional pedals or effects other than a bit of reverb provided by the amp itself.


I'm certainly no bass player, but I gotta say, I love the way this baby sounds. Deep and booming, yet very clear and crisp. It looks so awesome, and sounds so good, I'm sorely tempted to make myself another one! I never knew how much fun playing the bass could be.

I've still got the headstock decal to go before I call this one finished, so hopefully that will all be done and dusted by the weekend!

Tuesday, 17 June 2014

335 Semi-hollow Bass: All wired up

OK the wiring harness went in without a hitch today. It took all of 20 minutes to get the pots, output jack and 3-way switch into the body and the nuts tightened down. It's a new record! Third time building a semi-hollow has sure honed my skills.


Anyway she's looking really nice now and she sounds amazing through my solid-state Fender guitar amp. All that is left to do on this baby now is a fret level and re-crown, create a suitably awesome custom truss-rod cover, and stick my headstock decal on.

Thursday, 12 June 2014

335 Semi-hollow Bass: The Neck is Set

With the clear coats finally in an acceptable state, it was time to glue the set neck onto the 335 bass. Before I could do that, I needed to drill a hole for the bridge ground wire from the front bridge post out into the cavity. This time I remembered to use a metal ruler to protect the finish from the side of the drill bit.


All was completed successfully, and the ground wire was installed by baring some of the wire, turning this downwards into the post hole and then inserting the the post into the hole. A multimeter attached to the bridge post and the end of the ground wire indicates very quickly whether the bare wire is making contact.


With the grounded bridge post installed, the other bridge posts could be pushed in and the bridge mounted to allow the outside strings to be aligned down the neck. With this looking good, it was time to get out the Titebond and slather it into the cavity and onto the neck heel. The clamp went back on (tight!) and now it is left to dry for a couple of days.


I am a little concerned that the neck could come over more towards the E string at the tuner end. The string is sitting a little too far into the fretboard down at the pickup end of the fretboard for my liking. But try as I might, I could not get the neck to twist horizontally any further. It's definitely playable as-is, and this certainly wasn't a visible issue during the mock build,so we'll have to wait and see what it looks like when the clamp comes off.