Showing posts with label Ventures Mk II. Show all posts

Wednesday, 10 February 2016

Ash Mosrite: Polishing & Wiring

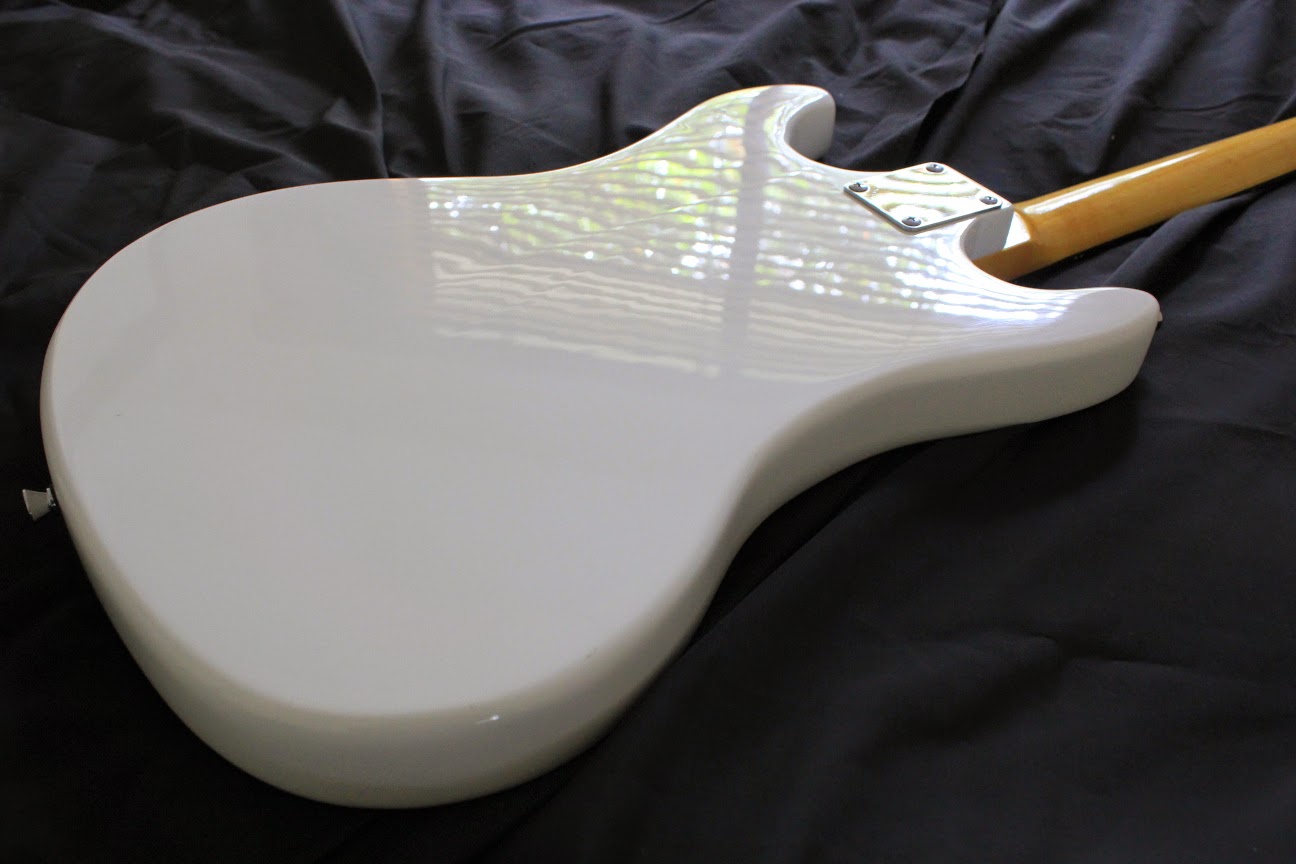
Big strides forward on the Ash Mosrite build the last couple of days, with the body finally cured and the polishing completed. To get the clear coats to their final state is a 4 step process. Firstly the body is wet sanded all over with 1500 grit. At the end of this step the body is completely level once more with no shiny spots at all. The surface is completely matte and ready to shine!

Then comes the 2000 grit wet sanding to remove all the scratches left behind from the 1500 grit. As the 2000 grit is applied, the surface slowly becomes more and more shiny. With the 2000 grit complete, the third and fourth steps are the application of cutting compounds - specifically Meguiars Ultimate Compound and then Meguiars Scratch X2.0 to complete the job.

Meguiars Ultimate Compound does it again.
After all four rounds the surface was as shiny as it was ever likely to get, and that's very shiny indeed! With the polishing done, I set the body aside and let the surface rest; concentrating instead on wiring the pickguard. I do love these builds with all the wiring on the back of the guard. So straightforward!!

I began by shielding the back of the pickguard using copper tape - specifically "Slugga" slug control tape from Bunnings. It's cheap and it works perfectly for shielding. With the pickguard shielded I added back all the components and soon had the simple 2PUP, 1Vol 1Tone 3-way switch circuit (one of the simplest) all soldered up.

1Vol 1Tone, 3way switch circuit.
Pickguard shielded and the 1V1T wiring complete.
With the pickguard completed, I went straight on to inserting the earth wire into the bridge post and shielding the control cavity. Slugga also made short work of this task, and I quickly had the bridge ground wire soldered to the shielding, and from the shielding to the back of the volume pot.

Cavity shielded and grounded to the bridge.
With the shielding and circuit grounded, It was time to assemble the guitar, screwing the neck and pickguard to the body. It was here that I came across a stupid mistake that I made during clear coating. Having attached my hanger using neck bolts in the usual way, I neglected to mask off the inside of the neck cavity. Although the hangar protected much of the cavity, about 1/4 of the pocket at the heel end was covered in acrylic clear. In effect these clear coats creating a neck shim and threw the whole balance of the neck and bridge out.

With a razor blade I set to scraping the clear coats back out of the pocket and with a little patience the problem was solved (phew).  The neck is now sitting nicely in the pocket and the assembly can continue.

Pickguard and neck screwed into place.
With the neck and wiring complete, the guitar makes noise and can be played. The action is still not so nice, and the whole thing desperately needs a fret level/re-crown to start playing nicely. The neck has a 0th fret, so although I don't need to make a new bone nut, I do need to file down the existing nut slots so that the 0th fret can come into play. That's the last step in this build and I can't wait to get her finished! Stay tuned for the final chapter.

Saturday, 6 September 2014

Johnny Ramone Mosrite: She's Ready to (Punk) Rock

Well the Johnny Ramone Mosrite Ventures MkII is finally finished and she looks totally awesome. The stark white finish is a dead ringer for Johnny's signature model (without the relic'ing) and the acrylic clear coats have really brought the shine. Whilst it isn't my first choice for other guitars, I think it works very nicely here.


I think I also did a good job with the neck. The Vintage Amber Colortone dye has resulted in a fairly deep yellow but it works well against the rosewood fretboard and the white body. Overall I'm so fucking happy with this axe. It just begs to be thrashed, and I'm just the kind of under-skilled player to do it! The DiMarzio FS-1 DP110 - the same bridge pickup that Johnny used throughout his career - is over-wound and really packs a punch. I'm hoping to have a sound demo posted soon, so stay tuned for that!

Thursday, 4 September 2014

Johnny Ramone Mosrite: DiMarzio FS-1

Well, I've been waiting, erm, patiently? for my DiMarzio FS-1 DP110 bridge pickup to arrive in the mail. Today it unexpectedly popped out of the Australian postal service and on to my front door mat! Nice.


I wasted no time in getting the little bugger mounted in the pickguard and wired into the 3-way switch. A quick tap-test revealed that this thing is over-wound out the wazzoo, so I can't wait to crank her up and take her for a spin.

With the wiring finally complete, It was a simple process to get the remainder of the shielding done (adding copper foil around the lip of the shielded cavity) and to get the pickguard screwed into place. Before I drilled the screw holes for the pickguard I added the E strings to make sure the pickups were in the correct place with respect to the bridge. In no time the beast was assembled!


All that is left to do now is to level the frets and lower the nut slots so that the strings are sitting on the 0th fret. I am tempted to take her out for a spin as-is, but I'm trying to resist. Much better to wait until the action is nice and low!

Wednesday, 3 September 2014

Johnny Ramone Mosrite: Shielding & Wiring


With the body all polished up it was time to consider all things electrical. And even though I still have to wait for my DiMarzio FS-1 to arrive, there's a shitload I can do in the meantime! First thing was the shielding - both the entire cavity and the back of the pickguard.


It's a huge swimming pool of a cavity and it took a great deal of copper tape to shield, but hopefully the results will be worth it. I still have to run a thin strip of copper tape along the top entire edge of the cavity so that the walls make contact with the back of the pickguard. I'll do that just before final assembly as I might want to hit the body with a little more polish between now and then.

With the shielding done, it was time to look at the wiring. I love wiring these simple 1 Volume, 1 Tone kits, especially with all the electronics mounted there on the pickguard. There's nothing to stress about, just whack it together. Two pickups enter the switch, one wire leaves and it's straight shooting to the output jack from then on. In no time I had the neck pickup wired in and could do a tap-test to check the volume and tone circuits.


Tappity-tap - volume, tone, it all works perfectly! Now just waiting on that awesome bridge pickup and everthing will be sweet. She's already looking cool, just one little hole to fill.


Next up is a fret level. I'm in a quandry about how to deal with the 0th fret. My options are to level it with all the rest or to leave it a little higher than the others. I'm leaning towards leaving it a little higher just like a nut would be. Still some thinking to do there..

Tuesday, 2 September 2014

Johnny Ramone Mosrite: Wet Sanding and Polishing


Well another great day for the Mosrite build - today I finally was able to get stuck into the final finishing of the body! I started with a thorough wet sanding with 1500 grit wet/dry to level up the surface.  After this, it was on to further wet sanding with 2000 grit to remove the scratches. God damn my shoulders ached after those sessions let me tell you.

After the wet sanding it was on to the Meguiars compounds to bring the shine. Firstly I applied Meguiars Ultimate Compound. This is all by hand mind you - no buffing machines here in Holgate unfortunately! I needed three passes with the ultimate compound - working in little circles a small area at a time - before all the sanding marks were finally gone. It's quite amazing how shiny the acrylic lacquer looks after just this cut!


To finish things off, I moved to the Meguiars 2.0 ScratchX. This is when the shine really takes off! I'm very happy with how the body has come up. There's a few little marks here and there that pay witness to my outdoor clear-coating activities (damn little bugs!) but all in all she looks awesome - I'm one very happy pinhead!


I finally ordered my DiMarzio FS-1 today to go into the bridge pickup slot. It's exactly the same pickup as Johnny rocked. That should arrive in the next few days, allowing me to get this baby wired up and rocking!

Friday, 29 August 2014

Johnny Ramone Mosrite: Speeding up the Curing


Well, I sprayed the final coat of acrylic clear on the Johnny Ramone Mosrite Ventures MkII and it's been 4 days curing in the bathroom. I've already gotten mega-impatient waiting. How the hell am I going to wait a whole month? No way Jose - not going to happen. And so I went to Bunnings today and bought myself an outdoor heater to speed up the curing process. If it's good enough for the guru Dingobass (in-house luthier with Pitbull Guitars), then it's good enough for me!


I had the Mosrite under the heater for a couple of hours each side today. I'll give it another few hours under the heater again on Monday and that should mean I can start cutting and polishing. Hmm or does it?? Using the IR lamp is a new technique for me so I'm not 100% sure of the times involved. I'll just have to play it by ear (and smell!) to see how long it needs. At least the impatience is gone and excitement is building again!

Wednesday, 20 August 2014

Johnny Ramone Mosrite: Autobiography

While the acrylic clear coats cure on the Johnny Ramone Ventures Mk II build, I thought I'd sit down with Johnny's autobiography. Written by Johnny after he had been diagnosed with prostate cancer in 1999, it's a great read for a fan of the man and of the band.


Told in his own words, it narrates the struggles the band had both internally and externally over their 20 year (odd) career. Pick up a copy to fill that wet Sunday afternoon and to show your support for one of the world's most influential (and angry!) rock guitarists of all time.

Sunday, 3 August 2014

Johnny Ramone Mosrite: Clear Coats & Headstock Decal

With around 10 coats of Tru-Oil on the neck, it was time to get the white vinyl decal on to the headstock. The decal, as usual, came from Andy at City Signs and Print in Port Lincoln SA and went on like a dream.


I could have gotten a more traditional look using a knock-off Ventures decal from ebay, but I'm not as desperate for the real thing as all that. Better to have a well made "Tribute" build rather than trying to pass my work off as something it isn't. I think my own logo looks mighty-fine perched atop this beast anyway.

Today was also exciting because I managed to get the first coats of acrylic clear on to the body. I was a little nervous - clear coats are always a little tricky - but the acrylic went on without incident and the Septone white spray gloss stayed beautifully unaffected underneath.


Happy days! Now just 3 more spray days to go and I can let the clear coats cure.

Saturday, 19 July 2014

Mosrite Ventures Mk II: Dying the Neck


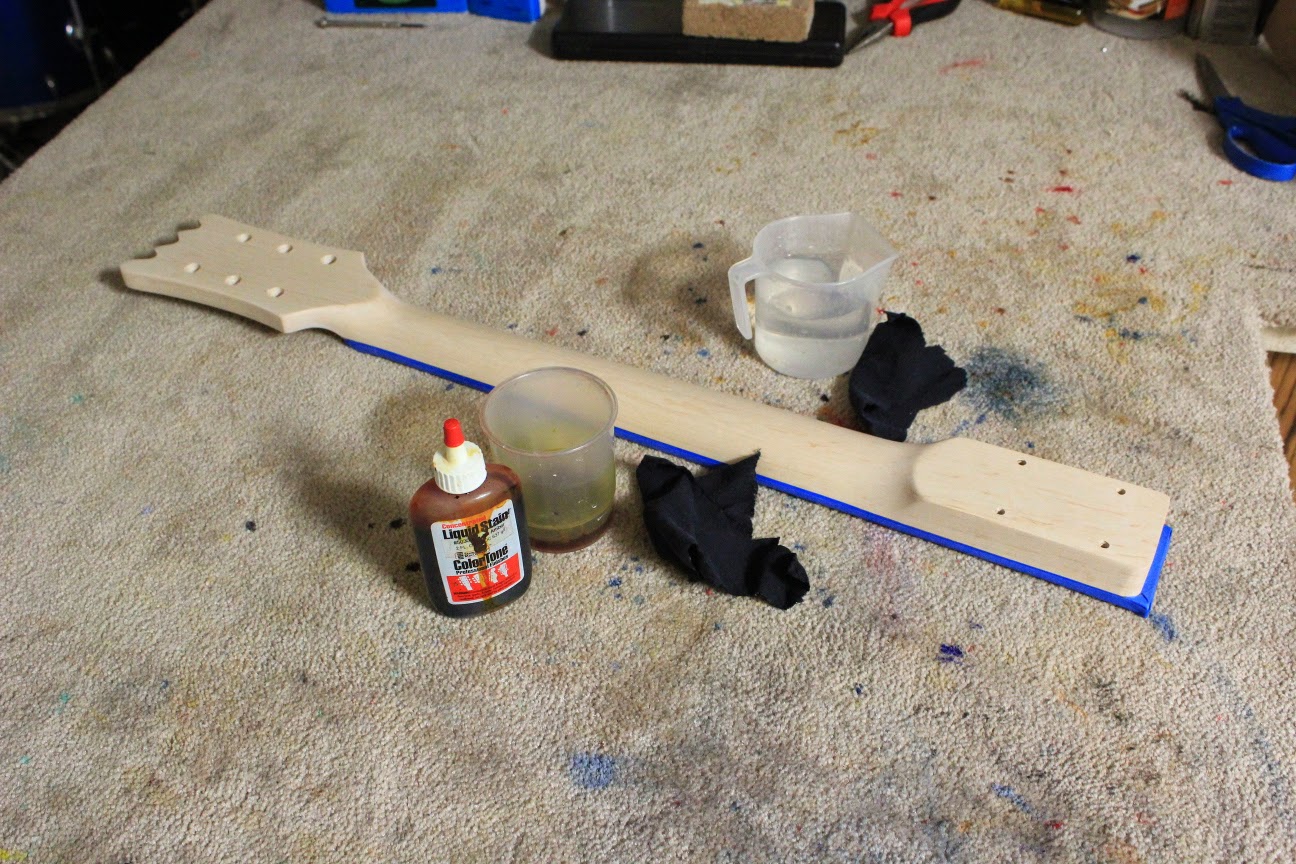
Here's how I go about preparing a rock maple neck with Colortone dye, be it Strat, Tele or in this case an uber cool Mosrite Ventures II, ala Johnny Ramone. The aim is to get the neck sanded smooth and dyed to the correct shade so that it is ready for it's decal and clear coats.

For this build I'm aiming for a light yellow colour as per Johnny's original Mosrite. To achieve this I will be using Colortone Vintage Amber dye mixed with water.

Step 1. Sanding
Rock maple necks are generally machined to a high standard straight from the factory. The finish is nice and smooth from the get go. Therefore, there is no need to start sanding at very low grits. Generally I start at 360 grit and then progress to 400 and then 600. I find that's all that is required for a super silky neck. You don't want to go too low if you are going to be dying the maple - you want *some* dye to get in there, and it wont if the surface is too "polished".

Step 2. Mask off the Fretboard.
Before liquids are involved, I generally mask off the fretboard. Even if you are just using water, fretboards (especially rosewood) are often dyed themselves at the factory and you risk the dye running (on to your maple!) if water gets on there. To mask the fretboard I use 6mm 471 tape from 3M at the boundary between the maple and rosewood. This gives the fretboard good protection where it needs it most. On top of this I generally use some blue painters tape to go up and over the edge of the fretboard.


Step 3. Prepare Your Water and Stain
Get some water in one container and mix your Colortone dye with some water in another. Test the concentration of the dye on a test piece of pine or similar - it should be *lighter* than your target colour!


Step 4. Raise the Grain
Before going any further it is important to raise the grain - once the dye goes on you won't want to sand the maple again! To raise the grain, wipe the maple all over with a damp rag and wait for it to dry.


You will immediately feel that your nice smooth neck feels rough again. These are the end grains that have swollen up with the water and are now sticking out! Once the neck is dry, give it a very light lick with the 600 grit paper again to take the raised grains off. The neck should be back to its smooth self again.


It is very important that you don't over sand at this stage. You don't want to expose *new* grains, just get rid of those that have been raised. Repeat this two step process at least 1 more time.

Step 5. Dampen the Surface
Before you actually start applying the stain, dampen the whole surface of the neck again. This prevents streaks in the final dye job by allowing the maple to pre-absorb a little liquid. You'll find that your dye job is a lot more even if you pre-wet the surface!


Step 6. Apply the Dye
Now apply your dye with a cotton rag. Go easy, with only a small amount of dye on the rag at first. Wring the rag out after dipping it in the container o prevent drips and runs. Apply dye evenly over the whole neck before starting again with a second pass.

Keep going over in successive passes until the desired strength of colour is reached. Wait for the dye to dry completely and that is job done!


I haven't decided yet what I will be using as clear coats. I'm tossing up whether to use Tru-Oil or Wudtone clear neck finish. Wudtone is much less hassle, but Tru-Oil adds depth and an earthy tone to the colour. Hmmm, decisions...

Friday, 18 July 2014

Mosrite Ventures Mk II: Mock Up and Test Fit


Well the mock build on the Johnny Ramone Mosrite is done. With a nice tight neck pocket, everything fit together like a dream with absolutely no wiggle room at all. What a quality kit this is turning out to be!


With the neck bolted into position, the E strings sit perfectly up the neck. No adjustment necessary.


That's all there is to report campers! When everything goes so smoothly, and fits together so damn easily, the news is often fairly bland. So it is this day! So without further ado, it's on to the finishing proper for this punk rock beast.

First job - sanding to 600 grit. Gabba Gabba Hey!

Mosrite Ventures Mk II: Hey Ho Let's Go!!

Guess what I found on my doorstep this morning? The most exciting thing to grace it for quite a while. It's my newest guitar kit from Pitbull Guitars: The Mosrite Ventures Mark II as made famous by the one and only, the incomparable punk rock legend, Johnny Ramone!


I'm so excited! I've wanted one of these for years and years, and I've waited patiently for the couple of months it took for this special order kit to arrive. But, I gotta tell you, it was SO worth the wait. This thing is amazing!


Out of the box, the kit is a wonder to behold. The body shape is spot on - exactly to spec - with that under-hanging larger horn and the misshapen back section that made the Ventures Mk II famous. The headstock also sports an exact replica of the immediately recognizable Mosrite "M" shape, and even the Zero'th fret has been included. Unbelievable!!


The body is 3-piece basswood with no obvious glue or machining marks. The neck pocket is quite long compared to your normal Tele or Strat, and that should mean a good transfer of vibration from the neck to the body. The neck meanwhile is a nice piece of Rock Maple with a Rosewood fretboard. It's a 22-fret setup with a scale length of 626mm measured from the middle of the 0th fret to the middle of the 12th. The profile of the neck is super thin so it should be really nice for me and my small hands to play!

All in all I couldn't be happier with the kit. I'm so happy in fact, that as soon as I opened the box I contacted Adam from Pitbull again to order another one; this time in Ash.

I'm going to finish this kit in traditional Johnny Ramone style - white, with a Dimarzio FS-1 in the bridge position. Reportedly, Johnny never played the neck pickup at all (in the end he even had the switch taken out) so I probably wont worry too much about replacing this one.

I'm so damn excited!! Time to get sanding...