Showing posts with label Clear Coats. Show all posts

Monday, 14 March 2016

Jeremy's Mahogany Les Paul: Clear Coats and Pin Holes

Jeremy's Les Paul has finally cured to the point where I can start looking at it again. Unfortunately, after flattening the clear with 600 grit I noticed that the acrylic clear coats have dried over the mahogany and left several annoying pin holes in the finish. Nothing for it but to drop fill them from the can. It's pretty straightforward - just spray come finish into the lid and use a bamboo skewer to put a drop of clear on top of each hole.

Lid from the Acrylic Spray and a Bamboo Skewer

Pin Holes filled. Now to let them set and then level off.
With each hole covered by a drop of clear, it's then a matter of time to let these drops dry sufficiently before they can again be leveled off with paper. In this case, with the help of my trusty outdoor heater the back was cured again in a week and ready for sanding down with 1500 grit. Having done this, and liking what I saw, I went straight on to the 2000 grit and Meguiars Ultimate Compound. The results are pretty great if I do say so myself.


A great deal of shininess is now on show. The next step is to get the neck glued on and the hardware installed. I'm getting pretty excited about this build now!

Thursday, 14 January 2016

Jeremy's Mahogny Les Paul: Final Clear Coats & Tru-Oil

Some more progress on Jeremy's Les Paul today. With the acrylic clear coats having hung for a month of more drying, it was high time I flattened them in preparation for final coats and polishing. With some 600 grit sand paper, I wet sanded the White Knight acrylic finish until all the orange peel had been removed and the entire surface took on an even matt finish. Soooo smooth!

Acrylic flattened with 600 grit ready for final coats
The body was then ready for two more acrylic coats, in preparation for a month of curing. She's looking nice and glossy at the moment - I'm very interested to see how she looks after the final polish.

Last clear coats on and now ready to cure.
With the body hanging to cure, I was also able to get another coat of Tru-Oil on the neck. There are over 15 coats on there now, and today I started wet sanding it with 600 grit. From now on I'll be applying coats of Tru-Oil thinned 1:1 with Minural Turps. You know when it's time to start thinning the Tru-Oil as you start to see streaks in the finish, and this tends to coincide with the first round of wet sanding.

Wet sanding with 600 grit and thinned Tru-Oil coats have begun on the neck.
About 5 more coats of Tru-Oil, with successively finer wet sanding, and the neck should be ready for a final polish. The neck is feeling really nice and smooth now, so she should give the final axe a really nice feel.

Sunday, 3 January 2016

Ash Mosrite: Clear Coats

It's first weekend of the new year and today (Sunday) was definitely a day for levelling and clear coating, with my Ash Mosrite joining the 12 String Telecaster build in getting its final finish laid down. With about 12 layers of White Knight acrylic clear on the body total, it was time to get out the 600 git sandpaper and wet sand it flat. It took about half and hour of careful wet sanding (no sand-trhough whew!) and the orange peel was finally removed to create a uniform matt finish. On went a final 3 coats of clear - a nice smooth finish to start cutting and polishing.

Levelled with 600 grit and final clear coats applied.
Before the polishing can begin, I need to allow these final coats to cure. That should take about a month (or less if the heat lamps are brought out) with the sniff test being the final decider. It's time I got on to the neck anyway. It has languished all these weeks still in the box because I couldn't quite face sanding again, but now is the time. With no headstock shaping required, I should be able to get it sanded and dyed ready for Tru-Oil coats in the next few days.

12 String Telecaster - Clear Coats

After 3 days worth of clear coats with White Knight gloss acrylic (3 coats per day), the 12 String Telecaster was ready for a couple of weeks hanging over the Christmas period. Now with its builder sporting a rather rotund post-holiday visage, the acrylic has cured sufficiently (just a slight lingering smell) to allow the clear to be flattened with 600 grit. With the orange peel removed and the surface brought down to an even matt finish, I was able to spray the final 3 coats of clear.

Acrylic levelled with 600 grit an final coats applied.
Time now to let this baby hang for a month or so to let the clear coats fully cure. It will then be time for the final cut and polish. In the meantime, I have to get started on the neck finish. I still have to get some 400 grit paper to finish the sanding, then a grain fill, amber dye job and copious layers of Tru-Oil.

With hindsight, I'm not sure that the choice of a trans-black finish was the best for this build. I think that in the end the dye job was too heavy and that the flame maple figure is lost in all that black. I definitely applied too many dye coats, and I should have stopped when the body was more of a "grey" tint with the flames standing out. Oh well, lesson learned. It's still gonna be a nice black Tele.

Friday, 4 December 2015

Jeremy's Mahogany Les Paul: Clear Coats!

A week has past since my last post on Jeremy's Mahogany Les Paul build. In the intervening days, the body has been receiving regular coats of White Knight Gloss Acrylic, and Tru-Oil has been slowly building on the neck. This is the first time I've sprayed acrylic clear directly onto a dyed flame-maple top and I gotta say that I'm pretty bloody happy with the results! I wasn't sure how much the flame maple would pop without a bit of oil soaked into the figure, but I needn't have worried. The flame maple is looking really really great! There's even a crap-load of chatoyance visible in the grain, and I really didn't expect that! I think Jeremy's gonna be pretty pleased with how she's looking.

Acrylic clear coats building nicely and popping that flame figure.
The thin coats of Tru-Oil are building much more slowly on the neck, but already the grain is looking really nice here too. I'm giving it a smooth down with 0000 steel wool every 3 coats or so, so after another hundred or so coats she'll be feeling really nice indeed :). After 3 or 4 more coats of acrylic I'll give the body a smooth down with 600 grit, bung on a couple of top coats and leave it to cure.

Monday, 24 November 2014

Surf Monster Telecaster: Polishing

After the longest finishing time ever, my seafoam green Telecaster got its final wet-sand and polish today. First, I started with 600 grit and wet-sanded the surface down to remove the majority of the orange peel. Then it was on to the 1500 grit and the 2000 grit to complete the job. With the wet sanding done, it was on to the Meguiars polish.

I apply the polish with a square of t-shirt material, and then take it off again with a clean piece.  I began with two rounds of Meguiars Ultimate Compound, and then followed this up with a final round of Meguiars Scratch-X 2.0. Couldn't be simpler.


As usual, the results are just awesome (if I do say so myself ;) ). My arms were aching by the end of it, but I love how the Meguiars brings up the acrylic clear coats. Now with just the shielding and the electrics to go, I should be rocking on this bad boy by the end of the week. I'm excited to hear how those GFS 63' Vintage pickups sound!!

Postscript 24/11/2014
In a fit of further productivity, I also got the shielding completed. Gotta love that "Slugga" tape from Masters :). Nothing stopping me from wiring this sucker up now :).


Thursday, 16 October 2014

Surf Monster Telecaster: Clear Coats

Well, for the last few weeks I've been meaning to get back to the seafoam green telecaster. I'm in the process of applying acrylic clear coats over the MTN 94 colour coats, but there was the Mosrite to get finished, and then my holiday. I've had two coats of acrylic clear on the body for quite some time now, but today I finally got the chance for a third coat.


I'm really liking the way it's looking. Take it from me, it looks much better in the sunlight - the photo is a little dark. I'll try to post a better picture in the next update.

Anyway, after this clear coat hardens, I'll level it with some 800 grit wet and dry, then give it a final coat ready for cutting and polishing. I'm loving my outdoor heater turned clear coats curer, It makes a tedious job very easy. I never managed the patience required to let the acrylic clear coats cure on their own...

Sunday, 24 August 2014

James' Les Paul Jnr: Wudtone Clear Coats

With 3 coats of colour on the body and 7 on the neck, James is now happy with the depth of Butterscotch colour I've managed to achieve on both pieces. The grain on the body is still visible, and the match between the headstock and body shades is good. As expected, the rock maple has taken the Wudtone differently to the basswood body, so the colours will never be identical, but it's pretty close.

So now that the colour is finalised, the clear coats can begin. I'm using Wudtone "Clear Gloss No Aging" on the body, and Wudtone "Clear Neck Finish" one the neck.


I've currently got 3 very thin coats of clear on the body and it's starting to look good. Not glossy yet - more of a satin finish - but that's ok. The main thing is that it's bringing out the colour - Wudtone clear doesn't purport to give a showroom finish. I am planning to give the body a few coats of Minwax wipe-on Poly at the very end to give better protection, and to add the requisite shine.

With 3 coats on the neck, it's also starting to look the business. I really love the way a neck plays with this Wudtone neck finish, so hopefully this one will be no exception!

All in all the build is coming together nicely. Hopefully in another week or so the clear coats will be done and we can move on to assembly. Excitement is building!

Sunday, 3 August 2014

Johnny Ramone Mosrite: Clear Coats & Headstock Decal

With around 10 coats of Tru-Oil on the neck, it was time to get the white vinyl decal on to the headstock. The decal, as usual, came from Andy at City Signs and Print in Port Lincoln SA and went on like a dream.


I could have gotten a more traditional look using a knock-off Ventures decal from ebay, but I'm not as desperate for the real thing as all that. Better to have a well made "Tribute" build rather than trying to pass my work off as something it isn't. I think my own logo looks mighty-fine perched atop this beast anyway.

Today was also exciting because I managed to get the first coats of acrylic clear on to the body. I was a little nervous - clear coats are always a little tricky - but the acrylic went on without incident and the Septone white spray gloss stayed beautifully unaffected underneath.


Happy days! Now just 3 more spray days to go and I can let the clear coats cure.

Tuesday, 22 July 2014

Stone Roses Tribute: Video Build Diary #7

The seventh installment of my video build diary for the RC-1 Stone Roses Tribute is now on YouTube. This installment deals with the do-over of the Pollocking paint job, and (finally!) the setting of the neck.


Enjoy!

Saturday, 19 July 2014

Stone Roses Tribute: Clear Coats

Well, it's crunch time again - time for the clear coats to go on to the Stone Roses Tribute RC-1. And with the memory of this build's last bitter failure still fresh in my mind, I decided to steer well away from Polyurethane in any of its many forms. So too, since my success rate with spray on Acrylic Lacquer is still less than 100%, I'm also reticent to go down that path with the Tribute either.

So what am I left with? Well, for my very first build, the Flying V, I actually had quite good success using Behlen spray on nitro. It was easy to spray on, didn't run (once I knew what I was doing) and tacked off quite quickly. And since I don't have to wet sand the Pollock, it seems like a convenient and stress-free choice for me to take. I even had a couple of cans of the stuff lying around!


And so it went. I ended up using the better part of two cans of Nitro on the body and headstock face. Firstly, I sprayed 5 coats of Nitro gloss. This was the better part of a whole can. I then moved to 5 coats of Nitro "Jet Spray" satin to finish off.


I must say, I'm really very happy with the results. You can still see the ridges and troughs where the splatter has gone on, but I was always planning on keeping them this time around. The lacquer has really popped the colour and I'm really impressed with the final look.


Now I plan to leave the lacquer a few weeks to cure. After that I'll be able to move on to assembly. Awesomeness!

Wednesday, 21 May 2014

Surf Monster Telecaster: 3rd Coat of Acrylic Clear

The acrylic clear coats are slowly building up on the blue telecaster now and she is looking better and better with each coat. I have now completed 3 coats (with 3 passes each) over the last 3 days. The colour is looking great! It's just about time for the first sand back to level up all the surfaces in preparation for a final coat.


I'm going to try and wait the full 30 days on this one before I attempt to wet sand and polish the acrylic finish. I've never been able to wait the required curing time in the past, whether it be for lacquer, Tru-Oil, or poly finishes, but I must have more patience. Yes I must!! It really helps the finish the more curing time you give it. Here's hoping I don't get too bored in the coming month...

Tuesday, 29 April 2014

Solid Body PRS: Headstock and Control Cavity Cover

A bit more progress on the PRS today. I traced the control cavity on the back of the guitar and cut a cover out of a pickguard blank for it. Successive trimming on the bench sander allowed me to get a reasonable fit. Not perfect, but not bad. It's very hard without the original routing template to go by (at least that's my excuse)!


I also got the headstock sprayed black and a couple of layers of Minwax Wipe-on Poly applied. It's not my best headstock attempt, but it will do in a pinch. I really should have sprayed it *before* applying the Wudtone to the neck (like I did for the Stone Roses Tribute) but I did the best I could under the circumstances. Lesson learned for next time > do all your staining and spraying before touching any Tru-oil or Wudtone!


Tuesday, 22 April 2014

Stone Roses Tribute: Fucking Minwax Wipe-on Poly

Ok, so I'm pretty fucking pissed off. After 5 coats of Minwax Wipe-on Poly, there has been a distinct change in the colours on my Stone Roses Tribute guitar. The colour scheme I had worked so hard to create is now changed beyond repair. The whites in particular now look off-white or "aged". Not sure if you can pick it up in the photos, but under normal lighting the difference between the white of the pickguard and the now yellowing white paint is enormous. What a fucking disappointment.


With hindsight, maybe I shoud have known this would happen. The Minwax product is a "wipe-on" product meant to be rubbed on much like oil finishes. For this reason it isnt surprising that the poly has a very slight amber tint. You dont see it with the first coat or even the third, but by the fifth it's pretty fucking obvious.


This being said, a can labelled [Clear Gloss] is at the very least misleading. Fuckers.  I've since bought another brush-on poly from Cabots that also professes to be "Clear". Dare I continue putting on coats? I've no fucking idea..

Monday, 21 April 2014

Flamed Telecaster: Spraying Acrylic Clear Coats

A really amazing day today. It was a long hard road to get there, but I finally managed to get 3 reasonable coats of acrylic clear on my flamed telecaster build. It took quite a bit of trial and error to get the spray gun dialled in. At first the weather here in Holgate was too humid (I think). To help overcome this issue I added a water trap to the bottom of the gun. Next, the clear was drying the instant it hit the wood (like sandpaper). The reason was too much pressure and too little fluid. To help overcome this issue I added a pressure regulator to the bottom of the gun, reduced it to about 18psi and increased the fluid control. The resulting gun setup looks like this:


It's some kind of supercharged hot-rod affair! With the gun now ready and dialled in (I hoped), it was time to get on and spray. Retiring to my high-tech spray booth (a saw horse outside the garage) I was able to lay down 3 nicely wet coats; waiting 15 minutes in between for the coats to tack off.


Thankfully, a friend of mine recommended a good quality Sundstrom mask to keep the fumes out of my lungs. It worked unbelievably well and I would highly recommend them to anyone. The end result of the spraying was pretty good for my very first attempt. There is a bit of orange peel, (I'll deal with that later), but some decent coverage has been laid down. I'm planning to sand this flat before applying 3 more finishing coats tomorrow.


The good news from today's success is that it seems acrylic clear can definitely be sprayed over Tru-Oil without any ill effects (or so it seems). This is great news for those of us that like to use Tru-Oil to enhance the chatoyence of the figured timber before adding the clear coats over the top. Roll-on the buffing and admiring!!

Saturday, 1 February 2014

Les Paul Florentine: Polishing Tru-oil

After applying my Tru-oil coats in conjunction with wet sanding down to 2000 grit, I've finally finished the clear coats and have allowed them to cure for a couple of weeks. Now it's time to give the clear some polishing to deepen the shine.

I use Colortone polishing compounds from Stewmac - 'medium', 'fine' and 'swirl remover' grades.


After applying the medium grade compound I'm already liking the depth of shine I have been able to create. Take a look and see what you think:


Just another few days and the finish on this bad boy will finally be complete (phew). It has been a long, long run for this one! Then it's just a matter of shielding and wiring. Hmm, hang on, the wiring on this puppy is going to be a challenge - just like the 335 12 string!

Wednesday, 15 January 2014

Les Paul Florentine: Thinning Tru-Oil with Shellite (Naptha)

A few weeks ago I posted a quick article about how to resurrect your Tru-Oil when it gets old and cruddy. The secret was to stick a bit of Shellite (Naptha) in it and give it a shake. Well, today I decided I'd try to thin my Tru-Oil down using Shellite rather than the usual Mineral Spirits. I wet-sanded for a couple of hours with 1500 grit (it needs more but that's another story) and then thinned some Tru-Oil about 70:30 with Shellite.


The thinned oil wiped on smooth and had soon settled into a new streak-free layer. I would even say that the thinned oil went on easier (smoother?) than when using Mineral Spirits, but I'm not 100% sure. Let me do it a bunch more times and I'll let you know the conclusion. All I know right now is that it went on nicely and the results speak for themselves! The shine is really starting to pick up on this sucker now. Just wet-sanding with 2000 grit to go.

Postscript 16/01/2014
Well, the oil dried and guess what? There were streaks in it where it hadn't settled. With hindsight this is not surprising given that Shellite (Naptha) evaporates much faster than Mineral Turpentine. Obviously the Shellite is evaporating way too fast. So in conclusion, thinning with Shellite is a very bad idea! Stick with Turps instead and save yourself the agony of having to wet-sand all over again...!

Friday, 20 December 2013

Les Paul Jnr Double Cut: Clear Coats Complete

Finally the clear coats are finished on the double-cut Jnr. I used Minwax Wipe-on Poly - about 4 coats - to help bring up the shine and to protect the finish a little more. To tell you the truth I just wasn't happy with the amount of clear that went on from the Wudtone bottle. Just 3 very thin coats! It didn't feel to me like it would survive the first bump.

So anyway, it's done and even without applying the Colortone polishing compound the poly has  really come up nicely.


Now to let the poly cure completely and then give it a quick buff with Colortone compounds. Should look killer when all that elbow grease has been applied.

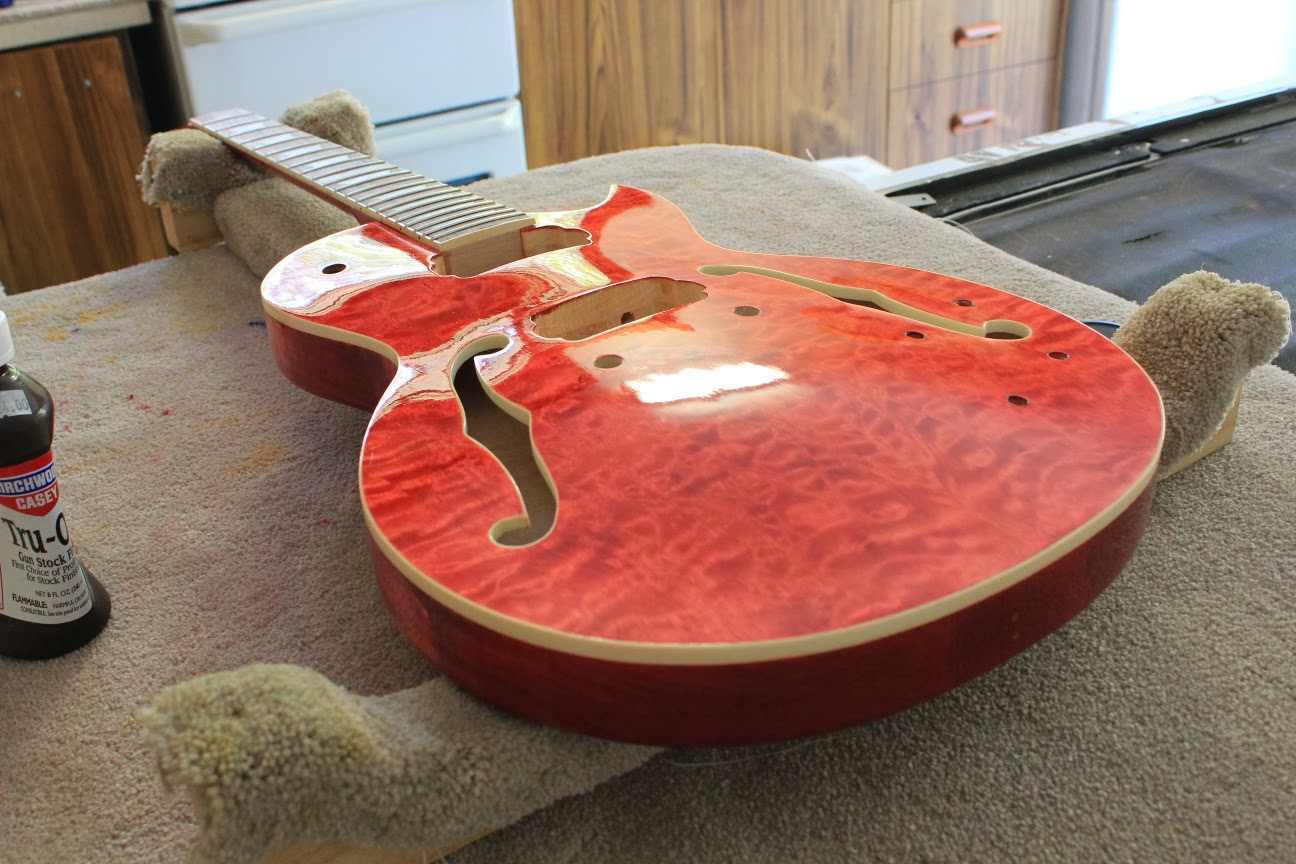
Les Paul Florentine: Tru-Oil Going On!

The Florentine is slowly building up layers of Tru-Oil and is starting to look nice and shiny. I have about 12 coats on both the back and the front so far and have wet-sanded in between to 800 grit.


Time to start with the 1200 grit and 50:50 thinning of the Tru-Oil from here on out. This beasty is starting to look nice (IMHO), especially on the back. Hard to believe that this is only basswood! I really like how the wine red stain has come up. Wish the front was a little darker, even though the quilted maple does look pretty good. A more 'wine' shade would have been better and I'm kicking myself that I didn't trace dye with black at the very start of this project. Oh well, you live and learn.

I am also thinking about spraying some clear acrylic over the body for this build. That will allow me to darken up the colour a bit on the front (using Colortone dye in the clear). I'm even thinking of a subtle burst of even darker colour around the edges. Not sure yet. Of course I'm thinking big even though I've never yet used a spray gun in my life. It's go hard or go home I guess.