Showing posts with label Les Paul Jnr. Show all posts

Thursday, 8 January 2015

James' Les Paul Jnr: All Finished

Well, James' Double Cut Les Paul Junior was finally completed today - it was a long push to get the wiring in, the frets levelled, and a new bone nut filed, but it's all done now! With the new nut, the action at the 1st fret is nice and low, but in the end the neck also needed a shim to allow the action to be as low as possble all the way down the neck. To create a shim, I used a piece of plastic milk bottle the width as the neck heel and half the length. It was a simple matter of cutting it out with scissors and pushing the neck screws through the plastic in place.

Now she plays beautifully, and the sound from the P90 is fantastic - despite being just the stock pickup fron the factory! I'm really loving the satin finish on this baby - thanks to the Butterscotch Wudtone. For my own DC Jnr, I applied a gloss finish with some wipe on poly over the top of the Wudtone, but I'm really liking this satin finish even more.


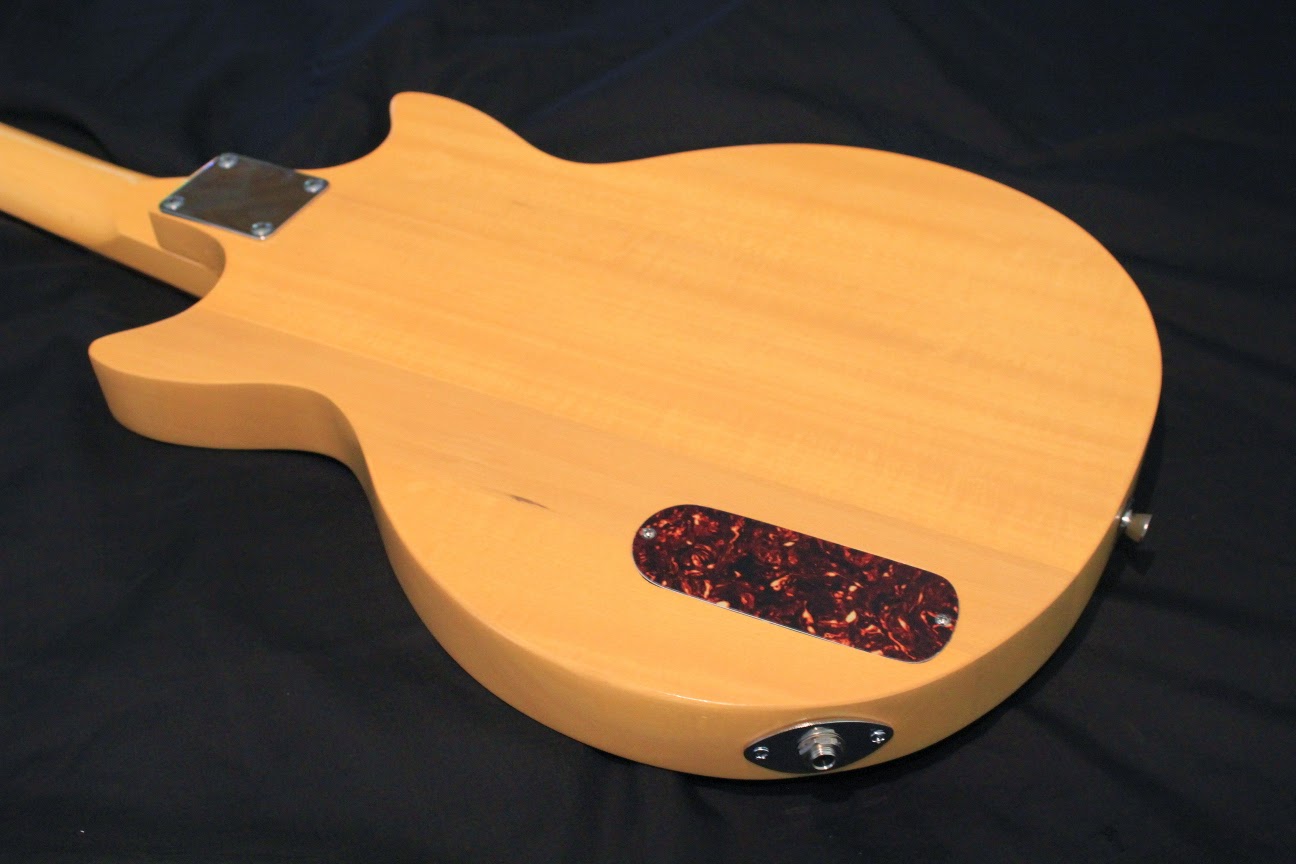


Just beautiful, if I do say so myself ;) ! I do love this model. Great look and killer sound all in a nice neat package with only a few working parts. Awesome. I'll be handing this one over to James in the next day or so. Hopefully I'll be able to get a sound demo out of him! Stay tuned for that.

Wednesday, 8 October 2014

James' Les Paul Jnr: Assembly Begins

Today I made some progress on James' Double Cut LP Junior build. With 3 weeks away from the man cave, the Butterscotch Wudtone on the neck and body has cured nicely. By default, Wudtone provides a nice 'satin' finish that can be burnished with some A4 printer paper to give it a little (only a little) shine. The overall effect is quite nice indeed. Most importantly, James is happy with the satin finish, so there's nothing more need be done. The headstock is still devoid of its decal, but that's still waiting on a delivery from Andy at City Signs and Print!

What I *was* able to achieve today consisted of some of the basic assembly tasks. I lubricated the neck screws with a little Dingotone Guitar Wax and got the neck screwed down tight. This was follwed by the installation of the bridge and a final check of the neck alignment using the two E strings. Everything looks good!


I'm not sure whether the neck will eventually need a shim or not. Currently the E strings are sitting just off the low frets. I would have prefered them to be sitting *on* the frets but we'll have to see how it goes. If a shim is required, then it won't need to be much.


With the E strings travelling up the neck, I was also able to get the P90 screwed into place, making sure that the pole pieces corresponded to the string position as much as possible. I think I got it placed pretty damn exact If I do say so myself.

Now I just need some more shielding tape and I can continue down the home straight with this one. That's gonna take a little while to arrive, so a few more days delay. I might tackle the scratchplate in the meantime. It needs to be heated and bent to correspond to the archtop body shape, and the screw holes need to be drilled before it can be finally mounted.

Sunday, 24 August 2014

James' Les Paul Jnr: Wudtone Clear Coats

With 3 coats of colour on the body and 7 on the neck, James is now happy with the depth of Butterscotch colour I've managed to achieve on both pieces. The grain on the body is still visible, and the match between the headstock and body shades is good. As expected, the rock maple has taken the Wudtone differently to the basswood body, so the colours will never be identical, but it's pretty close.

So now that the colour is finalised, the clear coats can begin. I'm using Wudtone "Clear Gloss No Aging" on the body, and Wudtone "Clear Neck Finish" one the neck.


I've currently got 3 very thin coats of clear on the body and it's starting to look good. Not glossy yet - more of a satin finish - but that's ok. The main thing is that it's bringing out the colour - Wudtone clear doesn't purport to give a showroom finish. I am planning to give the body a few coats of Minwax wipe-on Poly at the very end to give better protection, and to add the requisite shine.

With 3 coats on the neck, it's also starting to look the business. I really love the way a neck plays with this Wudtone neck finish, so hopefully this one will be no exception!

All in all the build is coming together nicely. Hopefully in another week or so the clear coats will be done and we can move on to assembly. Excitement is building!

Friday, 8 August 2014

James' Les Paul Jnr: More Butterscotch Wudtone, Custom Pickguard

James' Les Paul Jnr Double Cut is continuing very nicely indeed. Today I got the second coat of Butterscotch Wudtone on the body and the fifth coat on the neck and headstock. The photos look a little darker than they do in real life, but I do believe that the neck colour may have finally caught up to the body! There certainly isn't much in it. I reckon she's looking awesome! Not sure any more colour is needed - what do you think James?


I also got the scroll saw out and shaped a new pickguard and truss-rod cover from 3-ply tortoiseshell pickguard material. They both came out very nicely indeed.


I am a little concerned that there is little to no clearance between the fretboard and the guitar body itself. The 3-ply tortoiseshell material is a little thicker than the original single-ply pickguard that came with the kit, and this might mean that the new pickguard has to sit flush with the end of the fretboard rather than under it. I guess we'll have to suck it and see at this stage.

I think this time around, rather than add more screws to cinch the pickguard down onto the curved body, I might try heating the pickguard material up in the oven and then bending it to conform to the body shape. I've never tried this before, so maybe a little experiment is in order!

Tuesday, 5 August 2014

James' Les Paul Jnr DC: Butterscotch Wudtone

After sanding to 240 grit, pore filling with Timbermate and then finishing off with 360 grit, James' Double Cut Jnr was finally ready for it's colour coats. Similar to my own DC Jnr, James has requested a Butterscotch Wudtone body and neck colour - a great choice! The Wudtone was shipped from our friends at Pitbull Guitars in two bottles - a Butterscotch base colour, and some White for lightening it up.


On my last Butterscotch build, I mixed the two in a ratio of 2:1, so 1 third white to 2 thirds Butterscotch. Since the Butterscotch bottle was about three quarters full this time around, I mixed to a ratio of approximately 4:1 (i just topped the bottle up with White ;) ).


Once mixed, the colour was into the dish and wiped on with a cotton swab (t-shirt material). Last time I applied Butterscotch Wudtone, the colour seemed very washed out and it took many, many coats before a nice golden hue was achieved. On that occasion, I sanded both the neck and body all the way to 600 grit. This time around I followed the guidelines of Pitbull's resident luthier Dingobass and kept some tooth in the wood. This extra tooth, and a mix that's a little darker, has resulted in a much more satisfying result this time around. I tried my best to get as much of the colour into the wood as I possibly could, and this first coat is displaying a deep golden colour, with the grain highlighted nicely.


I'll consult James, but I don't think we are going to need many more colour coats the way this body is looking! The neck, on the other hand, is a different story. The guys at Pitbull warned me that the Rock Maple would not absorb Wudtone quite like the basswood, and they were right. The neck is much, much lighter, and will benefit from a few more coats to bring the colour up to par.


All in all, I'm pretty chuffed with the results so far. The grain is standing out beautifully and the colour is deep and golden. A couple more coats and we will definitely be on to the clear!!

Saturday, 2 August 2014

James' Les Paul Jnr DC: Shaping the Headstock

With the body of James' Double Cut Jnr prepared for Wudtone, it was time to concentrate on the neck. In general, the rock-maple necks that come with these guitar kits come finished quite well from the factory. They are smooth to the touch and to be honest, need little work. Still, it's customary to give them a going over with the sandpaper anyway, just to make sure the finish will take, and so I initially sanded the neck and headstock with 240 grit.

Before finishing the sanding with 360 grit, the headstock needed shaping. James indicated that a traditional Gibson headstock shape was desirable, and so it was to the interweb I went. Gibson headstock templates are a little thin on the ground compared to Fender, but I did manage to find my good old favourite - the Les Paul headstock template - here:


The template doesn't quite fit the Pitbull blank perfectly - neither in width or tuner hole positions - but with a little fudging it's close enough to provide an indication of position and shape. Using a centre line, I lined the top profile up with the sides of the headstock width-wise and ignored all other aspects of the template.


I then traced the template profile with my clutch pencil and roughed it out with my scroll saw.


Taking the roughed out shape, I sanded the curves right down to the pencil line using my smallest diameter Josco Brumby Slap Wheel.


The tight curves at the centre of the shape always seem to pose a problem for me. I got these close with the scroll saw, but still needed to use my half-round bastard file get them closer to acceptable. In the end they came out pretty well. This is about the 5th time I've had to cut this headstock shape, and I'm finally starting to get more comfortable with the steps required.

James' Les Paul Jnr DC: Pore Filling

Jame's Les Paul Jnr Double Cut is coming along very nicely. In preparation for the Wudtone colour coats, I have now sanded the body with 180 grit and 240 grit on the front and back. Since the end-grain typically takes up more colour, I have sanded it a little more - down to 360 grit. At this stage it was time to pore fill, to even up the surface (this will pay dividends when we are looking for a glossy finish) and to pop the grain in this basswood body.

As usual, I used a slurry of Timbermate - a great Australian product - to fill the pores. This time around I used a colour called "Blackwood" to fill the basswood.


To my mind it looks much much better than the "Maple" I was previously using. The Maple tended to look more pink than anything else, while Blackwood is adding a nice caramel hue to the wood.

The Timbermate slurry was brushed onto the body, both with the grain and against it and then left to dry. The idea is to get the little particles embedded down in the grain as tightly as possible.


The Timbermate was left overnight to dry completely, and then sanded off with 360 grit sandpaper. Timbermate sands really easily, although it does get a little dusty. The effect left behind in the basswood was really satisfying - the grain has popped beautifully, with the subtle flame that you sometimes see in basswood coming to the fore. With a little metholated spirits wiped over the body to remove the remainder of the sanding dust, the grain looks really spectacular!


The caramel hues of the Blackwood Timbermate are already adding a butterscotch colour to the body, and should compliment the Wudtone very nicely. I can't wait to start getting the colour coats on!

Monday, 28 July 2014

James' Les Paul Jnr DC: Unboxing & Mock Up

I received a new guitar kit on my doorstep this morning - a new Les Paul Jnr Double Cut from Pitbull Guitars. This is a build for my friend James who has requested a spanking new Jnr in butterscotch and tortoiseshell. No worries James! I gotta say, I love this particular model of kit. It's simple and elegant in its design, is straightforward to assemble and finish, and requires minimal wiring. It's just a joy to build, and the resulting guitar is just so nice to play!

The kit came well boxed, with a very generous compliment of butterscotch Wudtone nestled inside. James has requested that both the body, neck and headstock be finished in the butterscotch, so thankfully Adam and the boys at Pitbull have furnished me with a full bottle - enough I hope to finish the job! The basswood body looks good with no obvious machining marks or dents. There's some nice figure in the basswood, especially on the front of the guitar. Unfortunately, there are three obvious glue spots on the back of the body, and these will need to be sanded out before the Wudtone goes on.


The neck is 22 frets with a fretboard made from a beautiful piece of rosewood. There's a very nice grain pattern along its length that will look amazing when conditioned with a little Dr Ducks Axe Wax! The back of the neck, like the body, is free from blemishes and dents; and will come up beautifully with the Wudtone applied.


With the body and neck out of the box, the first task before sanding can begin in earnest is to get the guitar assembled to make sure everything is where it should be and that the strings can be aligned correctly up the neck. The neck has quite a bit of play in the neck pocket, so some care was required to make sure the correct lateral angle was achieved to allow the two E strings to sit equidistant from their respective edge of the fretboard.


This achieved, the neck was clamped and the neck screw holes drilled. A transfer punch allowed the exact position of the neck holes to be transferred onto the back of the neck heel. A hand drill was then used to drill into the neck and the neck was screwed to the body (using a little linseed oil for lubrication) to check that everything was OK.


At the same time, I checked the neck for backwards angle to see whether a shim will be required at assembly time. All indications are that the neck and body has been machined correctly - the E strings travel from the wrap around bridge down the neck and at the bridge's lowest adjustment height sit flat in the first few frets. This will allow a good action to be achieved when this beast is finally strung up. I also checked the location of the single P90 pickup and the pole pieces seem to line up reasonably well with the strings. The P90 pole pieces are a little narrower in total than the width of the bridge, but the pickups route allows them to be centred under the strings.

Now, on with the sanding! Best results are achieved with Wudtone when sanding up to a maximum grit size of 240. Therefore, sanding at 180, 220 and 240 grits will be the go here. Stay tuned!

Monday, 10 February 2014

Les Paul Jnr Double Cut: Sound Demo

OK, so for those of you interested in how this little rocker sounds, I have done a quick sound demo. Please excuse the crap playing and the snare in the background. Unfortunately I forgot to turn the snare off before recording. The guitar is being played through a Fender Reverb amplifier with no additional pedals or effects other than those provided by the amp itself.


Remember, what you are hearing is the stock pickup straight from the Pitbull kit. I have added a bone nut, but apart from that the sustain and the tone comes from all stock parts. The majority of the demo is with the tone circuit bypassed completely so you are hearing the P90 in all it's glory. Although I added an orange-drop cap, most of the time it isn't even in the mix.

I gotta say, I love the way this baby sounds, and it really is a dream to play! That stock P90 really is a surprise. I really didn't expect the quality (and quantity!) of sound that this thing pumps out!

Friday, 10 January 2014

Les Paul Jnr Double Cut: It's Finished!

Well, the Les Paul Jnr Double Cut was finally finished today - Woohoo!! I am very happy with how this one came out. In terms of the wiring mods discussed previously in this blog, in the end I used only a single push-pull pot to bypass the tone circuit. The tone bypass is the default - you have to pull the tone pot up (out) to enable the tone. In the down position you get the full dynamic range of the P90 without any modifications.


Apart from the custom scratchplate & truss-rod cover, only a small number of further changes were made above and beyond the stock Pitbull kit. I added an Orange-drop tone cap to the aforementioned push-pull tone pot for the tone circuit, and added a switchcraft output jack with an oval base plate. Lastly, a pair of black speed knobs finished off the look.


I couldn't be happier with how she has turned out. Even though the tuners, bridge and P90 are all stock standard from the Pitbull kit, she plays very nicely indeed with plenty of grunt and oodles of sustain. I would still like to get a P90 from GFS for this bad boy when funds become available, but what's there now sounds amazingly good anyway (go figure!). With a bone nut and the action dialed in, she's low to the deck and silky smooth! Man, I can't put this baby down - especially with the distortion cranked way up! Heaven..

Wednesday, 1 January 2014

Les Paul Jnr Double Cut: Wiring for a Single Pickup

Looking at the wiring for the Les Paul Jnr, I came across this interesting schematic from the Guitar Wiring Blog which provides for multiple tone options from a single, single-coil source. The circuit uses two on-on switches to provide both a tone bypass function and the choice of 2 different capacitance values when the tone circuit is engaged.

Here's how it works. Firstly we start with a standard single-pickup circuit with a volume pot and tone circuit:


We then add two cutoff switches (both controlled from the same physical switch) to provide the ability to completely remove the tone circuit when required:


To this we then add a second switch that selects between 2 separate capacitor values when the tone circuit is active:


And there you have it. Cool huh? A big thanks to the Guitar Wiring Blog for this idea.

For me this is an especially great idea for the Jnr as it only has the single P90. I have two push-pull 500K pots waiting on my workbench for just such an application, and so this seems too good an opportunity to pass up! I really think this baby is going to sound great with the tone bypass engaged. Makes me wish I could afford a new P90 pickup for this baby as well (I've had my eye on the GFS Dogear P90 for a while now) but the boss has frozen all guitar upgrade funds for the time being. This said, I'm planning on wiring in a wire terminator so that I can swap out the pickup very easily in the future :).

Monday, 30 December 2013

Les Paul Jnr Double Cut: Polishing & Cavity Shielding

After a lovely christmas break, I finally got back to the Les Paul Junior today. First task was to polish the Minwax wipe-on poly finish using Colortone swirl-remover now that it's had time to fully cure. This process didn't actually add any more shine to the surface, but took away the 'plastic' feeling from the poly; making it beautful and smooth to the touch.

Once the poly had been polished, it was time to get the cavities shielded using adhesive copper foil. The pickup cavity and control cavity were completed with no issues. I also got the grounding wire from the bridge post installed, and soldered it to the control cavity.


All that is required to do now is to solder up the electronics and get the hardware installed. Should be well worth the wait!

Tuesday, 24 December 2013

Les Paul Jnr Double Cut: Fret Levelling & Redressing

Despite the fact that I should have done it during the mock-up phase (naughty!) I finally got around to levelling and redressing the frets on my Les Paul Jnr Double Cut. If you are interested in how this is done, have a look at my previous post on the subject.

Interestingly, I recently acquired a new piece of kit - a 12" radiused sanding block - and I'm keen to see how this goes as a replacement for the precision straight edge for this particular job. To this point I have always used the straight edge for fret levelling, so it will be interesting to see which works best. I have found that with the straight edge you need to really concentrate so that you keep the sanding even across the entire width of the fretboard, and that you maintain the radius of he frets. With the radiused sanding block, these problems shouldn't be an issue.


I also got myself a new Fret Re-crowning File from Stewmac. Up until now I've been using the 'Little Bone' fret file. To be honest I'm not sure which I like better. The Stewmac file is a complete semi-circular file which means that once the sides are formed correctly, the file will begin to take height off the top of the fret again, ruining your careful levelling job.


Additionally, you can't see what is happening to the fret while you file. The little bone only takes the sides off the fret, and it is much easier (IMO) to see how close you are to finishing. Maybe I'm just not used to the new file. I'll give it a few more tries to allow time for a proper evaluation.


Anyway, it's all done now including the polishing of the frets with chrome polish and some Dr Ducks Axe Wax for the fretboard. It's looking nice and I can't wait to string her up.

Friday, 20 December 2013

Les Paul Jnr Double Cut: Clear Coats Complete

Finally the clear coats are finished on the double-cut Jnr. I used Minwax Wipe-on Poly - about 4 coats - to help bring up the shine and to protect the finish a little more. To tell you the truth I just wasn't happy with the amount of clear that went on from the Wudtone bottle. Just 3 very thin coats! It didn't feel to me like it would survive the first bump.

So anyway, it's done and even without applying the Colortone polishing compound the poly has  really come up nicely.


Now to let the poly cure completely and then give it a quick buff with Colortone compounds. Should look killer when all that elbow grease has been applied.

Monday, 16 December 2013

Les Paul Jnr Double Cut: Adeline Skulls!

Well, I couldn't wait any longer. After receiving my 'Adeline Skull' decals from Andy at City Signs and Print in Port Lincoln SA, I've been itching to see what they look like on my custom tortoiseshell pickguard and truss-rod cover. Well, here they are. They look freakin awesome and I couldn't be happier with them. This isn't a tribute build per-se, but a little salute to Green Day's Billie Joe was always on the cards with an LP Jnr.


Cool huh? Can't wait to see everything assembled and hear this baby scream.