Showing posts with label Butterscotch. Show all posts

Thursday, 8 January 2015

James' Les Paul Jnr: All Finished

Well, James' Double Cut Les Paul Junior was finally completed today - it was a long push to get the wiring in, the frets levelled, and a new bone nut filed, but it's all done now! With the new nut, the action at the 1st fret is nice and low, but in the end the neck also needed a shim to allow the action to be as low as possble all the way down the neck. To create a shim, I used a piece of plastic milk bottle the width as the neck heel and half the length. It was a simple matter of cutting it out with scissors and pushing the neck screws through the plastic in place.

Now she plays beautifully, and the sound from the P90 is fantastic - despite being just the stock pickup fron the factory! I'm really loving the satin finish on this baby - thanks to the Butterscotch Wudtone. For my own DC Jnr, I applied a gloss finish with some wipe on poly over the top of the Wudtone, but I'm really liking this satin finish even more.


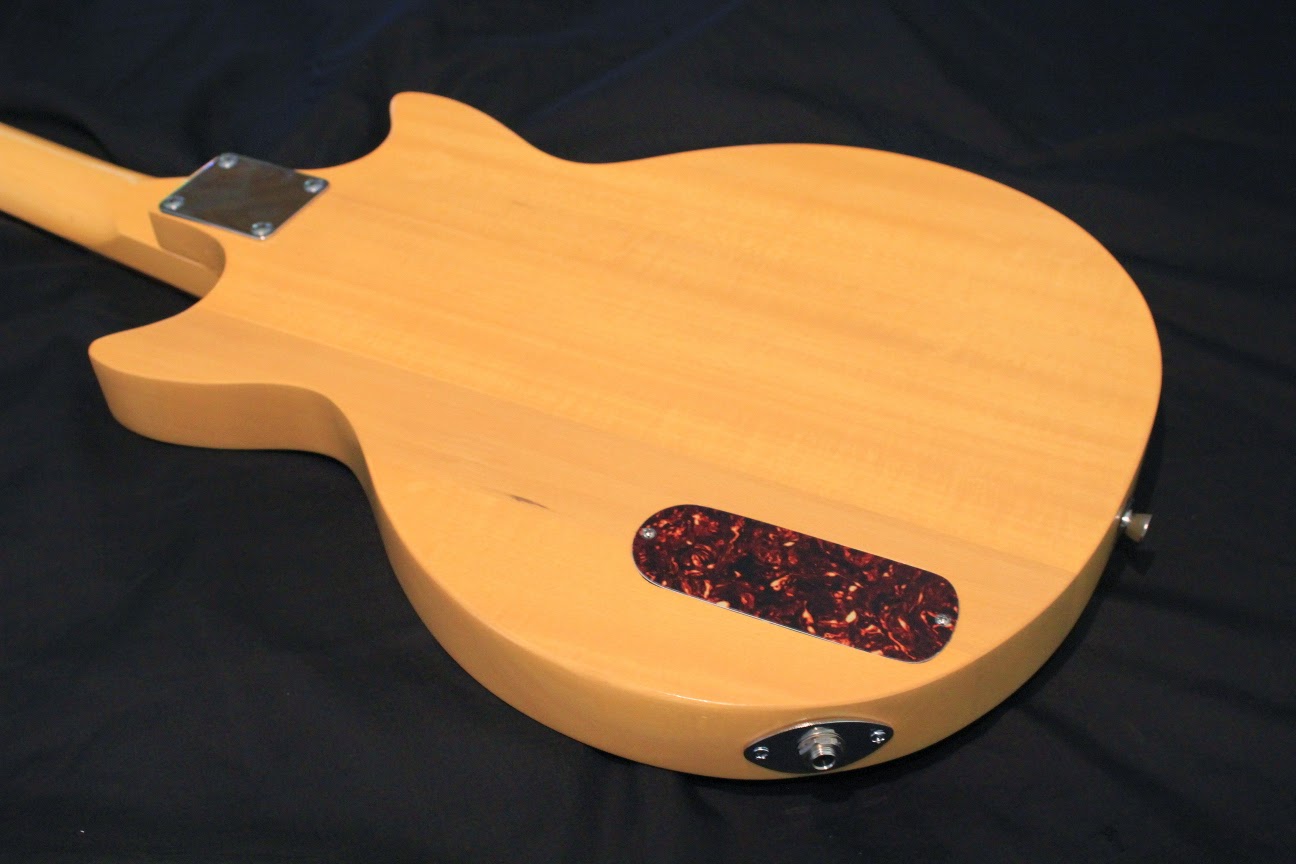


Just beautiful, if I do say so myself ;) ! I do love this model. Great look and killer sound all in a nice neat package with only a few working parts. Awesome. I'll be handing this one over to James in the next day or so. Hopefully I'll be able to get a sound demo out of him! Stay tuned for that.

Wednesday, 8 October 2014

James' Les Paul Jnr: Assembly Begins

Today I made some progress on James' Double Cut LP Junior build. With 3 weeks away from the man cave, the Butterscotch Wudtone on the neck and body has cured nicely. By default, Wudtone provides a nice 'satin' finish that can be burnished with some A4 printer paper to give it a little (only a little) shine. The overall effect is quite nice indeed. Most importantly, James is happy with the satin finish, so there's nothing more need be done. The headstock is still devoid of its decal, but that's still waiting on a delivery from Andy at City Signs and Print!

What I *was* able to achieve today consisted of some of the basic assembly tasks. I lubricated the neck screws with a little Dingotone Guitar Wax and got the neck screwed down tight. This was follwed by the installation of the bridge and a final check of the neck alignment using the two E strings. Everything looks good!


I'm not sure whether the neck will eventually need a shim or not. Currently the E strings are sitting just off the low frets. I would have prefered them to be sitting *on* the frets but we'll have to see how it goes. If a shim is required, then it won't need to be much.


With the E strings travelling up the neck, I was also able to get the P90 screwed into place, making sure that the pole pieces corresponded to the string position as much as possible. I think I got it placed pretty damn exact If I do say so myself.

Now I just need some more shielding tape and I can continue down the home straight with this one. That's gonna take a little while to arrive, so a few more days delay. I might tackle the scratchplate in the meantime. It needs to be heated and bent to correspond to the archtop body shape, and the screw holes need to be drilled before it can be finally mounted.

Friday, 8 August 2014

James' Les Paul Jnr: More Butterscotch Wudtone, Custom Pickguard

James' Les Paul Jnr Double Cut is continuing very nicely indeed. Today I got the second coat of Butterscotch Wudtone on the body and the fifth coat on the neck and headstock. The photos look a little darker than they do in real life, but I do believe that the neck colour may have finally caught up to the body! There certainly isn't much in it. I reckon she's looking awesome! Not sure any more colour is needed - what do you think James?


I also got the scroll saw out and shaped a new pickguard and truss-rod cover from 3-ply tortoiseshell pickguard material. They both came out very nicely indeed.


I am a little concerned that there is little to no clearance between the fretboard and the guitar body itself. The 3-ply tortoiseshell material is a little thicker than the original single-ply pickguard that came with the kit, and this might mean that the new pickguard has to sit flush with the end of the fretboard rather than under it. I guess we'll have to suck it and see at this stage.

I think this time around, rather than add more screws to cinch the pickguard down onto the curved body, I might try heating the pickguard material up in the oven and then bending it to conform to the body shape. I've never tried this before, so maybe a little experiment is in order!

Tuesday, 5 August 2014

James' Les Paul Jnr DC: Butterscotch Wudtone

After sanding to 240 grit, pore filling with Timbermate and then finishing off with 360 grit, James' Double Cut Jnr was finally ready for it's colour coats. Similar to my own DC Jnr, James has requested a Butterscotch Wudtone body and neck colour - a great choice! The Wudtone was shipped from our friends at Pitbull Guitars in two bottles - a Butterscotch base colour, and some White for lightening it up.


On my last Butterscotch build, I mixed the two in a ratio of 2:1, so 1 third white to 2 thirds Butterscotch. Since the Butterscotch bottle was about three quarters full this time around, I mixed to a ratio of approximately 4:1 (i just topped the bottle up with White ;) ).


Once mixed, the colour was into the dish and wiped on with a cotton swab (t-shirt material). Last time I applied Butterscotch Wudtone, the colour seemed very washed out and it took many, many coats before a nice golden hue was achieved. On that occasion, I sanded both the neck and body all the way to 600 grit. This time around I followed the guidelines of Pitbull's resident luthier Dingobass and kept some tooth in the wood. This extra tooth, and a mix that's a little darker, has resulted in a much more satisfying result this time around. I tried my best to get as much of the colour into the wood as I possibly could, and this first coat is displaying a deep golden colour, with the grain highlighted nicely.


I'll consult James, but I don't think we are going to need many more colour coats the way this body is looking! The neck, on the other hand, is a different story. The guys at Pitbull warned me that the Rock Maple would not absorb Wudtone quite like the basswood, and they were right. The neck is much, much lighter, and will benefit from a few more coats to bring the colour up to par.


All in all, I'm pretty chuffed with the results so far. The grain is standing out beautifully and the colour is deep and golden. A couple more coats and we will definitely be on to the clear!!

Friday, 10 January 2014

Les Paul Jnr Double Cut: It's Finished!

Well, the Les Paul Jnr Double Cut was finally finished today - Woohoo!! I am very happy with how this one came out. In terms of the wiring mods discussed previously in this blog, in the end I used only a single push-pull pot to bypass the tone circuit. The tone bypass is the default - you have to pull the tone pot up (out) to enable the tone. In the down position you get the full dynamic range of the P90 without any modifications.


Apart from the custom scratchplate & truss-rod cover, only a small number of further changes were made above and beyond the stock Pitbull kit. I added an Orange-drop tone cap to the aforementioned push-pull tone pot for the tone circuit, and added a switchcraft output jack with an oval base plate. Lastly, a pair of black speed knobs finished off the look.


I couldn't be happier with how she has turned out. Even though the tuners, bridge and P90 are all stock standard from the Pitbull kit, she plays very nicely indeed with plenty of grunt and oodles of sustain. I would still like to get a P90 from GFS for this bad boy when funds become available, but what's there now sounds amazingly good anyway (go figure!). With a bone nut and the action dialed in, she's low to the deck and silky smooth! Man, I can't put this baby down - especially with the distortion cranked way up! Heaven..

Monday, 16 December 2013

Les Paul Jnr Double Cut: Wudtone is On!

So the last coats of Wudtone colour and clear have been applied to the Les Paul Jnr. That makes 8 coats of colour and 3 coats of clear in total. I would have liked to get a  few more clear coats on there, but the bottle ran out. There could have been a little more in the bottle for mind..


Anyway, the colour has deepened well and I'm very happy with it. There's a pretty good solid colour, with just a hint of grain showing through. Should look killer with the custom Tortoiseshell Pickguard I've made. I've allowed the Wudtone to cure for a week and I've started polishing it. Currently I've rubbed my heart out with Colortone medium compound and I also plan to apply fine and swirl remover grades before I'm finished. Gotta remember not to rub too hard on those edges and start taking colour off..

Once the Wudtone polishing is done, I'll decide whether the gloss is enough to call the finish complete and go on to the assembly. Wudtone is not made to duplicate the lustrous shines achieved with Nitro or Poly, so I'll have to see. On Siena's Stratocaster I ended up with a few coats of Minwax Wipe-on Poly, but that was also for protection in addition to the shine factor. We'll see how I feel. I have a new spray gun and am planning to give the Les Paul Florentine a few coats of Vinyl lacquer. Possibly I could bring the schedule forward to include the Jnr?

Wednesday, 27 November 2013

Les Paul Jnr Double Cut: Off With His Head!

With no question that the Vintage Amber headstock colour had to go, I decided to scrub it back to bare wood (just the face) and start applying Butterscotch Wudtone instead. With the decision made, all that was left to do was sand with 180 grit until all the colour was removed, then finish off with 240, 360 (plus grain raising) and finally 400 grits.


The Wudtone on the sides of the headstock remained unaffected, and didn't even twitch as the colour came off the top edges. This was a great relief I can tell you. I also managed to sand flat so that none of the colour was removed from the sides of the headstock at all.


The first coat of Wudtone went on thereafter (ever so carefully) and the transformation was well on its way. I am paranoid that I'll make a mess of the Butterscotch down the sides of the headstock, but I'm being as careful as I can be. Only time will tell if this step backwards has been worth it, but I already suspect that it has been. Even without 5 coats of Butterscotch, I like the new headstock sooo much better.

Tuesday, 26 November 2013

Les Paul Jnr Double Cut: Fourth Coat of Wudtone

Well the fourth coats of Butterscotch and Vintage Amber Wudtone went on today. That will be all for the headstock and neck - it is now ready for the decal and clear coats. The colour on the body is deepening slowly every day. It really isn't as golden as I expected, but it is looking nice all the same. I reckon 2 or 3 more coats will see it finished. Here is a look at it out in the sun to try and get an accurate representation of the colour.


Pretty nice all in all. Should look great with the tortoiseshell pick-guard.

Monday, 25 November 2013

Les Paul Jnr Double Cut: Third Coat of Wudtone

Yes, you guessed it - the third coat of Wudtone went on today. The neck is pretty well finished in terms of colour. Might give it a steel wooling and see if it needs any touch ups. The body still has a few coats to go.


As always, the lighting and the flash plays havoc with the colouring of the photos. The Vintage Amber does not look as red or as golden as the photo implies, nor does the Butterscotch look as yellow. Sooner or later I'll take a photo in the sunlight to try and get a more accurate representation of actual colour. Overall, I'm pretty happy with how it is shaping up.

Sunday, 24 November 2013

Les Paul Jnr Double Cut: Second Coat of Wudtone

After a thorough steel-wooling to smooth out the surface, the second coat of Wudtone was slapped on the body and neck. All in all, the body colour seems to be filling out nicely, and the Butterscotch is slowly becoming more of a golden hue. It's hard to see any difference in the photos, but believe me it's there! In about 5 more coats it should be looking really something.


The Vintage Amber neck finish is also looking good. I took a little extra time with the steel wool to even out the first coat of Amber - especially on the edges where it seems to gather and darken. The time was well spent - it's looking quite good now! Maybe only one more coat will be required on the neck and headstock before the decal can be applied and the clear coats can go on.

Saturday, 23 November 2013

Les Paul Jnr Double Cut: First Coat of Wudtone

After preparing the surface, I was finally able to get the first coats of Wudtone onto this bad boy. I'm using Butterscotch for the body and Vintage Amber for the neck, both with high gloss clear coats. I added about a third of the bottle of White base-coat to the Butterscotch base-coat to lighten the colour a little, and to give me a little more finish to work with.

They both went on well, except for a few unfortunate patches of bog in the body that have now been highlighted rather starkly. Hmm.. I'm hoping they will disolve into the background as the colour deepens. Other than that I'm pretty happy.


Due to the Timbermate pore filling, the grain on this basswood body is standing out quite nicely. By the end of the process this will fade a little as I plan to put as many colour coats on as I possibly can, but hopefully it will still look nice.

The butterscotch colour is a little dull brown at the moment, but I'm hoping that the 'golden' colour will come to the fore as finish builds and the colour deepens. It could well be that my pore filling with Timbermate is affecting the colour. We'll have to wait and see!