Showing posts with label Rickenbacker. Show all posts

Monday, 12 June 2017

Ricky 4001 Bass - Well, She's Dead.

I got a little time today to go through some of the fallout from the fire and try to salvage the one remaining build-in-progress. Unfortunately, Looks like this one is ded as well. If there was any doubt about the caustic nature of electronics smoke/soot then here's all the evidence you need. I started sanding down the body with 360 grit to see if I could get it clean. The wood was actually coming up OK until I saw that the binding on the heel of the body had bubbled very badly as a result of soot exposure. I tried for 20 minutes to sand the bubbles out, but here's what I ended up with. The soot has eaten huge holes out. right down to the wood underneath.

Electrical soot is cautic shit. It even eats through plastic binding.
Looks like this build, along with its brothers, will be going into the rubbish. Someone with more skills could probaby replace the binding, but sadly that isn't me. Of all the builds I thought this one might survive as I'd planned a full body paint. But sadly it isn't to be.

Wednesday, 25 November 2015

Ricky 4001 Bass: Unboxing & Mock Build

Got a cool birthday present in the mail today - a spanking new RC-4 kit from Pitbull Guitars. I've been coveting one of these bad boys ever since the day Adam & co. announced they were stocking them, and I'm very happy to say that I'm finally in possession of one.

Unboxing the kit from Pitbull Guitars.
As usual, the kit itself arrived from Pitbull in great shape. The three piece body sports some nice grain, has no dents and while there's a couple of tiny glue marks on the front face, it's nothing a little Goof-off and some elbow grease won't fix. There's also a small knot up on the top horn, and while this won't be a hassle if I choose a solid colour, it may resist stain if I go that way.

Three piece basswood body has some killer grain happening.
The cavity and neck routes all look great, and the neck pocket fit is good and tight. The neck itself is nice and straight, and the grain on the rosewood fretboard looks amazing! All in all I'm very happy with the fit and finish from Pitbull.

The grain on the rosewood fretboard is also really awesome.
The mock build went together reasonably painlessly, with only the location of the bridge still giving me a few headaches. This time around the Stewmac fret position calculator was of minimal help because of the non-standard bridge type on this kit. I think in the end I'll take a guess at the position given the bridge's similarity to the standard Fender bass bridge.

Mock build without the bridge is just a neck.
Ever since I planned the Stone Roses Tribute build based on a Pitbull Guitars RC-1, what I *really* wanted to do was a bass. It was Manny's Rickenbacker 4005 that was the original inspiration for the tribute build, so yes - a 4001 Pollocked bass is something I've dreamt about for some time.

Mani's Pollocked Rickenbacker 4005.
Thing is, now that I see this kit and the amazing grain on the body, I'm very conflicted. Should I really cover all that lovely grain up with paint? I've always loved the 4001 Fireglo and blue burst models and would kill to own one, so the idea of doing a burst on this kit is very appealing to me.

A Blue-burst Rickenbacker 4001. A Beauty to Behold.
What a hard choice! It's something I will ponder in the days to come. I may well try the blue burst at first, with the Pollock as a good fallback option if I don't like the result. Hmm, choices...

Tuesday, 29 July 2014

Stone Roses Tribute: She's Finished & Couldn't be Better

Well, my oval jack-plate came in the mail yesterday, and that meant the finishing touches could be applied to the Stone Roses Tribute build and she could be released to the world. She is now finished and, in this builder's opinion, looks absolutely stunning. Dare I say a work of art? Fuck, it's the closest I'll ever come anyway.


In short, I think that this guitar looks amazing. The multicolored Pollock finish is beautiful and is contrasted nicely by the stark white scratch plate, black pickup surrounds and natural neck colour. The scratch-plate itself, with it's 4 black control knobs, retains the classic "Rickenbacker 330" look.


I even managed to source some grommets to raise the higher section of the scratch-plate off the under-plate, adding another layer of authenticity. The Rickenbacker look is also carried over into the awesomely awesome truss-rod cover with its custom decal that proudly proclaims this beastie as a genuine Stone Roses tribute, and does so in quintessential Rickenbacker style.


The choice of satin Nitrocellulose lacquer has been vindicated now that it has cured. It seems to be protecting the Pollock finish nicely with a hard outer shell, without highlighting the unevenness of the finish provided by the Pollock splatter.


Both front and back look balanced in terms of colour and design, and each compliments the other nicely. It remains to be seen whether the finish will stand up to belt buckles and other rigors of continuous playing, but that's a question for the future.


Most importantly the guitar plays very nicely. The custom bone nut has been filed so that the action at the first fret is low and comfortable, and the remaining action all the way down the neck is also nice and low. There's no fret buzz and the stock Pitbull Guitars pickups sound pretty good. They are meant to be humbuckers,  and I have no idea even what magnetic material they are made from, but these things growl like single coils. All in all quite a nice, vintage sound - at least to my ear.

All in all an amazingly satisfying build. The final guitar looks exactly as I intended it to look - even better if that's possible. I never imagined that the truss-rod cover would look even close to what is does, and credit for that sits squarely with Andy from City Signs an Print in Port Lincoln SA. The build has taken the better part of 7 months to complete, what with setbacks and so on, so I'm very glad it's over. Time to savor the results!

Friday, 25 July 2014

Stone Roses Tribute: Fret Level and Re-dressing

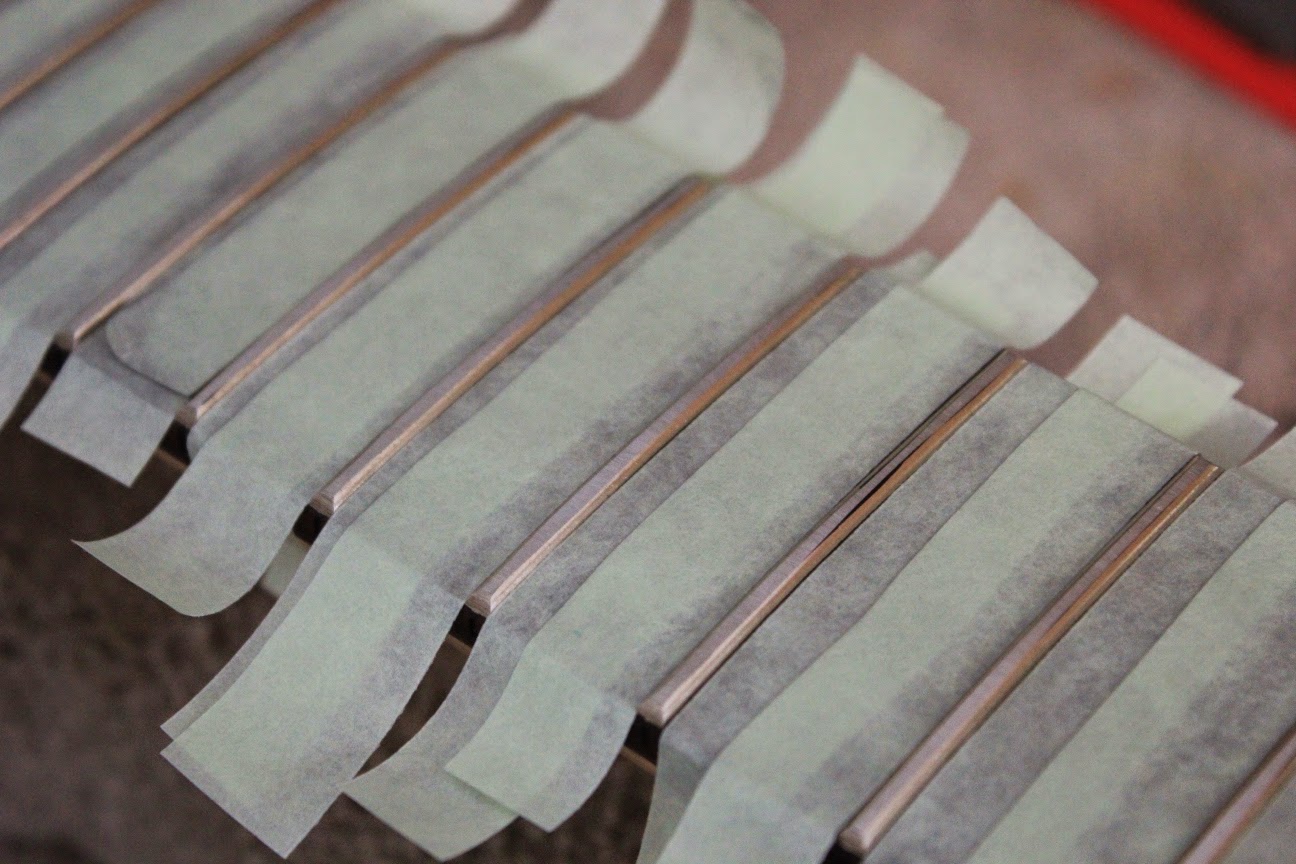
While I'm waiting for my oval jack plate and output jack to arrive in the mail, it's time I did a fret level on the Stone Roses Tribute build in readiness to string her up and let loose with some sweet tunes. After straightening the neck with the truss-rod, I protected the frets with some painters tape and marked the top of each fret with a sharpie.


I could then use my levelling beam - coated with 320 grit adhesive sandpaper - to sand all the frets until every fret had a strip of sharpie removed from its top edge. Some of the frets came right down let me tell you!


I then went on and did an additional level on the last 7 frets at an angle down towards the pickups. To do this I laid 3 pieces of tape across the 7th fret and used this as a rest for the end of my short levelling beam. Sanding this way creates a ramp down for the very last frets and allows a much lower action to be achieved.


With all the levelling done, I proceeded to use my trusty fret files to re-crown each of them. I use a combination of el-cheapo Double-edge Fret File from Stewmac and a Little Bone file from Rectify Master. Each has it's place depending on which fret you are re-crowning. The Stewmac files are useless down near the pickups if there are horns on the guitar as there are in this case. Before using the files to re-crown, I re-applied the sharpie to each fret as a guide to how much material I was taking off each side. You don't want to file so far that you change the height of the fret!

Anyway soon the frets were re-crowned and polished to a chrome lustre. Beautiful! I then gave the neck a soak of Dr Duck's Axe Wax and it looks spectacular.


Finally, the neck needed only a new bone nut to be perfect. With my trusty Stewmac nut files and my bench sander I soon made quick work of the new nut. The action at the nut is really nice now and the whole neck feels great.


With the nut superglued in place, it was time to string her up and apply my beautiful custom truss rod cover. I received the decal for the cover from Andy at City Signs and Print in SA yesterday and couldn't wait to apply it. It looks absolutely amazing and is the perfect cap to a wonderful


Now just that output jack to go and I can call this worthy tribute guitar finished! It's looking so awesome I'm lost for words. Can't wait to get her strapped on and noodle away!

Stone Roses Tribute: Wiring Her Up!

Hot on the heels of the shielding, the wiring for the Stone Roses Tribute build quickly came together today. It was relatively easy to do, given the fact that all the wiring takes place on the back of the scratchplate. First to go on were the pickups - which slid effortless into their shielded cavities and were screwed home. I was tossing up whether to replace the surrounds by white, but I'm definitely liking the black!


Next the components went into the shielded scratchplate and were tightened into place. To save troubleshooting woes later on, I made a plastic shield for each pot out of milk-bottle container. This stops the terminals of the pot from shorting out on the scratchplate shielding when the pot is tightened. A neat trick that I learned from watching Crimson Custom Guitars on YouTube.


With the pots and switch in place, I followed the standard 50's VintageWiring schematic to get the components wired together. No hassles, no stresses here. I've done it so many times now I think I could do it in my sleep!


An so with the wiring all soldered up I did a quick tap-test on the pickups to make sure the volume and tone controls worked for each pickup and that the switch varied the signal source correctly. All sweet! All I'm waiting on now is an oval jack plate and output jack from Realtone Music Parts and I'll be able to put this baby to bed.

Thursday, 24 July 2014

Stone Roses Tribute: Shielding

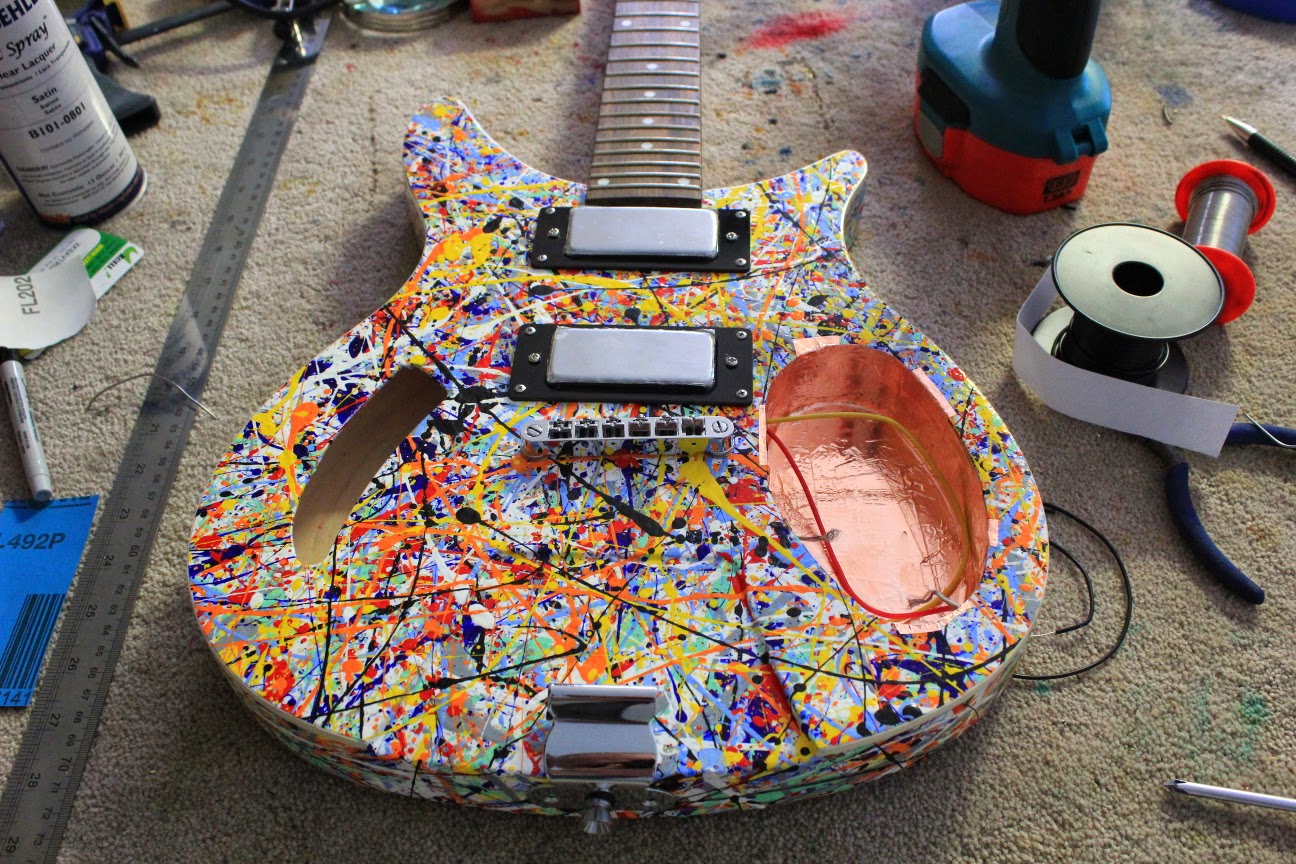
The neck clamp came off today and everything looks good. Time to get going with the electrical side of things! Before I could start on the wiring proper, the cavities and pickguard needed to be shielded and grounded to protect the guitar from noise generating EM interference.

Using double-sided conductive copper shielding tape, I coated the walls and floors of both the pickup and control cavities. Similarly I coated the inside surface of the pickguard, and overlapped some tape over the edge of the control cavity to make contact with the pickguard. The idea is to create a complete 3D Faraday cage around the important signal carrying wires.


After the copper tape was in place, each of the 3 cavities was joined to the others using wires soldered between them. I love this copper tape because it's so easy to work with - just being able to solder wires directly to it  - awesome. I used some small pieces of copper tape to keep the soldered wires out of the way, and used my multimeter to make sure that I had a complete conductive surface between all points on all cavities.


Next I took the ground wire from the bridge and soldered this wire to the wall of the control cavity. The result is that all shielding now conducts noise to ground. This was also tested with a multimeter to make sure there was an electrically conductive path from the bridge to the shielding.


Finally, a new ground wire was soldered to the control cavity wall. This wire will be used to connect to the back of one of the pots to provide a ground signal for the control circuit. With this in place, every thing is ready to chuck the pots and switch into the pickguard and commence soldering up the control wiring!

Saturday, 19 July 2014

Stone Roses Tribute: Clear Coats

Well, it's crunch time again - time for the clear coats to go on to the Stone Roses Tribute RC-1. And with the memory of this build's last bitter failure still fresh in my mind, I decided to steer well away from Polyurethane in any of its many forms. So too, since my success rate with spray on Acrylic Lacquer is still less than 100%, I'm also reticent to go down that path with the Tribute either.

So what am I left with? Well, for my very first build, the Flying V, I actually had quite good success using Behlen spray on nitro. It was easy to spray on, didn't run (once I knew what I was doing) and tacked off quite quickly. And since I don't have to wet sand the Pollock, it seems like a convenient and stress-free choice for me to take. I even had a couple of cans of the stuff lying around!


And so it went. I ended up using the better part of two cans of Nitro on the body and headstock face. Firstly, I sprayed 5 coats of Nitro gloss. This was the better part of a whole can. I then moved to 5 coats of Nitro "Jet Spray" satin to finish off.


I must say, I'm really very happy with the results. You can still see the ridges and troughs where the splatter has gone on, but I was always planning on keeping them this time around. The lacquer has really popped the colour and I'm really impressed with the final look.


Now I plan to leave the lacquer a few weeks to cure. After that I'll be able to move on to assembly. Awesomeness!

Sunday, 29 June 2014

Stone Roses Tribute: 9th Colour Layer (Second Coming)

Well, the Pollocking is coming along (again) and hopefully I'm creating something that will come close to what we had before. The 9th colour layer (black) is on and I'm ready to start the cycle again. Here's what she looks like:


I think it's looking pretty good, but only time will tell. It's a lot more nerve-wracking this time around given that I had something special the first time! By way of comparison, here's what she looked like at this stage last time:


This time, I put more white on in layer 8, which has masked off quite a bit of the more brilliant colour layers. These will come back with the next colour cycle.

Friday, 25 April 2014

Stone Rose Tribute: Poly Fails == Do-over

Ok so I made the difficult decision today to stop adding the poly to the Stone Roses Tribute and to give up on the finish. Although the paint job looked awesome when first completed, subsequent layers of both Minwax Wipe-on Poly and Cabots Polyurethane had muddied the colours to such an extent that I just didn't like looking at it any more. It was muddy and green and horrible.

Well, C'est la vie. Out comes the scraper..


I haven't had a solid colour build that hasn't involved a do-over. I had hoped that this build would be the exception, but unfortunately not. And I was sooo happy with the paint job on this one too !!! Oh well...

I will be repainting the body in exactly the same manner as before. The difference this time is that I wont be shooting for a level, or even a gloss finish. Just a few layers of satin clear over the paint and I'll leave it at that.

Tuesday, 15 April 2014

Stone Roses Tribute: Video Build Diary #6

The sixth installment of my video build diary for the RC-1 Stone Roses Tribute is now on YouTube. This installment deals with the actual Pollocking of the front, back and sides of the guitar body and headstock. This is the fun part of the build and I get some help from my son Eben.


You can't quite see it in the video, but that very first chuck of light-blue paint was a little too enthusiastic and most of it went all over me. Nice one Eb!

Sunday, 13 April 2014

Stone Roses Tribute: Psychedelic Pollocking Complete

Well today I finally finished the Pollock inspired colour coats on my Stone Roses Tribute build. With the last splatter coat in place on the sides, this boring piece of basswood has been transformed into a masterpiece of psychedelia :P. In the end the paint job came out very close to what I was shooting for and I think it looks awesome! I just can't stop going back to look at it!


All the masking went exactly to plan. There was quite a bit of paint on the top of the binding, and it took some very careful work with an exacto blade and my binding scraper jig to get it all clean. But, in the end, it's clean as a whistle and looking very professional indeed ;).


Next step is to decide on a way to get this bad boy clear coated. I am strongly leaning towards Minwax wipe-on poly for this one as it will be simple to apply and may well fill some of the valleys between splatter pretty nicely.

Wednesday, 2 April 2014

Stone Roses Tribute: Five Layers of Splatter

I'm 5 layers of colour into the pollocking of the Stone Roses Tribute. It's looking a bit average (read: shitty) at the moment. Just a bloody mess. I'm hoping things will only improve from here the more paint I get on there.


I think in general my son Eben and I are not using enough paint per layer. The guitar body is larger than my prototype and we need to be mindful of this. Will have to just keep at it and see what develops.

Postscript: 3/4/2014
With the fifth layer well and truly dry, I chucked the hardware on there to see how the build is really looking. See for yourself. I have revised my original opinion - I think this is shaping up really nicely!


The more colour I can get on this body, the better it is going to look. I haven't even got to the black lines yet - and in my opinion they help to bring structure to the overall design. Just have a gander at some of Pollock's actual work to see what I mean!

Friday, 28 March 2014

Stone Roses Tribute: Procrastination Anyone?

So, for a week or more now there's been no progress on the Stone Roses Tribute build. There's been a couple of contributing factors but the main reason, now that it comes to it, is that I'm nervous about starting. Once that paint hits the guitar there's no going back!

And so in the spirit of complete and utter procrastination, and to vet my splatter technique one last time, I built a life-size prototype of the guitar out of 6mm ply, painted it with the same primer and gloss enamel used to prep the actual guitar body, and got the kids to fling paint at it. I could have had the kids flinging paint at the actual guitar body but hey.


There was one useful outcome of the exercise. This time around I varied the amount of paint used on the guitar compared to my first prototype, with a much smaller amount of paint, and fewer paint passes used to create the effect. I had looked at my first prototype long and hard and was starting to worry that it was too busy. The result of the changes to our technique was a guitar with much more white space.

Which do you guys think looks better? The consensus from the interweb is a unanimously in favour of the initial prototype. I think I agree! And so, the procrastination has reaching it's logical termination. The only thing left to do now is to bite the bullet and start-a-splattering. Watch this space!

Monday, 17 March 2014

Stone Roses Tribute: Video Build Diary #5

The fifth instalment of my video build diary for the RC-1 Stone Roses Tribute is now on YouTube. This instalment deals with the scraping of the edge binding, and applying the Wudtone colourless neck finish. See my new binding scrapers (made from a scrap of wood and a razor blade) in action!

Wednesday, 12 March 2014

Stone Roses Tribute: White Gloss Base Coats Complete

The spraying is finally complete on the Stone Roses Tribute. In the end I sprayed 3 coats of white primer, and then 3 coats of White Gloss Acrylic over the top of that. All surfaces have come up really nice and flat, and all my masking held to the last. There is a nice edge between the front headstock face and the natural back and sides, and the cavities remained clear of colour.


The only thing left to do now before I begin the Pollocking is to scrape the binding clean. I've had trouble with this in the past, and so to help me I have constructed a couple of jigs to keep my scraping blade an even distance from the edge of the guitar. This should lead to dead straight binding reveals and hopefully no wood showing - an issue that has plagued me on previous "freehand scraping" adventures.


The jigs allow the depth of a razor blade to be varied according to the size of the scrape surface required. A wing nut allows the split wood to be loosened and tightened so that once the exact width is dialed correctly it can be locked into place and not move.

Doing the 1-ply top binding is going to be a challenge as not only is it very thin, but the thickness of the binding varies depending on how hard the end grain was sanded in that area. I think I'll err on the side of caution and set the scraper to a little less than normal 1-ply binding width.