Showing posts with label Unboxing. Show all posts

Saturday, 21 November 2015

Jazz Bass: Unboxing and Mock Build

Another day, and another new build - this time from my stack (that never seems to get any smaller ;) ). It's a Pitbull Guitars JB-1 styled on the Fender Jazz bass - a kit i picked up during the birthday sale way back in September 2014!

Finally cracking the box open, the kit looks in good shape, apart from a split at the heel of the body where two of the basswood pieces have joined. It's quite possible that this may have resulted from the kit's long stay in the stack.

Unboxing the Pitbull Guitars JB-1 kit.
A split in the heel at the body join
Far from a game changer, the split will be easily filled. What it may mean though, is that this kit is destined for a solid colour. To be honest I was leaning towards a solid colour anyway. There's little to no grain on show here and besides, I've also got an ash JBA-1 in the stack and that will be much better for stain!

As with all Fender-style kits, the mock build went together very quickly. The only hassle was finding the correct position and angle for the bridge. The problem was I couldn't use the outside tuners to hold the strings down the neck, owing to not wanting to push the tuner bushings into the headstock this early in the game. Without the tuners, I had to resort to a clamp on the headstock, and that made getting the string lengths equal (and therefore a straight bridge) very difficult. In the end I made it, as you can probably imagine since the photo below doesn't show a smouldering mess.

Mock build complete, bridge placed correctly, and ready for sanding.
In all honesty, if I was to voice a personal preference out of the various Fender solid body bass models, I would go for the P-Bass. It's the model Dee Dee Ramone used after all, and the kooky control plate on the jazz bass just always threw me for a loop. I know it's a styling choice carried over from the Jaguar, Mustang, even the Jazzmaster and it's ilk, but I like the P-Bass continuation of the scratch plate much better. Having said that, now that the mock build is together I'm pretty pleased with how it looks. I still haven't decided on colours - both body or scratchplate  (I'm even tossing up whether a black control plate would look good) - so that decision can be mulled over while I get the sanding done.

Next job though - shaping the headstock!

Friday, 20 November 2015

12 String Telecaster: Unboxing and Mock Build

Yet another new kit arrived today that I'm very excited about. It's a new kit from DIYGuitars - a flame maple 12 String Telecaster! Even though I can't really play one for shit, I must confess that I am in love with 12 string guitars. I love my Olson 335 12-String build, and this build looks to be just as cool.

Unboxing the Telecaster
The kit came well packaged from DIYGuitars, with all the wooden pieces snugly placed and protected by soft sheeting. The components also came well wrapped, with the chrome components (bridge, control cover) especially well looked after. The 3-piece basswood body of the guitar has no machining marks or obvious glue spots and the binding looks well done. The flame maple veneer is subtle, but should come alive with a little stain. 

Some nice Flame Maple Veneer popped with a little water.

There's a little grain to be seen on the back of the body, but not too much. About the only negative I could say is that one of the string-through holes is a little off centre, throwing all the others off too. It won't be as obvious once the ferrules go it, but I'll still know.

One ferrule hole is not quite straight.
The neck is straight and fits well in its cavity. The 12-string headstock is a new one for me - I'll have to come up with some kind of design for the top - not that there's much wood up there to work with. There's also a subtle grain to the fretboard that I really like. It's going to be a hard decision whether to give the neck a little amber dye or leave it natural. I'm leaning towards a yellow + amber + orange burst for this one so an amber neck may not be the best decision. Still thinking on that one.

Straight neck with all those tuner holes.
Some subtle grain on the fretboard.
Straight from the unboxing to the mock build, and this thing went together in no time. 6 of the strings go through the body so the string ferrule holes needed to be aligned with the bridge. The factory has even marked where the top corners holes of the bridge should be drilled so there's no wiggle room as far as bridge placement is concerned. Just drill and screw.

Bridge positioning - making sure the string-through holes line up.
It really is a matter for this build, of placing the bridge and then adjusting the neck to get the strings travelling correctly. But with no wiggle room in the neck pocket either, it's in the hands of the gods to be honest. Let's hope the factory did its job properly, especially with respect to scale length and intonation. The good news on that score is that the bridge actually has compensated saddles for the high and low strings of each pair. Pretty amazing for such a cheap kit. My 12-string 335 build had no such thing with it's cheap tune-o-matic bridge. I can't wait to see how this bad boy sounds!

Tuesday, 2 June 2015

Jeremy's Mahogany Les Paul: Unboxing

Today I received a new kit in the mail - ready to start a build for my friend Jeremy from GuitarGAS.com! It's a Pitbull Guitars LP-1M - a mahogany body Les Paul with a flame maple veneer and a mahogany neck.

As usual, the kit arrived from Adam and the guys Pitbull well packaged and undamaged, and the kit itself looks pretty darn good! Here's how the kit looked straight out of the box..

Unboxing - always an exciting time
The mahogany neck looks good, with some interesting swirls in the grain. The neck profile is a little shallower than my recent Pitbull LPA-1 build, so this LP will be even more comfortable to play. It's much closer to my Epiphone Les Paul standard than my other Pitbull kit.

Nice mahogany neck will look killer grain filled.
The frets and fretboard also look good, with straight binding all the way up the neck and all the frets seated correctly. I think that there could be a little glue on the fretboard down near the 18th/19th fret but it's only very slight. It's almost nothing to worry about. The grain on the rosewood fretboard looks really nice, with vertical patterns down the entire length. It should look killer with a little Dr Ducks.

Fretboard grain looks killer and frets are all nicely seated.
As for the flame maple veneer, it's unfortunately not as pronounced as other kits I have seen. When the veneer is dry you can hardly see the figure at all. However, add a little metholated spirits and the flames can be seen more distinctly. Hopefully some Colortone dye can help to bring them out!

The flame maple figure appears with a little metholated spirits to help it.
Lastly, the all important neck fit is really impressive. The neck is really tight in the pocket and I can easily lift the body with no glue needed. That alone will give this axe some great sustain. I'm very happy with it.

The neck fit is accurate and tight.
So in terms of positives, the kit looks generally very good. There are a few issues however that will need to be taken care of (or hidden under the finish). Firstly, whilst it's not really that bad, the two pieces of mahogany that make up the body don't really match too well in terms of grain. The join line is quite apparent when you flip the body over. It wont be as obvious once the body is stained but still.

The two pieces of mahogany aren't very well matched.
The other negative is the condition of the sides of the guitar body, with quite a bit of glue evident in places just under binding (the worst place for it).

Dreaded glue spots near the binding
On the heel of the guitar there are also a couple of fills that have been done to fix small cracks in the mahogany. It's nothing that will affect playability, but it's something I may not be able to hide completely. Hopefully some sanding and Colortone stain will hide these for the most part. At least we can be thankful that they aren't up on the horn or visible from a playing position.

A couple of cracks filled on the heel of the guitar.
So there you have it. A warts-and-all unboxing of my new Pitbull build. Hopefully Jeremy will be satisfied with the results. I'm planning a tobacco burst for the top (similar to my Ash Les Paul build) so it will be interesting to see how it comes out on the flame maple rather than the ash veneer. Jeremy has sent me a complete set of custom hardware to slap on this bad boy so stay tuned for the mock build over the next few days.

Wednesday, 4 March 2015

Ash Mosrite: Unboxing

Well, the postie has been and gone this morning and left a spanking new kit on my doorstep. A special order from Adam and the lads at Pitbull Guitars, it's an MKA-2 - the version of their popular MK-2 Mosrite kit with a 2-piece ash body. I ordered this bad boy the minute I opened up my original basswood MK-2 kit, and although it has taken a couple of months to arrive, it has been well worth the wait!

Unboxing time - I'm still like a kid in a candy store!
The kit comes complete with a solid ash body, a 23-fret rock maple neck (with the important zeroth fret and Mosrite headstock shape), and an authentically shaped pickguard. The stock configuration is powered by a single coil at the bridge position, and a Chinese mini-hum at the neck position. Exactly the same as the MK-2 kit.

With the box open, I could get a good look at the slabs of wood that I had purchased. The body is made up of a couple of nice pieces of ash with a subtle vertical grain pattern. To be honest, I wouldn't have said no to a little more of that beautiful ash grain - but hey, that's the luck of the draw.

The body is a two piece, subtly grained slab of ash.
The neck on the other hand has the most grain I think I have ever seen in a piece of rock maple, with many vertical grain lines to be seen all over the headstock

Now that's some grain for a rock maple neck!
The craftsmanship on both the body and the neck are spot on with no nicks, dents or even glue spots in evidence. That's great news since I am planning a tobacco burst for this sucker. The neck fit is also nice and tight which will give me maximum sustain once this baby is bolted together.

You might remember that I recently purchased a roller bridge and Xtrem tremolo system for my Thinline Cabronita build. I would dearly love to get a tremolo onto this build too - it would just look so damn good. Here is a mockup with the Xtrem and roller bridge in place. It looks awesome if I do say so myself.

Xtrem tremolo and roller bridge positioned on the Mosrite body - cool as!
Unfortunately there is a problem with that plan. The problem is that the post holes for the stop-bar have come pre-drilled. I was hoping that these holes would be such that the tremolo would hide them - all I would have to do is fill them with dowel and finish right over them. Unfortunately no such luck with the Xtrem. The holes are too far apart for the tremolo to hide them completely. On a stained finish they are going to look awful.

Another option is a Bigsby B5/V5 combination. This will attach straight into the stop bar post holes perfectly, but at around $200 AUD a set (and then some) I'm still considering my options. I may have to finish the guitar sans tremolo (using the original stop bar for now) and purchase the B5/V5 when I have the cash.

Anyway, I'll keep my eye out for other tremolo options while I complete the mock build. For this kit that really only amounts to bolting the neck in place, so in no time at all I will be sanding this beast. Fun times!

Monday, 28 July 2014

James' Les Paul Jnr DC: Unboxing & Mock Up

I received a new guitar kit on my doorstep this morning - a new Les Paul Jnr Double Cut from Pitbull Guitars. This is a build for my friend James who has requested a spanking new Jnr in butterscotch and tortoiseshell. No worries James! I gotta say, I love this particular model of kit. It's simple and elegant in its design, is straightforward to assemble and finish, and requires minimal wiring. It's just a joy to build, and the resulting guitar is just so nice to play!

The kit came well boxed, with a very generous compliment of butterscotch Wudtone nestled inside. James has requested that both the body, neck and headstock be finished in the butterscotch, so thankfully Adam and the boys at Pitbull have furnished me with a full bottle - enough I hope to finish the job! The basswood body looks good with no obvious machining marks or dents. There's some nice figure in the basswood, especially on the front of the guitar. Unfortunately, there are three obvious glue spots on the back of the body, and these will need to be sanded out before the Wudtone goes on.


The neck is 22 frets with a fretboard made from a beautiful piece of rosewood. There's a very nice grain pattern along its length that will look amazing when conditioned with a little Dr Ducks Axe Wax! The back of the neck, like the body, is free from blemishes and dents; and will come up beautifully with the Wudtone applied.


With the body and neck out of the box, the first task before sanding can begin in earnest is to get the guitar assembled to make sure everything is where it should be and that the strings can be aligned correctly up the neck. The neck has quite a bit of play in the neck pocket, so some care was required to make sure the correct lateral angle was achieved to allow the two E strings to sit equidistant from their respective edge of the fretboard.


This achieved, the neck was clamped and the neck screw holes drilled. A transfer punch allowed the exact position of the neck holes to be transferred onto the back of the neck heel. A hand drill was then used to drill into the neck and the neck was screwed to the body (using a little linseed oil for lubrication) to check that everything was OK.


At the same time, I checked the neck for backwards angle to see whether a shim will be required at assembly time. All indications are that the neck and body has been machined correctly - the E strings travel from the wrap around bridge down the neck and at the bridge's lowest adjustment height sit flat in the first few frets. This will allow a good action to be achieved when this beast is finally strung up. I also checked the location of the single P90 pickup and the pole pieces seem to line up reasonably well with the strings. The P90 pole pieces are a little narrower in total than the width of the bridge, but the pickups route allows them to be centred under the strings.

Now, on with the sanding! Best results are achieved with Wudtone when sanding up to a maximum grit size of 240. Therefore, sanding at 180, 220 and 240 grits will be the go here. Stay tuned!

Friday, 18 July 2014

Mosrite Ventures Mk II: Hey Ho Let's Go!!

Guess what I found on my doorstep this morning? The most exciting thing to grace it for quite a while. It's my newest guitar kit from Pitbull Guitars: The Mosrite Ventures Mark II as made famous by the one and only, the incomparable punk rock legend, Johnny Ramone!


I'm so excited! I've wanted one of these for years and years, and I've waited patiently for the couple of months it took for this special order kit to arrive. But, I gotta tell you, it was SO worth the wait. This thing is amazing!


Out of the box, the kit is a wonder to behold. The body shape is spot on - exactly to spec - with that under-hanging larger horn and the misshapen back section that made the Ventures Mk II famous. The headstock also sports an exact replica of the immediately recognizable Mosrite "M" shape, and even the Zero'th fret has been included. Unbelievable!!


The body is 3-piece basswood with no obvious glue or machining marks. The neck pocket is quite long compared to your normal Tele or Strat, and that should mean a good transfer of vibration from the neck to the body. The neck meanwhile is a nice piece of Rock Maple with a Rosewood fretboard. It's a 22-fret setup with a scale length of 626mm measured from the middle of the 0th fret to the middle of the 12th. The profile of the neck is super thin so it should be really nice for me and my small hands to play!

All in all I couldn't be happier with the kit. I'm so happy in fact, that as soon as I opened the box I contacted Adam from Pitbull again to order another one; this time in Ash.

I'm going to finish this kit in traditional Johnny Ramone style - white, with a Dimarzio FS-1 in the bridge position. Reportedly, Johnny never played the neck pickup at all (in the end he even had the switch taken out) so I probably wont worry too much about replacing this one.

I'm so damn excited!! Time to get sanding...

Wednesday, 11 June 2014

Burley 335: Unboxing

A spanking new kit dropped on my doorstep this morning courtesy of DIY Guitars Australia. It's the new ATH-26, a semi-hollow 335 style kit, topped with a burled, birds-eye maple veneer and powered by two P90s. I had high hopes for how this baby would look and I wasn't disappointed! The top veneer really looks amazing. There will be no dye needed for the top of this baby - some clear coats is all it will take to make her look spectacular.


The grain has been filled in a couple of places (most notably inside the burls) at the factory, and there are a few places where some quite open grain still exists in the veneer. I'll have to find some kind of clear grain filler for these. The rest of the grain on the back and sides looks great, without any visible glue spots or other blemishes. The neck also looks good - with some nice maple grain down it's  length and on the headstock.


The fretboard looks good with no machine marks or scratches. There is a small issue with the width of the neck at the heel - it is a very tight fit into the neck pocket (this is a set-neck kit). In fact it is so tight that I can't get the neck all the way down into the pocket. Looks like I'll have to sand a little off each side of the neck heel before it will reach the bottom. No sweat - at least this will guarantee a tight fit and that's perfect for a set-neck build.


Despite this small issue, all in all I'm very, very happy with the kit and I think it looks awesome - I'm really looking forward to this build!


First thing will be the mock build to make sure everything fits (including sanding the neck heel) and then I'll be able to start the finishing process. I have a real soft-spot for hollow and semi-hollow guitars, especially the 335 body shape. Whist this baby will be the 4th semi-hollow kit I have attempted, it's the very first with P90s. I really can't wait to hear their vintage growl coming from a 335. Total awesomeness!

Friday, 28 March 2014

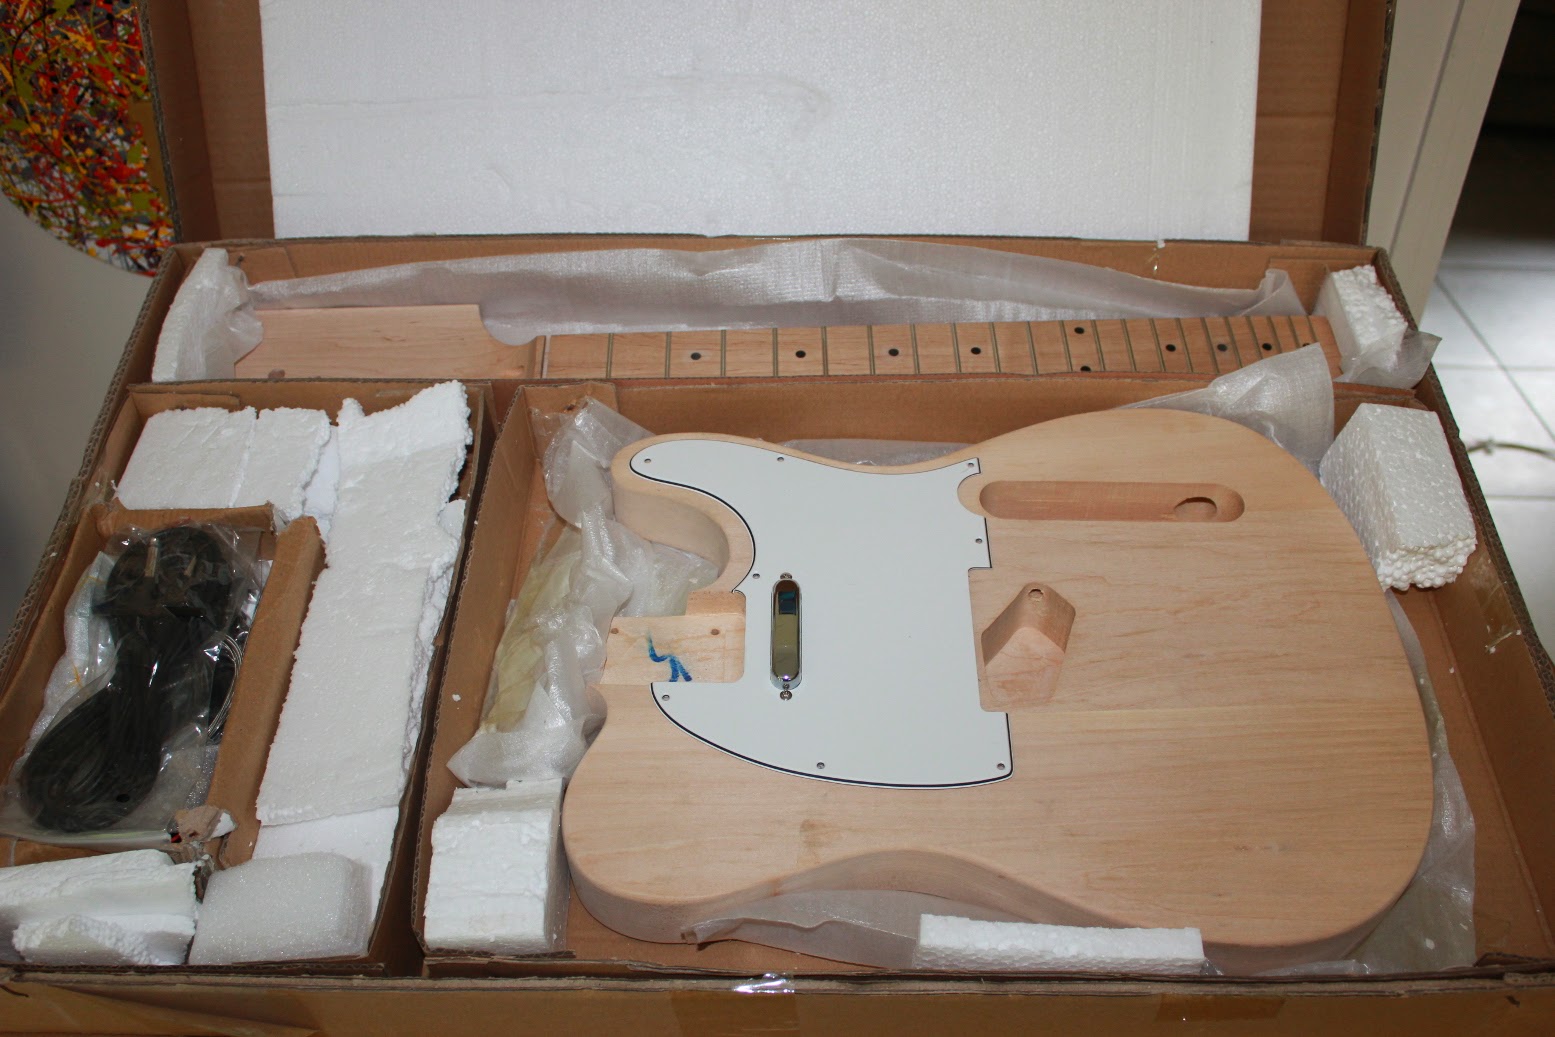
Surf Monster Telecaster: Unboxing

I got a nice surprise in the mail this morning - a Telecaster kit from a new Australian guitar parts site: Guitar Builder Store Australia. It is always so exciting to received new guitar kits in the mail! I got the kit at a bargain price that has subsequently been increased by $30, so I am counting myself very, very lucky to have it. I hope I didn't wipe out all the margin for the folks at Guitar Builder Store!


Out of the box the kit looks good. Overall, the packaging was excellent with tons of polystyrene packing that was taped into place. The hardware was placed in a separate cardboard box, with scratchable items (most importantly the pre-loaded control plate) wrapped in a soft covering to prevent scratching. Other much appreciated features - the neck screw holes came pre-drilled on both body and neck, and the neck came without it's nut glued in! I've never seen a kit with this before and it is a really cool way to ship, especially for Telecasters that have that annoying nut slot.


The body is 3 piece basswood with grain nicely matched and cleanly routed. This isn't much of an issue for me as I intend a solid colour for this one.


There's nice grain on the maple neck, and the maple fretboard, and no glue spots are apparent on the body (again not an issue for me this build). The fretboard is nicely finished (it feels very smooth) with no machining marks at all and nice even frets.


One tiny gripe with the packaging is that the pickguard came taped to the body. This meant that a gum stain from the tape was left on the body upon removal (it'll have to be sanded off) and the pickguard's protective covering was ripped off, no matter how much I tried to retain it. This is one thing that could definitely be improved in an otherwise excellent packing job.

I did notice that the bridge pickup route looked a little small compared to my other telecaster kit. A quick fit-test showed that the supplied pickup and bridge fitted snugly. However, when I tried my OEM bridge and GFS vintage '52 pickup that I purchased for my Flamed Telecaster build, they just didn't fit. The bridge could not be seated in line with the neck - the bridge pickup route will definitely have to be enlarged to fit the GFS pickup.

Apart from the issue with the bridge pickup route, I'm very happy with the kit. I'm planning on painting this one seafoam green - I've always wanted a surf telecaster like the example given below. Not bad for inspiration huh?


The closest spray paint I could find to Seafoam Green from Australian online retailers was "Studebaker Green" from OzGraff.


Looking at it now, the colour may be a little bluer than I was hoping for, but what the hell. Hopefully it will look good so long as it isn't held up against another seafoam guitar.

Solid Body PRS: Unboxing

I scored myself a bargain today. A flamed maple PRS-style solid body kit from DIYGuitars Australia. The kit was $99AUD delivered for just the neck and body. For any kit with a nice maple cap that's a super price!!


As previously stated, the kit comes with a flamed maple cap over a body of basswood. The kit is set-neck with a nice tight neck fit - there is not one mm of movement side to side, and the end of the neck fits snugly against the bottom of the neck pickup cavity with the pickup installed. The maple cap is beautiful and will looks fantastic with some ColorTone stain and Tru-Oil.


I'm thinking about a Turquoise dye job - a 50/50 mix of ColorTone blue and green, with the flame maple popped with a darker mix. I've never attempted this colour before, so should be interesting! The kit came with nothing but the wood. This means that I will have to cut a control cavity cover myself.


I've got plenty of pickguard material around here to choose from, so no sweat there. But, it will be yet another first for this build!

Lastly, I have to choose some hardware for the build; most importantly the choice of bridge. I have several bridges here to choose from - an intonated wrap around bridge, a tune-o-matic bridge with either stop or trapeze tailpiece, or even a strat-like stop bridge. I'm leaning towards the trapeze tailpiece, but as you may have noticed from my previous builds I'm a real sucker for the trapeze!


Anyway, there are plenty of options. The pickups in the photo will probably be replaced by others. I'm not a big fan of plastic pickup rings, and I may source some flashier pickups from GFS. With so many choices to make, I'm very excited about getting this kit underway. It should be a great one, so stay tuned!!