Showing posts with label Gibson Florentine. Show all posts

Tuesday, 18 March 2014

Les Paul Florentine: She's Finished!

I made the finishing touches to the Florentine build today - with the custom truss rod cover being finally screwed into place. The cover still isn't as "cream" as I would have liked (I was aiming for the same colour as the Dream 180s) but in a pinch it will do.


I think that this build turned out beautifully - with that cherry quilted maple and all gold fittings really catching the eye. The Pit Bull Guitars kit (ES-2T) is a great kit - with a quality maple cap - at a very reasonable price compared to other semi-hollow kits. The guitar is very nice to play as the semi-hollow body is very light compared to your typical mahogany Les Paul. To be honest it's a revelation! The tone that the semi-hollow body it creates is warm, even without the guitar plugged in, and in conjunction with the Dream 180s it can really scream when it wants to.


All in all I couldn't be happier with this build. I'm seriously considering purchasing another one of these to finish in a different colour (tobacco-amber burst?). There's so many different kits out there to explore, but I've particularly enjoyed this one every step of the way.

Anyway, let me know what you think peoples! I think it's stunning, but how about you??

Saturday, 15 March 2014

Les Paul Florentine: Sound Demo

OK, so for those of you interested in how this beat sounds with the semi-hollow body and the GFS Dream 180 pickups, I have done a quick sound demo. Please excuse the crap playing. The guitar is being played through a Fender Reverb amplifier with no additional pedals or effects other than those provided by the amp itself.


In addition to the Dream 180s, I have added a bone nut, switchcraft jack and 3-way switch, CTS pots and orange-drop caps. The entire demo is with the tone all the way up.

I gotta say, I love the way this baby sounds. Quite a large tonal range to play with, and the light body fells great in the hands. It looks so awesome, and sounds so good, I'm sorely tempted to make myself another one!

I've still got the custom truss-rod cover to go before I call this one completely finished. Just waiting on some supplies from eBay!! 

Tuesday, 4 March 2014

Les Paul Florentine: A New Toy for a Better Nut?

Today I worked on a new bone nut for the Florentine build. It was the first time I got to use a new toy - the Stewmac "Safe Slot Nut Guard". In the past I have found it hard to hold and bend a stack of feeler guages against the fretboard radius by hand while tracing lines on my nut blank. This little tool from Stewmac seemed to be the answer to this problem, holding gauges firmly against the fretboard and thereby leaving my hands free to wield my pencil with confidence.


Unfortunately, following Stewmac's own nut making guide, although I was able to draw the first line at fret height + 0.030, adding another 0.045 for the thickest E string for the next line meant a stack of feeler gauges that was now too fat to fit the tool's slots. Talk about disapointing!! With slots just a few microns bigger, this would have been a perfect tool. Bad luck Stewmac.

Wednesday, 5 February 2014

Les Paul Florentine: All Soldered Up

With new heat shrink in hand, today I soldered the pickups and switch connections to the wiring harness. Viola! There were no issues at all with the wiring harness, despite the violence metered out to it at times yesterday in my attempts to get it seated properly.


Now this baby makes some serious noise! There's a lot of wire in the cavity (if you look from the right direction you can see it) but who's worried about that? I'm not about to fool with it at this stage. I guess I *may* go back and trim the wires up at a later date, but who am I kidding?

I still have a couple of things to do before I can call this build finished. I have a full fret level and re-dress to do. Also, I need to create a bone nut for this baby. I have ordered a new tool from Stewmac - the 'Safe Slot Nut Guard' so I'll wait for that to arrive before I get started on the bone blank. I also need a truss-rod cover that is fitting for this baby. I am thinking of a hand-cut cream perloid cover, but I'll have to find the right pickguard material. Sounds like i have some ebay trolling to do!

Tuesday, 4 February 2014

Les Paul Florentine: Vintage 50s Wiring Harness

Today I finally got the wiring harness done for the Les Paul Florentine. It's all but complete, although I haven't actually tested it with the pickups and switch. I *did* test each wire as it was soldered into the harness to make sure there were no shorts, so fingers crossed it should be OK!  I used all custom parts, including 500K CTS pots, orange drop caps and a Switchcraft output jack for the harness to give those GFS Dream 180 pickups no excuse to sound anything but awesome!


As far as the circuit was concerned I used the so-called 50's vintage wiring scheme, with the addition of the independent volume mod. The circuit (without the mod) is shown below. The independent volume mod simply swaps the volume pot tabs so that the input from the pickup is on the middle (swing arm) tab and the output+tone is on the outer tab.

50s Vintage Wiring Schematic for Gibson Les Pauls, 335s and so on.
It came together pretty easily, and it's a neat job if I do say so myself. This is the first time I've used 'Shielded Push-Back Wire' from Stewmac to build a wiring harness and I've gotta say that once I got used to using it, I quickly fell in love with it. So much easier to ground the shielding than the plastic coated 'Shielded Circuit Wire' from Stewmac that I have used on my last 2 hollow-body builds. You just solder the shielding straight to the back of your pots. Brilliant!

With the harness complete, did I stop to test everything before shoving it into the body? Nah! Instead I charged ahead and attempted to man-handle the harness into the body of the guitar. I really should have stopped to test everything first, but what the hell. I'll probably pay for it tomorrow. Anyway, after 5 attempts I was about to give up. The CTS pots are much higher than the stock pots that came with the kit and they would only move inside the body cavity if they were laying down just so. My 5mm aquarium pipe wasn't helping much either.

But, on the 6th attempt, i finally got it in there! I'm not sure what damage I may have done to the wiring (some jimmying of the pots was required at certain stages) but fingers crossed everything is OK. I *really* don't want to have to pull these buggers out again!!

 
With the harness in I was finally able to set my gold knobs and screw in my oval jack plate from GFS. More than a touch of awesome I reckon!


Now all there is to do is to connect the pickups and switch to the harness and heat shrink the lot. Sounds like tomorrow might see this baby completed! Fingers very very crossed!

Sunday, 2 February 2014

Les Paul Florentine: Polishing Done, Hardware Installed

Well today was a big day for the Gibson Florentine. First the polishing was finished using the 'fine' and 'swirl remover' ColorTone compounds from Stewmac. The finish has come up nicely indeed. Not sure I'm going to be able to use my right arm for a couple of days, but hey - that's what it costs!

As soon as the polishing was complete it was on to the shielding of both pickup cavities using my old friend copper foil with conductive adhesive. The ground wire was added to the bridge post, the bridge post hammered home and the ground wire soldered to the bridge cavity wall. Additionally the neck and bridge cavities were joined eletrically with a second lengh of wire soldered at both ends to the cavity walls.


After the shielding was complete, it was time to install the three-way switch. The switch was soldered to some 4-core shielded cable from Stewmac and then placed inside the body using the tried and trusted 5mm aquarium pipe method. You can see how this works in the photos below.


Amazingly, the switch went in relatively easily - it only took three attempts!! Once the switch was in, I just had to get the rest of the hardware in to see what it looked like. I had to widen the hole from the bridge cavity to the outer body to accomodate all the wires, but everything fitted in the end.


I think it is looking pretty damn good, don't you? The gold hardware really sets off the cherry dye job. Anyway, just the wiring to go now. I'm planning on using 50's vintage wiring with the independent volume and treble bleed mods - just like I did with my 335 12 String build. Should sound great with these Dream 180 humbuckers from GFS!

Saturday, 1 February 2014

Les Paul Florentine: Polishing Tru-oil

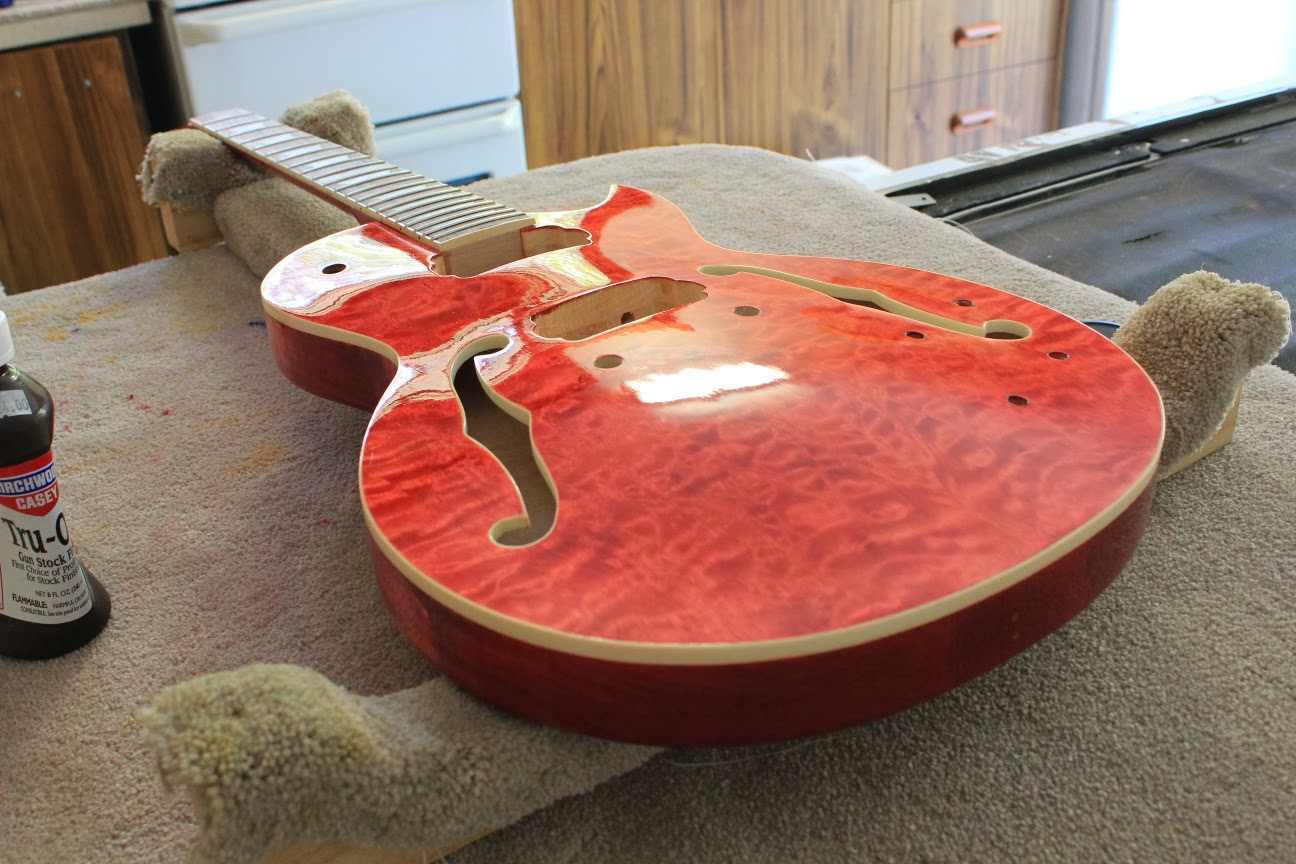
After applying my Tru-oil coats in conjunction with wet sanding down to 2000 grit, I've finally finished the clear coats and have allowed them to cure for a couple of weeks. Now it's time to give the clear some polishing to deepen the shine.

I use Colortone polishing compounds from Stewmac - 'medium', 'fine' and 'swirl remover' grades.


After applying the medium grade compound I'm already liking the depth of shine I have been able to create. Take a look and see what you think:


Just another few days and the finish on this bad boy will finally be complete (phew). It has been a long, long run for this one! Then it's just a matter of shielding and wiring. Hmm, hang on, the wiring on this puppy is going to be a challenge - just like the 335 12 string!

Wednesday, 15 January 2014

Les Paul Florentine: Thinning Tru-Oil with Shellite (Naptha)

A few weeks ago I posted a quick article about how to resurrect your Tru-Oil when it gets old and cruddy. The secret was to stick a bit of Shellite (Naptha) in it and give it a shake. Well, today I decided I'd try to thin my Tru-Oil down using Shellite rather than the usual Mineral Spirits. I wet-sanded for a couple of hours with 1500 grit (it needs more but that's another story) and then thinned some Tru-Oil about 70:30 with Shellite.


The thinned oil wiped on smooth and had soon settled into a new streak-free layer. I would even say that the thinned oil went on easier (smoother?) than when using Mineral Spirits, but I'm not 100% sure. Let me do it a bunch more times and I'll let you know the conclusion. All I know right now is that it went on nicely and the results speak for themselves! The shine is really starting to pick up on this sucker now. Just wet-sanding with 2000 grit to go.

Postscript 16/01/2014
Well, the oil dried and guess what? There were streaks in it where it hadn't settled. With hindsight this is not surprising given that Shellite (Naptha) evaporates much faster than Mineral Turpentine. Obviously the Shellite is evaporating way too fast. So in conclusion, thinning with Shellite is a very bad idea! Stick with Turps instead and save yourself the agony of having to wet-sand all over again...!

Saturday, 11 January 2014

Les Paul Florentine: Installing a Tune-o-matic Bridge

For my Les Paul Florentine project, the Pit bull ES-2T kit came with the option of a fixed or floating bridge. Since I am after a fixed tune-o-matic bridge, it was up to me to install the bugger - including finding its proper location and drilling the holes for the bridge posts. For anyone who is interested in how to do this, here are the steps I take to do a tune-o-matic bridge installation.

Step 1. Mask off the body and Extend Neck Line: To make sure your measuements and line marking doesn't impact the body of your guitar, first mask it off with painters tape. Then, using your ruler, mark lines on the tape extending the line of your neck down past the bridge pickup cavity.

 
Step 2. Measure the Scale Length & Calculate Bridge Post Position: As we all know, the bridge must be positioned correctly (witin 1-2mm) so that correct intonation can be achieved in each of the 6 strings. The correct position of the bridge posts, on both the treble and bass sides, is determined by the scale-length of the neck +- some compensation for each string that takes into account string gauge and so on.


The scale length of a guitar neck is equal to twice the distance from the fret side of the nut to the very middle of the 12th  fret. On my guitar, as on many Les Paul style kits, the distance to the 12th fret is 313mm, giving a total scale length of 626mm. Once the scale length is known, to find the position of the bridge posts it is a simple matter of consulting the Stewmac Fret Position Calculator. For a 22 fret neck with scale length 626mm and tune-o-matic bridge, Stewmac tells us that:

"From the nut to Treble Side Post should be 627.534mm, and that we should allow another 1.5mm to 3mm further on the Bass side post".


Step 3. Measure Bridge Post Position and String It Up: Once the bridge post positions are known, it is a relatively simple task to measure the distance from the nut and mark each position off on the tape (across the neck line we drew). For the bass-side post, I tend to measure into the middle of the suggested range (adding in this case 2mm to the treble side distance).


Once the posiiton is known length-wise, we need to locate the bridge posts across the body - ie. with respect to the neck and the tailpiece so that the E strings are positioned correctly up the neck. The easiest way to do this is to string the guitar up with the two E strings and pass them over the bridge (that is sitting flat on the body). If the strings are touching the frets, then washers can be used to raise the bridge off the body until the strings sit off.


The bridge is then moved side to side until the correct string placement up the neck is achieved.

Step 4. Mark the Post Holes: Once you have the position of the bridge just the way you want it, you need to mark the position of each hole ready for drilling. It is important that the correct location of the posts is maintained through this process, and the best way to ensure this is to use a set of transfer punches to mark each position.


Select a punch which is the largest possible that still fits through the hole in the bridge, and then tap lightly with a hammer to mark the center of the hole. Make sure the bridge doesn't move when you tap that first hole!

Step 5. Measure Depth and Drill Test Hole: With the locations for each post marked with the punch, you can move on to drilling the post holes. To minimise gauge-out around the edges of the holes, I recommend using a brad-point drill bit. I bought an imperial set from Stewmac and they have been my best tool investment yet. However, before you reach for the drill, you should measure the required depth of the post holes, mark this distance on the drill bit using some tape, and drill a test hole to make sure you have the correct drill bit size.


Step 6. Drill..!: Once you are satisfied that everything is correct, you can go ahead and drill your holes in the guitar top. Try to hold the drill as straight as possible in both directions (or better still use a drill press). Drill down to the indicated depth only and make sure all the crap has been cleaned out of the holes.


 If you use a brad-point drill bit as suggested, you should end up with nice clean post holes like mine!

Step 7. Tap in the Posts: After you've successfully drilled the post holes, all that remains is to test-fit the posts and the bridge. To do this you simply tap them in using some wood to even out the force and protect the bridge's finish.


I usually do this step on both posts simultaneously, with the bridge fitted to make sure the posts go in straight and still allow the bridge to sit astride them once fully seated. But that's just me - paranoid about everything!


And viola! There you have it - a tune-o-matic bridge fitted to your guitar with the correct placement, taking into account correct comensation and the like. Of course we have made use of expertise from those nice folks at Stewmac, but hey - no point re-inventing the wheel!

Wednesday, 8 January 2014

Les Paul Florentine: She's Got Neck

So, who says that I can't glue a set-neck? Not me. Well, not anymore at least. Today, after 2 days of waiting, I released the clamps holding the neck joint on the Florentine. The Titebond glue seems to have produced a very strong join, although to be honest I haven't driven my car over it.


One thing that did worry me is that upon inspection the angle of the neck seemed quite shallow compared to my Epiphone Les Paul. Worried that I might end up with action out the wazoo, I immediately fitted the trapeze tailpiece and the E strings to check the string height. Thankfully, using the bridge but without the bridge posts fitted, the E strings are just touching the neck at the highest fret. I'm hoping that once the bridge posts are in, this will leave just enough wiggle room to allow a nice action to be achieved. That's the big trouble with these set-neck builds - once it's in, it's in! Not being able to shim the neck to fix the action brings me out in a cold sweat..

Anyway, apart from the neck angle (which is, well, fine actually) everything else looks good. With correct bridge post placement, the two E strings can be aligned so that they sit over the outermost pickup poles and travel nicely up the neck to the nut. Yippee!! The next job is to drill the bridge post holes (carefully, carefully!!) and then finalise the finish so that the wiring can begin. She's slowly nearing completion, although her wiring promises to be a real pain in the grunions. Fun times ahead - stay tuned for that one!

Sunday, 5 January 2014

Les Paul Florentine: Gluing the Neck

Today marked another first for me. I finally glued the neck onto my Les Paul Florentine - the first set-neck that I have built. I was a bit worried about it, having never glued in a neck before, but the neck fit was reasonably tight on the kit and I didnt really expect problems. I used a liberal amount of Titebond glue on all surfaces (the cavity and the neck) and then held the neck in place with two clamps.


Titebond is reportedly much stronger than PVC for neck setting, and is still water based. I was able to wipe off excess glue with a damp rag. The nice thing about this particular set neck project is that the bridge posts havent been drilled yet. What that means for me is that I could just glue the neck into place without having to worry too much about string alignment from the bridge, over the pickups and down the neck. In a couple of days I'll remove the clamps and see how well I've done.

Once the neck is dry I can position the bridge, taking the string alignment and pickups into account, and then drill the post holes when everything is lined up nicely. That will be the next step for this bad boy!

Monday, 18 November 2013

Les Paul Florentine - Unboxing

I started a new build today, with the arrival of a Pitbull Guitars ES-2T set neck kit as an awesomely unexpected (and much appreciated!) birthday present. Un-boxing was commenced in haste, and the unassuming cardboard box divested its awesome contents.


The kit is a semi-hollow model with dual f-holes and a nice quilted maple cap. The headstock is pre-shaped and looks pretty schmick, and the rosewood fretboard has nice trapezoidal MOP inlays. The cap and the f-holes are both surrounded in neat white binding, and both the bridge and stop bar have been left undrilled just in case a trapeze tailpiece and floating bridge are desired. Hmm, that's not a bad idea at all!


 So what do I have planned for this bad boy? Well, it's an awesome looking kit and I want to make the most of it - a bit of extra-special treatment. I am thinking a wine-red Colortone dye with black grain highlighting and sexy gold hardware. I'm not too fond of the twirly-whirly tailpiece that came with the kit, so in addition to a gold upgrade I have dialed it back and ordered a new 335 style trapeze in gold. I think I will forego the floating bridge in favour of a fixed ABR-1 tuno-matic bridge just to make re-stringing easier. With the body having the solid central block (like all semi-hollow bodies) the sustain will benefit greatly from having a fixed bridge anyway.


In terms of pickups, I am coveting a pair of GFS Dream 180s in Gold and Pearl (pictured above), surrounded by gold plated brass humbucker surrounds and delivered through a 50s vintage wiring harness. Man do these pickups sound awesome - have a listen:


Should look vintage-fucking-awesome against the wine red body, especially with the gold surrounds. Some gold tuners (naturally) will top the whole thing off - I'm thinking Wilkinson EZI-lock. I mean how awesome does all that sound? I know! I can't wait to get started.

First step - fitting the set neck with a bit of Titebond, doing a fret level and re-crown and then a mock-up assembly to make sure all the hardware fits. I have to wait for my new parts to arrive, so maybe I'll slip in a little sanding as well before the mock-up. Stay tuned!