Showing posts with label 50s Vintage Wiring. Show all posts

Tuesday, 20 January 2015

Ash Les Paul: Sound Demo

Finally got a sound demo done of this beast in action. Unfortunately, it's me playing again, so no virtuoso performance ;). You'll just have to put up with it I'm afraid! The guitar is being played through a Fender Deluxe 112 amplifier with a Joyo Crunch Distortion pedal. It's feeding back to the bullshit, but hey - I like it! The song is "Mother" by Danzig - one of my favourite songs to play. Easy enough for me to get my fingers around (mostly) if you stay with the rhythm.


I'm certainly no great player, but I gotta say, I love the way this baby sounds. The Entwistle HDN pickups just scream - it's the hottest guitar I've ever owned in terms of sheer output. It was hard to sync up the original backing track with my playing so it's a little off. But hey, you get the picture. Let the flaming begin!!

Tuesday, 13 January 2015

Ash Les Paul: All Wired Up!

Well it's been a hectic couple of days, but the Ash Les Paul is almost ready to rock. Once the neck glue was dry (I gave it 24 hours), I set about shielding the cavities and wiring the electronics on a cardboard template. The shielding was grounded (pickup cavities and control cavity) and in no time at all the pickups were installed.

The electronics were wired using the "Vintage" Les Paul wiring model. You can see a diagram of this below. The difference between Vintage and so-called Modern wiring is that the Vintage circuit connects the tone capacitor to the output of the volume pot (ie. the middle lug) rather than the input (the outside lug).
Vintage Wiring - Diagram Copyright guitar-mod.com

In simple terms this means that the low pass filter is only applied the signal that the volume pot lets through rather than being applied to the entire (raw) signal. The benefits of this approach are hotly debated in forums across the inter-web, but anecdotally it is said to give a brighter response when dialing down the volume. Whatever. I just like anything with "Vintage" in the title :) .

With the wiring done, I cut some circles of milk bottle plastic to sit under the pots (it stops the pot lugs from inadvertently shorting out) and then installed them. The shielded control covers followed shortly, and a tap test confirmed that everything was working as expected. In addition to the wiring shown in the diagram I also used push pull pots for volume, allowing me to coil tap both the neck and bridge humbuckers. When the volume knobs are pulled out, single coils it is!

With everything in and working, I strung her up for a first test of the Entwistle HDN pickups. I reckon she looks magnificent!

A guitar at last. The burst and zebra pickups look killer!
I'm really digging my burst headstock now.
With the burst and the zebra pickups, this is one mean rock beast. At least in my opinion. Something Slash might find himself holding ;). A first test of the HDNs showed that these are indeeed hot, hot pickups. Even on the clean channel they all but melted my face. For the first time ever I found myself diving for the guitar's volume control! Really a wonderful (powerful!) sound. I have only to file a new bone nut for this beasty and I'll be able to take her for a proper sound test. Stay tuned for some very badly strummed tunes on a very loud, very rock-worthy axe! Guffaw...

Friday, 25 July 2014

Stone Roses Tribute: Wiring Her Up!

Hot on the heels of the shielding, the wiring for the Stone Roses Tribute build quickly came together today. It was relatively easy to do, given the fact that all the wiring takes place on the back of the scratchplate. First to go on were the pickups - which slid effortless into their shielded cavities and were screwed home. I was tossing up whether to replace the surrounds by white, but I'm definitely liking the black!


Next the components went into the shielded scratchplate and were tightened into place. To save troubleshooting woes later on, I made a plastic shield for each pot out of milk-bottle container. This stops the terminals of the pot from shorting out on the scratchplate shielding when the pot is tightened. A neat trick that I learned from watching Crimson Custom Guitars on YouTube.


With the pots and switch in place, I followed the standard 50's VintageWiring schematic to get the components wired together. No hassles, no stresses here. I've done it so many times now I think I could do it in my sleep!


An so with the wiring all soldered up I did a quick tap-test on the pickups to make sure the volume and tone controls worked for each pickup and that the switch varied the signal source correctly. All sweet! All I'm waiting on now is an oval jack plate and output jack from Realtone Music Parts and I'll be able to put this baby to bed.

Saturday, 14 June 2014

335 Semi-hollow Bass: 50s Vintage Wiring - Tweaked!

In the process of creating my wiring harness for the 335 bass, I have re-examined how to go about laying out the wiring harness for a semi-hollow build so that it is both simple, and will survive the installation process. For my other semi-hollow builds (the 12 String 335 and the Les Paul Florentine) I used the following circuit. It's a Gibson 50s Vintage wiring scheme, with the independent volume mod added for good measure.


While this orientation is perfect for wiring those big arse oil-caps into small Les Paul control cavities, when you are talking about mounting in a semi-hollow body those capacitors wired "inline" between the volume and tone pots are devilishly hard to secure. You end up attaching wires to one or both ends of the capacitor legs, and then lashing this to another of the joining wires for stability. All in all, it's a hack at best!

Instead, there is actually no reason why the capacitors couldn't be mounted to the back of the tone pots instead. You see this orientation very often in Fender wiring schemes, and in other single volume / single tone configurations. It's actually a very convenient way of mounting the tone capacitors, especially for semi-hollows! Taking the wiring diagram above, it's a simple matter of shifting the capacitor from before the variable resistance in the tone circuit to "after" it instead. The result is electrically equivalent and much easier to secure and install.


In this configuration we need only piggyback the tone caps to the back of the tone pots. No additional wires need be soldered to the capacitor legs, and no lashing is required to secure the capacitor in place. It's so simple and elegant, why the hell didn't I think of it before??

Anyway, the sucker is wired up. With the volume pots at the top and tones at the bottom the wiring harness is surprisingly neat.

Tuesday, 4 February 2014

Les Paul Florentine: Vintage 50s Wiring Harness

Today I finally got the wiring harness done for the Les Paul Florentine. It's all but complete, although I haven't actually tested it with the pickups and switch. I *did* test each wire as it was soldered into the harness to make sure there were no shorts, so fingers crossed it should be OK!  I used all custom parts, including 500K CTS pots, orange drop caps and a Switchcraft output jack for the harness to give those GFS Dream 180 pickups no excuse to sound anything but awesome!


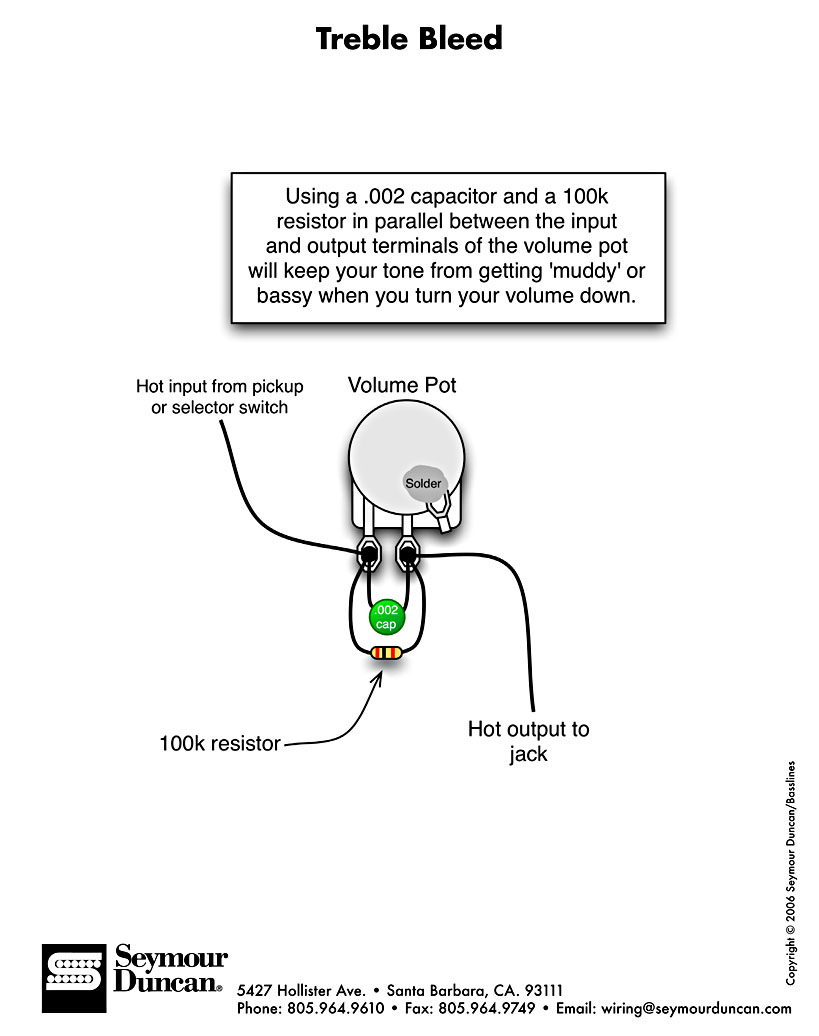
As far as the circuit was concerned I used the so-called 50's vintage wiring scheme, with the addition of the independent volume mod. The circuit (without the mod) is shown below. The independent volume mod simply swaps the volume pot tabs so that the input from the pickup is on the middle (swing arm) tab and the output+tone is on the outer tab.

50s Vintage Wiring Schematic for Gibson Les Pauls, 335s and so on.
It came together pretty easily, and it's a neat job if I do say so myself. This is the first time I've used 'Shielded Push-Back Wire' from Stewmac to build a wiring harness and I've gotta say that once I got used to using it, I quickly fell in love with it. So much easier to ground the shielding than the plastic coated 'Shielded Circuit Wire' from Stewmac that I have used on my last 2 hollow-body builds. You just solder the shielding straight to the back of your pots. Brilliant!

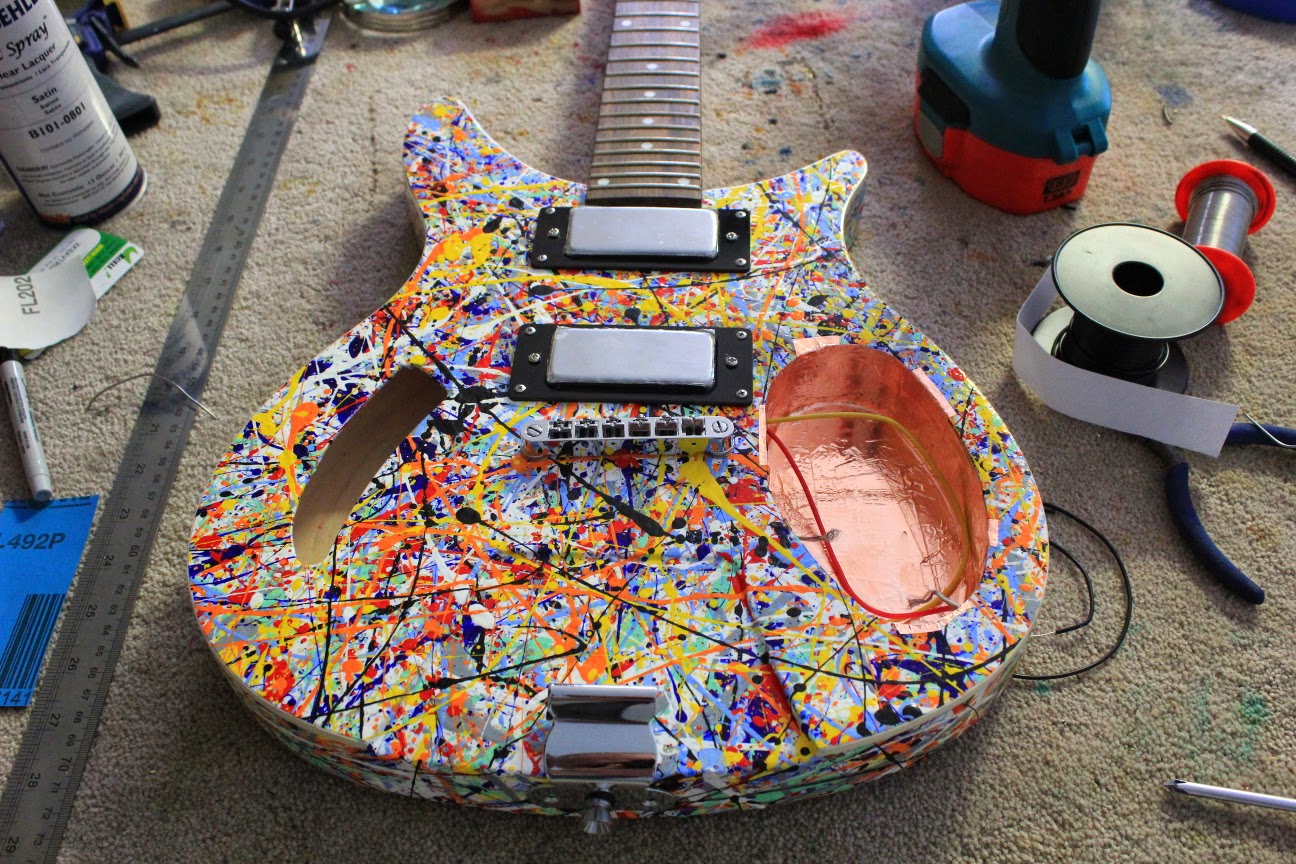
With the harness complete, did I stop to test everything before shoving it into the body? Nah! Instead I charged ahead and attempted to man-handle the harness into the body of the guitar. I really should have stopped to test everything first, but what the hell. I'll probably pay for it tomorrow. Anyway, after 5 attempts I was about to give up. The CTS pots are much higher than the stock pots that came with the kit and they would only move inside the body cavity if they were laying down just so. My 5mm aquarium pipe wasn't helping much either.

But, on the 6th attempt, i finally got it in there! I'm not sure what damage I may have done to the wiring (some jimmying of the pots was required at certain stages) but fingers crossed everything is OK. I *really* don't want to have to pull these buggers out again!!

 
With the harness in I was finally able to set my gold knobs and screw in my oval jack plate from GFS. More than a touch of awesome I reckon!


Now all there is to do is to connect the pickups and switch to the harness and heat shrink the lot. Sounds like tomorrow might see this baby completed! Fingers very very crossed!

Thursday, 8 August 2013

12 String 335 - Vintage 50s Wiring Harness

I got the wiring harness for the 335 wired up today based on the "Vintage 50s Wiring" scheme used by Gibson in the (unsurprisingly) 50s and 60s. This wiring scheme attaches the tone capacitor (and therefore tone pot) to the output of the volume pot rather than the input as is the case for so-called "Gibson Modern Wiring" that is used in all 335, Les Pauls and SGs today.


I'm hoping that this wiring scheme, in combination with my GFS Surf-90 pickups, will lend the guitar a very 50s jangly sound.

Everything went together fairly easily using 500K CTS pots and 0.022 uF orange caps from Stewmac. Because my push-pull CTS pots wont fit through the f-hole in the 335 body, my planned series/parallel and coil tap modifications had to be scrapped for this build. Hopefully in a later build I will be able to explore the plethora of wiring modification possibilities.


At present I satisfied myself with a simple modification to the 50s Vintage wiring scheme to allow the volume pots to operate independently. The problem with both 50s Vintage and Modern wiring is that when both pickups are selected, turning one one of the pickup volume pots to zero grounds out the entire signal from the 3-way switch (including any signal generated from the other pickup). A simple modification swaps the volume pot input and output lugs, placing the pickup input wire onto the pot's swing arm.  When the pot is turned to zero, only the hot wire from the pickup in question is grounded rather than the whole circuit, allowing the other pickup to continue to supply signal to the 3-way switch as normal.

A second simple modification I am considering is the addition of a "treble-bleed" circuit to each of the volume pots so that the high-end jangle is not muddied as the volume is turned down. This simple circuit involves a resistor and capacitor wired in parallel across the volume pot "hot path" to allow high signal frequencies to bypass the increasing resistance as the volume is turned down.


As the pot is turned and the resistance increases, the resulting signal, while attentuated for the majority of the frequency range, is not reduced for the higher frequencies. These higher frequencies stay in the signal and the resulting output retains the high jangly tones even as the volume is rolled off.