Showing posts with label Tru-Oil. Show all posts

Monday, 28 November 2016

Jazz Bass: Headstock Shaping and Tru-Oil for the Neck

Sorry guys, it's been a long, long time since I posted any updates on any builds to this little bloggerino. Unfortunately I've been terribly busy with work, and am finding less and less time to either build (which is utterly fucking depressing) or even to write about it. Anyway I'm hoping to address this situation in the coming weeks - with several builds close to completion, I would really like to share the results with you all.

Anyway, today's post concerns the Jazz Bass build which recently changed it's colour to Surf Green and got a few coats of acrylic clear. It's looking pretty good I dare say, and while the clear coats cure, I have finally found some time to shape the headstock and sand the neck smooth.

The standard Fender Jazz Bass headstock template.
I managed to find a bunch of Fender bass headstock templates on the TDPRI site, and hoped they would be enough to seal the deal. I decided on the stock standard jazz bass template and printed the pdf 100% scale. Problem was, the template (as usual) didn't really match the headstock blank from the factory. In the end I was forced to use the template to mark out the circular end of the headstock, and then just free-hand the curved fin along the bottom. Not really a problem - even with my shoddy drawing skills there's nothing a belt sander and drum sander can't fix right? Right. Anyway, the stars seemed to align, the jig saw did as it was told, and even the sanding disc and slap wheels didn't burn out the edges. Sweet

With the headstock shaped, I sanded the neck down to 360 grit and raised the grain a few times with water before staining. This time around I went for a weak solution of Colortone Vintage Amber (I do love those vintage tones) and did 3 passes in quick succession in an attempt to pop as much of the grain on this nice looking maple neck as I could.

Headstock shaped, Vintage Amber applied and 1st coat of Tru-Oil.
After the dye was dry, it was on with the first soak coat of Tru-Oil and the maple just drank it up. Man, I can already see that the grain on this neck is really going to pop when the oil gets in there. About another 10 coats or so to go, so patience grasshopper, patience..

Sunday, 22 November 2015

Ash Mosrite: Tobacco Burst and Tru-Oil

Finally some progress on the Ash Mosrite. I filled the deep ash grain with some Walnut Timbermate and then got to work on the creation of a subtle tobacco burst. The burst is a combination of Vintage Amber, Red Mahogany and Tobacco Brown Colortone dyes.  I'm pretty happy with it, although it could have been a little darker on the edges. I probably should have used some black as the last step, but I'm not going to go messing with it now!

With the Colortone dye applied, I got out the Tru-Oil and slapped a couple of coats on to try and pop the grain as much as possible. The ash just soaked it right up, enhancing the grain nicely, and with no noticeable addition of shine.

Successful tobacco burst. The 2 coats of Tru-Oil have helped pop the grain.
In the end, I'm going to add gloss Acrylic clear coats to this sucker. I'm hoping that the Tru-Oil will fill the pores and create a barrier between the wood and the acrylic, without stopping the acrylic clear from bonding to the timber. I did have a few pinhole problems with the acrylic clear coats on the Ash Stratocaster build, so I'm hoping that maybe this is the answer. I guess we'll have to wait and see if it works.

With the Tru-Oil dry I could finally get a feel for the final look with my P90 scratchplate installed. You can see it in all its whiteness in the photo below.

My custom white scratchplate over the burst.
Unfortunately my first impression of the white with the brown is not too positive. The white just jumps out way too much for the subtle body colour. In stark contrast, the original black scratchplate looks much better.

The original black scratchplate.
It looks like black is a winner! Looks like I'll have to go back and get a black version of the P90 scratchplate made. I might even have to swap out the cream soap bar covers with black ones, but I'll wait and see how the cream looks with the black scratchplate before I make that decision. Time to get the White Knight Gloss Acrylic cans out and get spraying!

Thursday, 8 January 2015

Ash Les Paul: Setting the Neck

Today I got back to the Ash Les Paul. I was able to level, re-crown and polish the frets for a sexy look and a super-smooth action! I've previously waited until after the neck was attached to do the frets, and on the whole my experiences have been mixed. Previously I have found it hard to re-crown frets on the bridge end of the neck for some models when the fretboard is close to the body. I decided to try leveling and re-crowning the frets before gluing this time. The frets turned out ok, but trying to hold on to the neck whilst sanding and filing was a bit of a bitch. I guess I need a couple of vices here on the work-bench!

Anyway, with the frets done, I carried on immediately and glued the neck. Fingers crossed that I did everything correctly! It all looks great - the E strings run nice and straight up the neck and are sitting almost on the top of the 22nd fret. Should make for a nice low action! However, in the back of my mind I couldn't shake a little voice telling me that I didn't use enough glue. I had all the surfaces covered, but there wasn't much squeeze out. But that's a good thing right?? Oh well, time will tell!

Titebond and a clamp does a set-neck make!
The whole shebang. She's looking the goods!
E strings sitting nice and straight up the neck and almost resting on the 22nd fret.
I'm very excited about getting this little baby completed, and she's actually starting to look like something now! Next step is to get the control cavity shielded and to solder on the ground wire. I don't think I'll shield the pickup cavities this time around as I've read comments out there on the inter-web saying that shielding here cuts the highs from the signal? Am I right in thinking this? Let me know your opinions out there!

Once the clamp comes off the neck, I'll be waxing the fretboard with Dingotone guitar wax and then starting on the electronics. Stay tuned!

Wednesday, 31 December 2014

Ash Les Paul: Neck Colour

In the last week or so I have been patiently working away at the neck and headstock of the Ash Les Paul build. Firstly I sanded it down to 400 grit and then coloured it with Colortone dyes. I attempted a burst on the headstock similar to the ash veneer, and tried to get the neck colour as close as possible to the solid ash body. In the end, the headstock burst came out *ok* (it's growing on me), whilst the neck colour is quite a bit darker than the body.

Headstock with an Amber/Red Mahogany/Tobacco burst and 5 coats of
Tru-Oil. There's some oil overrun to fix up on the right edge.
The neck has been coloured with Amber/Red Mahogany and
5 coats of Tru-Oil.

All in all I'm reasonably happy with the results. I would have been happier if the neck wasn't quite as dark as it is, but when you see it against the body it doesn't look too bad. Just goes to show you what an in-exact science this dying stuff is. In truth, I really should have dyed the neck and body at the same time to guarantee as close to the same colour as possible. With the different woods (Ash vs Rock Maple) there is always going to be somewhat of a difference in colour at the end of it all, so I'm not too precious about it. All in all, I'm pretty happy with the results when you see the two pieces together.

The bursts on the headstock and body complement each other.
The darker neck colour still works well with the lighter ash body colour.
After only 5 coats of Tru-Oil on the headstock I was still toying with the idea of spraying it black. But the burst is growing on me and I think that in the end it compliments the look of the burst Ash veneer. It's just a matter of applying a few more coats of Tru-Oil to the neck, wet sanding down to 1200 as I go, and the finished neck will be ready for gluing. I'm waiting on some new cream pickup rings and electronics upgrades from Realtone, so once they arrive I'll be able to see how this axe is really going to look assembled. I'm pretty excited about how she's gonna look, and can't wait to chug out some thumping rock rhythms. Fun times ahead!

Wednesday, 17 December 2014

Ash Les Paul: More Dying and 3 Coats of Tru-Oil

With the top burst looking pretty schmick, it was time to make a decision about a colour for the back and sides of the Ash Les Paul. With the grain already nice and dark thanks to the Walnut Timbermate, I opted for a medium shade of brown for the remainder of the body. I achieved it using an initial few coats of Vintage Amber Colortone dye, and then following this up with a few more coats of Red Mahogany (while the original dye was still wet). I've used this mix before on my 335 Semi-Hollow Bass build and I really like it - especially with the darker grain peeping through. It's warm, and it glows - without being too amber, too red or too middle of the road.


With the back dyed, it was time to move on to the Tru-Oil. After leaving the dye some hours to dry completely,  I managed to get a good soak coat of oil over the entire body before the day was done - man, this Ash body just drank the oil up! I'm always amazed just how fantastic wood looks when that first coat of Tru-Oil is on and still wet - the grain just jumps out at you. The ash grain on this top looks especially dark and wonderful now that the Tru-Oil is soaking in, almost like it's been burned. I really, really like the effect! As of this moment - now 2 days on - I have 3 coats of Tru-Oil on the top, back and sides, and the wood is finally starting to reach saturation point (it's looking a little glossy).

Third coat of Tru-Oil on the top. It's still wet in this photo.


Third coat of Tru-Oil on the back and sides. It's still wet in this photo.
Shows how nice the Ash grain is looking with the Timbermate filling combined
with Tru-Oil. Timbermate hasn't filled the grain smooth but I like it much better
this way. You can still see the grain texture.

So now it's a matter of applying coat after thin coat of Tru-Oil until the body is shiny. While that's happening, I'll be getting on to the headstock shaping and prepping the neck for dying and oiling as well. She's coming along nicely!

Tuesday, 14 October 2014

Black Ash Telecaster: Red Tortoiseshell or Red Pearloid?

Well, it's been a few days without progress on any and all guitars. Bloody work is getting in the way of my building obsession. If I didn't need it to pay for guitar kits, maybe I'd chuck the whole IT thing in. Oh well - suck it up dude!

On the plus side, my alternate pickguard arrived from Pitbull today and I now have a choice to make. Tortoiseshell or Pearloid? They both look very similar, although the pearloid is a little darker in real life than it looks in the photo.


Well, what do you guys think? Ok, so there isn't much difference, but for my money it's the tortoiseshell (on the left).

Now if only I could find some time to finish off this body with a cut and polish, I could get the cavities shielded and this baby assembled. Soon. Hopefully.

Postscript 17/10/2014: Well it looks like overwhelming support for the tortoiseshell! I have gone ahead and ordered soume bourne 250K pots, an orange-drop cap and some Tonerider Hot Classics (pickups) for this baby. I can't wait to get her all wired up and to hear that rock twang!

Friday, 10 October 2014

Black Ash Telecaster: Headstock Decal and Pickguard

A little more progress this week on the Black Ash Tele. The neck is now finished - I've applied 8 thin coats of Tru-Oil on there, with a little wet-sanding (800 and 1500 grits) between the last couple of coats. Man, it's feeling nice and smooth and fast! I've also applied my headstock decal and it's looking pretty cool. I really like the black text on the amber finish.


I received a red tortoiseshell pickguard in the mail yesterday and did a quick mockup to see what it looks like. It needs some work around the neck to fit it properly, but that's no sweat. I'm waiting on a red pearloid pickgurd as an alternate to the tortoiseshell, and once that arrives I'll have to choose between the two of them. Once the choice is made I'll get out the file and improve the fit around the neck.

As it is, I think the red tortoiseshell is looking pretty damn nice! It's going to be tough to beat. I love the colour balance between the black, the red and the amber neck.


I'm getting pretty excited now - I can't wait to get this baby finished and to plug her in! It's shaping up to be either a Mental Wilko Johnston model or an Introverted Shoegazer - whatever floats your boat baby!

Tuesday, 7 October 2014

Black Ash Telecaster: Headstock Shaping & Neck Dye

Today I put the body to one side for a while, and started finishing the neck of the Black Ash Telecaster. I decided to go for a traditional Fender "yellow neck" look to contrast with the black body. Using my usual 'modern Telecaster' headstock pattern from the headstock templates pdf, I quickly got the headstock shaped and the whole neck sanded with 180, 240, 360 and 400 grit paper. At 400 grit, I raised the grain a couple of times and knocked it back down again with a gentle wipe of 400.


For the colour coats I used a weak solution of Colortone Vintage Amber, and applied it to the headstock, neck and fretboard. This is the first time I have dyed a fretboard, so it's kind of an experiment. I love the look, but have never been able to work out how to seal it effectively and still provide a good playing surface.


For clear coats I used two products. On the headstock and neck I applied my tried and trusted standby - Tru-Oil from Birchwood-Casey. On the fretboard I didn't want to use Tru-Oil (I've read some horror stories of fretboard wear and tear with Tru-Oil applied). Instead, I used some Dingotone Guitar Wax - hopefully this will be effective in sealing in the dye and providing a nice playing surface.


I have always loved the way Tru-Oil necks feel to play. The Dingotone Wax already feels really nice on the fretboard, so the combination of the two should result in a beautifully smooth playing axe. Expectation is now very high! A few more coats of Tru-Oil on the neck and this baby will be ready to assemble...

Saturday, 23 August 2014

Burley 335: Tru-Oil on the Neck

Well the clamps have come off the Burled Birdseye Maple 335 and the set neck looks good. It's a strong join and should serve nicely. With the glue dry, the application of Tru-Oil can now resume. I've gotten 5 coats on the back of the body now and it's starting to look great.


While there's no "figure" to speak of on the back or the sides, the maple grain has been highlighted nicely by the Tru-Oil. I must say I'm liking the natural colour for a change.

So too with the neck. I've now managed to get 2 coats of Tru-Oil on the neck and headstock. This is the first time I've done a rock maple neck completely natural - without dye of any sort - and I'm amazed at how dark the wood is becoming!


The Tru-Oil is picking up the grain very nicely, and I think the darker overall colour will contrast nicely with the natural body. There's still a shitload of coats to go, so I do expect it to "Amber up" quite a bit before I'm finished. It can only look better and better!

Monday, 4 August 2014

Burley 335: 1st Coat of Tru-Oil

Well, after finishing the sanding of the Burled Birdseye Maple 335, I debated long and hard about what colour to dye it. I was thinking of a dark walnut colour, and then an amber and red mahogany burst like my 335 Bass,  but just couldn't bring myself to pull the trigger on the dye job. I slept on it last night, and this morning decided to leave the top natural as I had originally intended.


With this decision made, the first "soak" coat of Tru-Oil went straight on the veneer. All I can say is wow! The Tru-Oil revealed details in the grain that I never knew existed, and the amount of chatoyance - even with a single coat - is amazing. I'm very pleased with how this is shaping up!

I still haven't decided what to do with the back and sides. My current thinking is to go natural just like the veneer. But hey, all that might change come tomorrow morning ;). A dark walnut colour could also contrast very nicely with the natural top!

Tuesday, 22 July 2014

Mosrite Ventures Mk II: Pore Filled Body, Oiled Neck


Today saw the 5th layer of Tru-Oil go on the neck of the Johnny Ramone Mosrite. Despite the neck ending up a tad more "yellow" than Johnny's original, I'm really digging how the neck is shaping up. The colour is bright and the Tru-Oil has produced a depth of finish that is really remarkable.


I've been giving the oil a very light steel wool in between coats, and after the 4th coat I gave it a light sand with 1500 grit wet and dry. I think I'll give it another few coats, with another lick of 1500 in between each, and see how she feels. It's already feeling smooth and looking shiny, so I don't think it will take many more coats before I am satisfied.

While the Tru-Oil has been drying, I've also been sanding the body. I started with 180 grit and gave the body two solid sessions, concentrating on the end-grain. I'm not sure I got *all* the machining marks out, but I did my best. Since I'm painting this axe a solid colour, it doesn't much matter if they all come out. Any remaining mess will be removed during pore filling.

After 180 grit I moved to 240 grit, where I again gave the body a really good work over. After 240 grit, it was on to 360 and then I pore filled the body with a slurry of Maple coloured Timbermate.


The Timbermate was sanded off with 400 grit paper. In the process of sanding it off, I dropped the body on the concrete (!!!!). There were no major shape deformations, but I did created a few small scratches and scrapes here and there. This meant going back to the Timbermate (as putty/filler this time) and patching it all up. I was not a happy boy let me tell you!

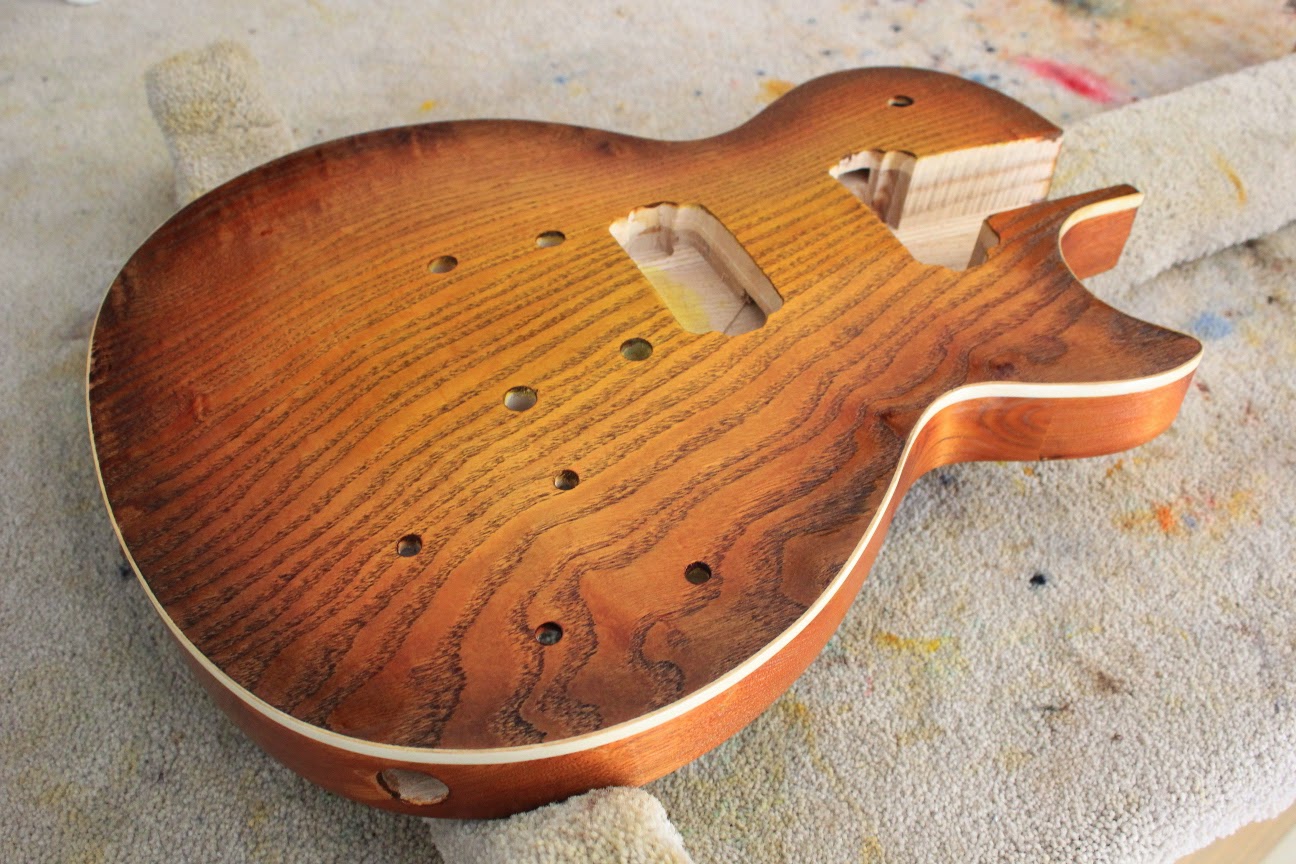
Anyway, she's patched up and sanded to 400. Shame this isn't a stained build as the Timbermate has really brought out the grain on this body. When I wet the body down with Metholated Spirits to clean the fine Timbermate dust off, I couldn't help admiring what a nice piece of basswood this is - and I don't often get to say that!


Anyway next steps are a quick sand with 600 and 800 grit paper and then on with the primer. The excitement is building!!

Thursday, 17 July 2014

Scratch Pine Toronado: 4 Layers of Tru-Oil

After getting the body dyed black with Colortone dye, I have been steadily laying down coats of Tru-Oil in an effort to pop the grain in this pine body before spraying it with Acrylic lacquer. I gotta say, the combination of black dye and Tru-oil is truly spectacular. Definitely a combination to explore in more depth in future builds.


Basically the body is ready for clear coats now. I'm just waiting for a fine day with no wind so that I can start spraying. Stay tuned!

Wednesday, 14 May 2014

Solid Body PRS: Shredder's are Go!

Well, she is all put together and she looks amazing. Today I received my CTS 500K pots and Sprague Orange Drop capacitor in the mail and they went straight into the control cavity. From there it was a relatively painless job to get the rest of the wiring soldered in and the Switchcraft jack with stylish oval jackplate installed.


I really love how this build has ended up, from the beautiful flame maple veneer to the Wudtone Vintage Yellow neck, from the art-deco trapeze tailpiece to the jet black headstock. Of course the bird inlay stickers are the icing on the cake.


I wish I was skilled enough to add *real* fretboard inlay to my bulds, but at the moment the stickers will have to do. I've done a few bends over them and they seem to be staying in place, although I haven't got any Dr Ducks Axe Wax on there yet!


Even the basswood body came up very nicely with the Colortone dye and Tru-Oil finish. I was a bit disappointed with the final colour (as the original turquoise went green under the influence of the Tru-Oil) but that's a lesson learned. With my next build I'm going to try blue Colortone dye with just Acrylic Clear over the top. We'll see how much chatoyance we achieve without the Tru-Oil..


Anyway, I've managed to get quite a low action on this baby and she plays like a dream. The GFS Surf-90 pickups sound really nice - a good vintage growl - and they sound really nice both clean and through the overdrive. It's not too heavy, and is very balanced on the strap. I'll be shredding this bad boy (if you can call what I do shredding ;) ) for the next few weeks no doubt!!

Saturday, 3 May 2014

Solid Body PRS: Polishing Tru-Oil with Meguiar's

Well, the Tru-Oil coats are finally finished on the PRS. It is always a relief, I can tell you, to get to the end of the 15-20 coats required to build up a decent shine. I never feel like it is going to end, but the final few thinned coats went on pretty quickly (with wet sanding in between) and here I am. With just the thinned Tru-Oil, the shine you can produce is actually pretty good..


But to really dial in the shine you need to polish. This time around I'm taking the advice of Jarrod from the Pitbull Guitars Forum and trying Meguiar's Ultimate Compound and Meguiar's Scratch2.0 to do the polishing. In the past I have used Stewmac Colortone Compounds with good results. However it's pretty expensive by volume if you include the postage. Anyway, Jarrod (and also Sully from Sully's Guitars) uses Meguiar's compounds for acrylic clear coats, but they should be OK for Tru-Oil right? They're just an abrasives right?? Well only one way to find out..!

And so I got rubbing. After applying the Meguiar's Ultimate Compound, there was really nice shine developing. The surface definitely feels smoother, and it doesn't seem to have affected the Tru-Oil in any detrimental way that I can see.


Despite my arm feeling like lead, I immediately went on to the Meguiar's Scratch2.0. A thousand small circles later and the top was finished. It's only a subtle improvement from the Ultimate Compound to the Scratch2.0 but I *think* there's a difference. There better be given how much my arm aches ;). What do you think?


Anyway, now i need to polish the sides and back and this baby will be ready to assemble. First job will be to glue the neck and then we can get on to the electronics. Fun fun!!

Monday, 21 April 2014

Flamed Telecaster: Spraying Acrylic Clear Coats

A really amazing day today. It was a long hard road to get there, but I finally managed to get 3 reasonable coats of acrylic clear on my flamed telecaster build. It took quite a bit of trial and error to get the spray gun dialled in. At first the weather here in Holgate was too humid (I think). To help overcome this issue I added a water trap to the bottom of the gun. Next, the clear was drying the instant it hit the wood (like sandpaper). The reason was too much pressure and too little fluid. To help overcome this issue I added a pressure regulator to the bottom of the gun, reduced it to about 18psi and increased the fluid control. The resulting gun setup looks like this:


It's some kind of supercharged hot-rod affair! With the gun now ready and dialled in (I hoped), it was time to get on and spray. Retiring to my high-tech spray booth (a saw horse outside the garage) I was able to lay down 3 nicely wet coats; waiting 15 minutes in between for the coats to tack off.


Thankfully, a friend of mine recommended a good quality Sundstrom mask to keep the fumes out of my lungs. It worked unbelievably well and I would highly recommend them to anyone. The end result of the spraying was pretty good for my very first attempt. There is a bit of orange peel, (I'll deal with that later), but some decent coverage has been laid down. I'm planning to sand this flat before applying 3 more finishing coats tomorrow.


The good news from today's success is that it seems acrylic clear can definitely be sprayed over Tru-Oil without any ill effects (or so it seems). This is great news for those of us that like to use Tru-Oil to enhance the chatoyence of the figured timber before adding the clear coats over the top. Roll-on the buffing and admiring!!

Monday, 14 April 2014

Solid Body PRS: 3 Coats of Tru-Oil

Well, I've now got 3 coats of Tru-oil on the PRS. Unfortunately, the amber hue of the oil has turned the once turquoise colour more towards green. Nonetheless she's still looking pretty sweet - the flamed figure is really starting to pop, and the chatoyance is deepening more and more.


For the neck finish, I've decided to go with a Wudtone Vintage Yellow neck kit. With the rock maple neck sanded to 400 grit, I've currently got one application of the Wudtone base coat on and drying. I'll post a pic of the neck when the base coats are done. The face of the headstock will get turquoise Colortone and Tru-oil like the body.

Sunday, 16 March 2014

Flamed Telecaster: 8th Coat of Tru-Oil

8 coats of Tru-Oil are now on the flame maple telecaster. Starting to look really nice. The colour is a little dark for me, and there isn't enough of a burst along the edge, but not bad for a first attempt. I can see now that the trace-dye coat I did was too dark using just Red Mahogany. A mix of Vintage Amber and Red Mahogany (maybe 70/30) would have been much better! The flame would have have been more subtle, but this would have allowed much more of the Amber colour to come to the fore in the centre of the burst. On the plus side, the Tru-Oil has soaked into the grain and enhanced the chatoyance nicely.


I am especially happy with the back of the guitar. No chatoyance here, but the pores of the mahogany filled very nicely with Timbermate and the Vintage Amber / Red Mahogany burst is more pronounced. Yes the burst could have been better, but all in all it came up nicely.


Overall I'm pretty happy with how the build is progressing. The mahogany body should sound really good with the GFS 52' professional series pickups I've bought for it, and the custom perloid pickguard also looks the business.

A couple more coats of Tru-Oil and I'll be ready to start wet sanding.