Showing posts with label Telecaster. Show all posts

Wednesday, 30 November 2016

12 String Telecaster - Jangles a Go-Go

Well, she's been finished for a month or two now, but today I finally had time to take some photos of my trans-black 12-string Telecaster.. I reckon she looks amazing! I've always had a thing for black and white Telecasters, and for a 12-string she is surprisingly comfortable to play.

Now admittedly I'm not the best guitar player that ever lived (far from it) and the 12-string is a challenge to play compared to the traditional 6, but god I love picking this bad boy up. Thanks to a nut height that needed no adjusting and a super straight neck, the action is low and very little finger pressure is needed to fret the strings. It's just so comfortable that even I can bust out a tune with just a little extra practice.


Already some scuffs on the back - tough love!

Despite taking half a day to get in tune, once the neck settled down the tuning stability is really quite good. Some locking mini-tuners would make this even better, but I can live with it for now. Some of the strings do need a little tuning tweak now and again and that's ok (as I said, for now). Unfortunately, just checking each and every each string with the electronic tuner is a major undertaking ;).


Trans-black flame maple with a deep Acrylic gloss.
The guitar's single coils deliver a beautiful jangly tone, especially with a clean channel. Open chords are especially nice and the sustain (even accounting for my bad finger placement) is great. Time to channel Marty Wilson Piper and belt out a few tunes by The Church.

Tune me please. Please?

All in all a very satisfying build and a great end result. I can't stop picking this thing up and strumming it. DIYGuitars did a good job with the kit, especially the dialed in nut height and I'm really impressed with the kit quality. I highly recommend you all to get out there and build your own 12 string Telecaster. There aren't many of them out in the wild (compared to other models) and that makes it all the more satisfying to own one.

Tuesday, 1 December 2015

12 String Telecaster: Fucking Glue Spots

Ok, did I say that the 12 String Telecaster kit had no obvious glue spots? Well, I was wrong. I got the kit out today to do some more sanding and to hunt for possible glue spots on the flame maple veneer (just in case :o). I'm leaning towards a trans black finish on the top, so I applied a weak wash of black dye to start to pop the grain and as a pre-colour just in case there's any glue spots to uncover.

A weak wash of black dye to highlight any glue spots.
The flame started to pop alright, but unfortunately I uncovered glue-a-plenty on the veneer. There's big gloops of glue around the binding near the neck pickup route, and it continues around most of the top half of the guitar. How the hell do you spill so much glue getting the binding on there and not clean it up?


A real mess around the binding
I'm pretty pissed off to be honest. These factories will build a kit with the thinnest of thin veneers to save money, but will then slather glue all over it to make finishing said veneer next to impossible. I don't know how I'm going to clean this glue up without sanding right through the veneer. I might try a few rounds of Goof-off Adhesive Remover on there to see if it helps, but I'm not holding out much hope. At this rate my nice flame maple 12 string is going to be covered with a solid colour finish. Not happy Jan!!

Friday, 20 November 2015

12 String Telecaster: Unboxing and Mock Build

Yet another new kit arrived today that I'm very excited about. It's a new kit from DIYGuitars - a flame maple 12 String Telecaster! Even though I can't really play one for shit, I must confess that I am in love with 12 string guitars. I love my Olson 335 12-String build, and this build looks to be just as cool.

Unboxing the Telecaster
The kit came well packaged from DIYGuitars, with all the wooden pieces snugly placed and protected by soft sheeting. The components also came well wrapped, with the chrome components (bridge, control cover) especially well looked after. The 3-piece basswood body of the guitar has no machining marks or obvious glue spots and the binding looks well done. The flame maple veneer is subtle, but should come alive with a little stain. 

Some nice Flame Maple Veneer popped with a little water.

There's a little grain to be seen on the back of the body, but not too much. About the only negative I could say is that one of the string-through holes is a little off centre, throwing all the others off too. It won't be as obvious once the ferrules go it, but I'll still know.

One ferrule hole is not quite straight.
The neck is straight and fits well in its cavity. The 12-string headstock is a new one for me - I'll have to come up with some kind of design for the top - not that there's much wood up there to work with. There's also a subtle grain to the fretboard that I really like. It's going to be a hard decision whether to give the neck a little amber dye or leave it natural. I'm leaning towards a yellow + amber + orange burst for this one so an amber neck may not be the best decision. Still thinking on that one.

Straight neck with all those tuner holes.
Some subtle grain on the fretboard.
Straight from the unboxing to the mock build, and this thing went together in no time. 6 of the strings go through the body so the string ferrule holes needed to be aligned with the bridge. The factory has even marked where the top corners holes of the bridge should be drilled so there's no wiggle room as far as bridge placement is concerned. Just drill and screw.

Bridge positioning - making sure the string-through holes line up.
It really is a matter for this build, of placing the bridge and then adjusting the neck to get the strings travelling correctly. But with no wiggle room in the neck pocket either, it's in the hands of the gods to be honest. Let's hope the factory did its job properly, especially with respect to scale length and intonation. The good news on that score is that the bridge actually has compensated saddles for the high and low strings of each pair. Pretty amazing for such a cheap kit. My 12-string 335 build had no such thing with it's cheap tune-o-matic bridge. I can't wait to see how this bad boy sounds!

Friday, 9 January 2015

Black Ash Telecaster: Shimming the Neck

After a few weeks of playing my Black Ash Telecaster, despite loving the sound and the action, there were a couple of issues that I wanted to fix to improve the overall playing experience. It was high time that I got this baby back on the workbench!


First of all, the expensive Bourne mini-pots that I bought for this project not only stick out from the control plate too far (they have no second nut to adjust their height) the tone pot has busted completely and now turns of its own volition 360 degrees. What a piece of shit. Never gonna go there again!

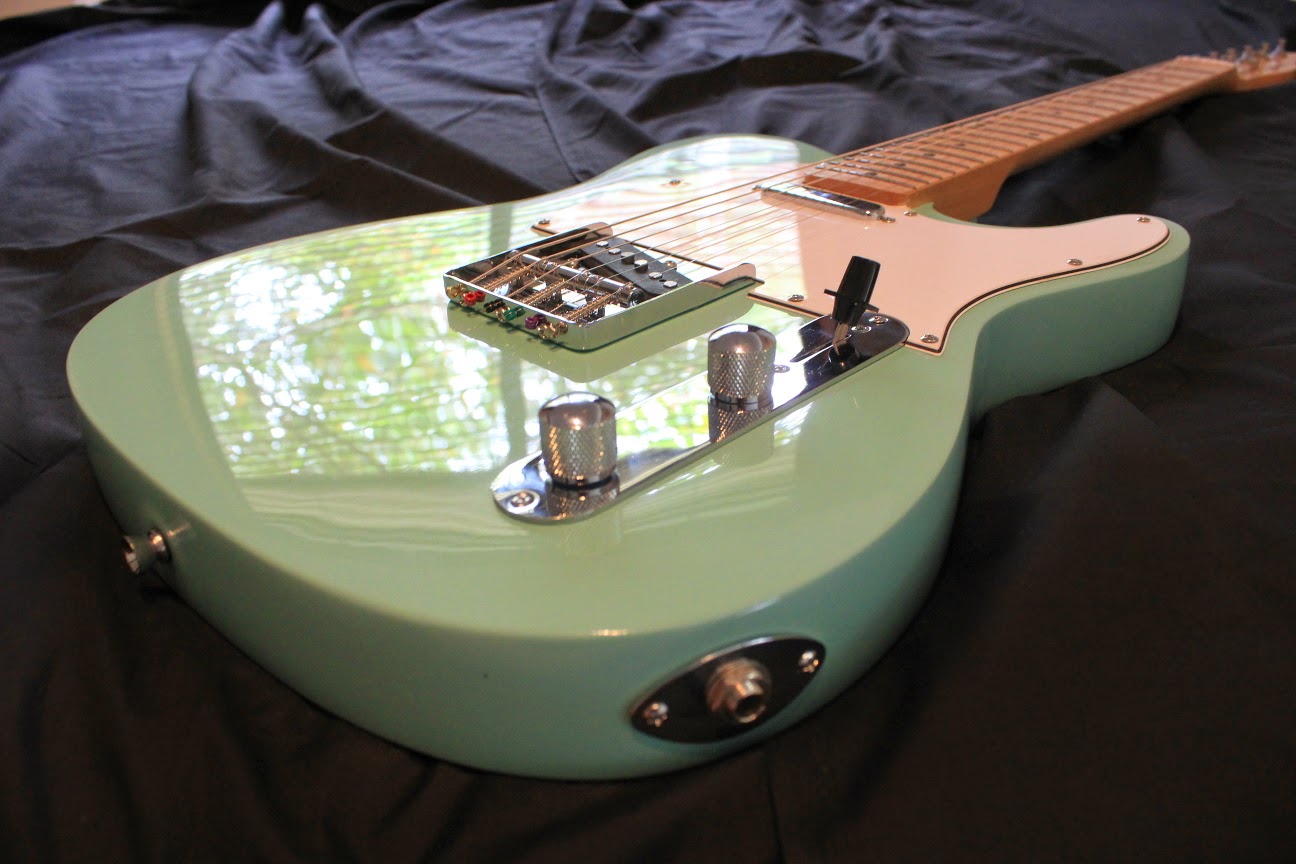
Secondly, and more importantly, (i mean who touches the volume and tone anyway? ha!), whilst the action I was able to achieve on the guitar is very satisfying, it came at the expense of very low saddles at the bridge. These very low saddles meant that their height adjustment screws stuck up so far that I kept scratching my hand on them every time I tried to palm mute the strings.

Low Bridge saddles means high adjustment screws. Ouch!
And so, the solution to this little issue, of course, is to shim the neck to bring the default height of the bridge saddles up!

Shimming the neck is really very easy. The first step is to cut a piece of shimming material. Depending on how much you need to raise the heel of the neck, you can use many different materials, from a piece of wood veneer, to a sheet of paper, or anything that isn't going to compress easily. In my case I like to use a piece of milk-bottle plastic. It's about as thick as a business card, it's very stiff and it won't compact under pressure. I cut the material to fit the neck heel and make it small enough so that it can't be seen from the open side of the neck.

Step 1: Plastic shimming material, cut to size.
The second step is to unscrew the neck completely. There is no need to remove the strings, just loosen them right off. You only need the strings loose enough to allow the neck heel to come away from the body.

Step 2: Neck is removed with the strings still connected to the bridge.
Next, with the screws sticking out a little into the neck pocket, press the shim onto the screws so that they push through the material and hold it. When I use plastic like this, I also like to take the shim back off and use a razor blade to trim off the plastic sticking up around the holes I just made. This makes it a lot easier to get your neck sitting flat again in the pocket.

Step 3: Push the screws through the shim to create the holes.
Lastly, screw the neck back on with the shim in place. Be careful to screw each of the neck bolts down evenly (a little at a time) to make sure the neck heel sits flat. When you finally tighten the screws, do the non-shimmed end first to make sure these are on the deck before tightening the shimmed end. If you don't, you might find the neck sitting up further in the pocket than your shim intended.

Problem: The neck is sitting further up at the heel than the shim intended.
With the shimming process complete, I needed only to adjust the height of the saddles to get the action back into sweet, sweet, sweet territory. Now the saddle height is such that the adjustment screws are only just peeking out of the top. 

The adjustment screws are now at a comfortable height.
My killer Ash Telecaster is now even more comfortable to play and I couldn't be happier! Now to give those Bourne pots a good going over. That's a few bucks I'll never see again!

Wednesday, 26 November 2014

Surf Monster Telecaster: Done and Twangin

Well here she is - the Seafoam Green Telecaster! I put the finishing touches on this build today and I couldn't be happier with how she's turned out. The finish, composed of MTN94 spray colour and auto acrylic clear coats, looks about as close to a showroom job as I think I am capable of. I think she looks amazing. The Montana Colors MTN94 "R-6027: Luminouse Green" is just a perfect interpretation of Seafoam - I just love it. A big shout out to Harry Aznavoorian for steering me onto this colour in the first place!


I went with a standard white pickguard to give the whole thing as much of a vintage feel as I could. The neck and headstock is finished in clear Wudtone neck finish and feels nice and smooth to the touch. It's beautiful and playable. On the fretboard I've got Dr Ducks Axe Wax and nothing else. I added a set of roller string trees too. I really like the look of them, and hopefully they will lead to fewer string breakages.


The GFS Professional Series Vintage '63 pickups sound really nice. I went with the "Vintage Wound" bridge pickup, and I think I made the right decision. The question everyone is asking though, is do the GFS Professional '63s sound better than the Toneriders Hot Classics that I used in the Ash Telecaster? Well they both sound really great, and both completely different! The Toneriders are hotter and rockier, whilst these GFS baby's are twangier and surfier (if that makes sense). They actually sound perfect for what I wanted for this guitar! I'll try to get a sound comparison of the two posted soon so that you can decide for yourself.


All in all an amazing result given my limited skill set. I'm really loving these painted finishes at the monent. First the Johnny Ramone Mosrite and now the Surf Telecaster - and both look amazing. I'm already planning my next solid colour finish. Surely it is time for some more hot rod flames?

Monday, 24 November 2014

Surf Monster Telecaster: Polishing

After the longest finishing time ever, my seafoam green Telecaster got its final wet-sand and polish today. First, I started with 600 grit and wet-sanded the surface down to remove the majority of the orange peel. Then it was on to the 1500 grit and the 2000 grit to complete the job. With the wet sanding done, it was on to the Meguiars polish.

I apply the polish with a square of t-shirt material, and then take it off again with a clean piece.  I began with two rounds of Meguiars Ultimate Compound, and then followed this up with a final round of Meguiars Scratch-X 2.0. Couldn't be simpler.


As usual, the results are just awesome (if I do say so myself ;) ). My arms were aching by the end of it, but I love how the Meguiars brings up the acrylic clear coats. Now with just the shielding and the electrics to go, I should be rocking on this bad boy by the end of the week. I'm excited to hear how those GFS 63' Vintage pickups sound!!

Postscript 24/11/2014
In a fit of further productivity, I also got the shielding completed. Gotta love that "Slugga" tape from Masters :). Nothing stopping me from wiring this sucker up now :).


Friday, 14 November 2014

Black Ash Telecaster: She's Done!

Well today I put the finishing touches on the Black Ash Telecaster. I got myself a bone nut blank, shaped it for the Telecaster nut slot and filed the string slots. All in all it took me only about half an hour.


Amazingly, with the nut in and the slot heights adjusted for correct string height at the first fret, the imagined problems with high-action just melted away. I've got the saddles almost right to the bottom of their travel range, but she plays really nicely without any fret buzz. Possibly I could have gone down a little lower with a neck shim, but all in all I'm really happy with how she feels.


The Tru-Oil neck feels nice and fast, and I'm very happy with the Dingotone Guitar Wax on the fretboard. Maybe not as slick as Dr Ducks Axe Wax, but I know that it's keeping the colour locked in. So-too the Tonerider "Hot Classic" pickups sound great. They deliver a real punch when over-driven, and still sound crystal clear in clean mode. With just a touch of reverb this thing sounds just beautiful!


All in all I'm very pleased with this build. I've always wanted a black Tele, and now I have a great sounding, great looking shoe-gazer that I can thrash around the man-cave to my hearts content!

Wednesday, 12 November 2014

Black Ash Telecaster: Shielding for Slugs

Sitting at home today, willing the postman to deliver unto me some shielding tape so that my raft of current builds could continue, I remembered something that I had read in one of the guitar building forums around the place. It was postulated that copper tape sold as "slug barrier" tape could be used just as efffectively to shield a guitar as "sold for purpose" copper shielding. That couldn't be true could it??

Well, with this in mind, and with no postman in sight, I decided to head to my local Masters (big-chain hardware) and see if there was any truth to it - if slug barrier tape could indeed be the answer to my short-term shielding woes. Luckily I managed to find some - 10 metres for 8 bucks. It seemed like a bargain, but would it serve for shielding?


Well, I got the stuff home and proceeded to run a few quick tests to see how it performed. What I really needed to know was:

1. Do overlapping pieces form a continuous conductive surface?
Well, yes they do! I used three lengths stuck down to a piece of pine with a 0.5cm overlap. The surface did indeed register conductivity on my multimeter with a resistance of 0 Ohms. Great so far!

2. Can I solder directly to the tape and does the solder joint conduct?
Well, yes absolutely! The solder went straight on to the tape without any problems at all. A little flux was all that was needed (I use flux-cored solder) and the solder stuck fast with a nice clean joint.

In summary, the barrier tape performed identically to the tape I've been buying from ebay and other suppliers as "double sided conductive" shielding tape. Amazing!

With my 10 metres of tape in hand I dove straight into shielding the pickup and control cavities of the Black Ash Telecaster. The tape went on without any problems at all. Ground wires were easily soldered to the cavity walls to join all the cavities electrically, and then the bridge cavity was joined to the bridge using an underside bare wire.


To wire this beasty I'm using 250K Bournes mini-pots, an Orange Drop capacitor and a 4-way Oak-Grigsby switch. First time I've tried a 4-way switch on a Telecaster, but that's not surprising given it's only the second one I've ever built ;). I'm hoping it will extend the range of tones she will be able to produce - especially the new "series" setting. The circuit for the 4-way wiring scheme can be found on DIYGuitarMods and is shown below.


As it stands, the wiring of the control plate is all but completed (you can see it in the photo above) following the schema in the diagram. All that remains is for me to attach the pickups to the switch and to connect the output jack to its wires. This will be tomorrow's job, in addition to looking at the neck angle. With the bridge now in place it looks suspiciously like a shim is going to be needed - bummer.

Monday, 10 November 2014

Black Ash Telecaster: Moving the Bridge

Well, today I had every intention of getting the remainder of the hardware installed on the Black Ash Telecaster. But, unfortunately, it was not to be. When I did my mock build of the Telecaster prior to starting the finish, I did so with a humbucker in the neck position. As such, the bridge was positioned such that the strings travelled correctly over the poles of the humbucker and up the neck.

Now that I've decided to use a traditional Telecaster pickguard, it turns out the bridge was not perfectly placed to run parallel to the bottom edge of the guard (and wasn't centred either). It looked bloody horrible to tell you the truth. The only thing to do was to move the bridge, and that meant drilling out the original bridge screw holes and plugging them with 6mm oak dowel. Not the best thing to have to do once the finish is completed, but at least the bridge is large enough to cover the damage!


The job was, at least, completed with a minimum of fuss. I sanded the dowel a little with 180 grit paper to make it slide more easily into the 6mm hole, and used Titebond to glue each plug in place. Each plug required a tap with the hammer to get it all the way in, but in the end each sat nice and flush with the top of the guitar.

With the plugs in place, I was able to line up and install both the scratchplate and the control cover. All in all I reckon she's looking pretty bloody good - although in the photo below the bridge is just sitting on top of the plugs.


Once the Titebond has dried overnight, I'll get the bridge lined up again (using both the neck and pickguard as reference this time) and get it screwed down. Then I'll just have the wiring to go. Unfortunately I'm still waiting for shielding tape, so this may still be a while away.

Wednesday, 22 October 2014

Black Ash Telecaster: Tonerider Hot Classics

I have decided to upgrade the pickups on the Black Ask Telecaster build to Tonerider "Hot Classics". I've heard great things about these relatively inexpensive beasties, and so I ordered a set from my friends at Pitbull Guitars. The mailman dropped them on my doorstep this morning!


With a couple of holes drilled in the pickguard to mount the neck pickup (I never liked to idea of having to screw into the guitar body) one half of the upgrade was completed in no time. The bridge pickup, however, was another story!

Unfortunately, the bridge route on the kit was a little smaller than standard. It was perfect for the pickup supplied with the kit, but the Tonerider was just a smidge too big for it. I've had the same issue before - the bridge route on the Surf Telecaster build had to be enlarged to fit the 63 Tele Vintage Wound Professional Series pickup as well. It seems to be a common issue with Chinese made kits!

Anyway, I set about widening the bridge pickup route using my trusty router and the template from Stewmac.


It certainly wasn't the best time to start routing the body - what with the finish just being completed and all - but hey, needs must! I stuck the template down with double sided tape and away I went. It all went pretty smoothly to be honest and the route was complete in no time.


The results are nice and clean (my nice Tru-Oil finish survived!). Now the assembly can continue - as soon as my shielding tape arrives that is!!