Well, she's finally finished - the Ash Surf-abilly Thinline Cabronita. I'm very, very happy with the final results - much better than I ever imagined that they would be. The seafoam green flames over the Bali green base work really nicely, and give a nod to the rockabilly set. All that chrome hardware from GFS also works nicely too, as does the retro Cabronita pickguard.

The seafoam and Bali greens are very difficult to photograph. Depending on the light, the photo you end up with is either a washed out olive green, or a light blue like the photos below. You'll just have to take my word for it - this baby looks seafoam in the flesh. That is to say, really bloody awesome!


As usual, the acrylic clear coats came up beautifully. The White King spray cans of gloss acrylic really are the easiest way to get a beautiful gloss finish on your axe - I cannot recommend them highly enough.

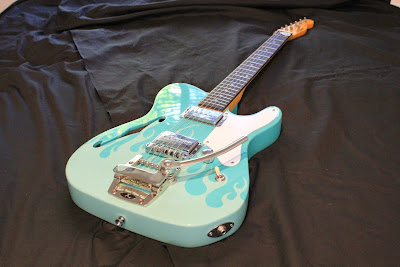
While the Thinline retains the classic lines of the Telecaster, the semi-hollow body removes most of the weight, resulting in a guitar that is very easy to handle. The body resonates really nicely too and you can almost play it like a hollow body (almost). Certainly there's a deal more noise coming from the guitar than a straight solid body Ash Telecaster.


All in all, I'd have to say that the Thinline Cabronita is very nearly the perfect guitar. Doing away with the control plate, it's got super-cool looks, it feels nice and light in the hands while remaining balanced on the strap, and it sounds really great unplugged. And with a couple of GFS Mean 90s on board, the package is even better!
These pickups sound really nice in clean mode - delivering just enough single coil twang for surf and rockabilly riffs. When you crank up the distortion, the pickups meet the challenge head on and really live up to their "mean" moniker. These babies rocks as hard as the best of them! So too, the xTrem tremolo from GFS is a really nice addition. It has a nice fluid feel, and combined with the roller bridge and roller string trees, doesn't seem to create any tuning stability problems. All in all a great little package that I'm having a hard time putting down!


