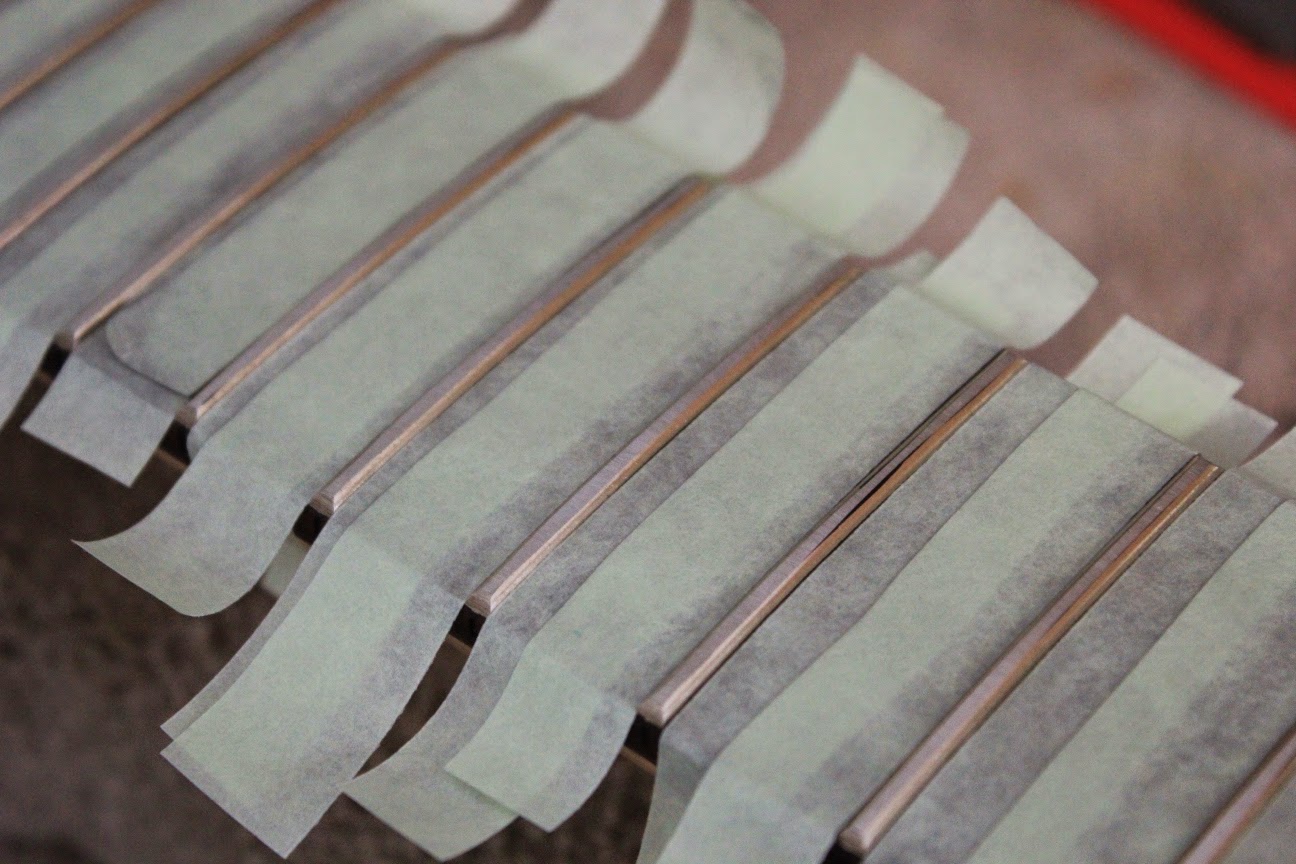
While I'm waiting for my oval jack plate and output jack to arrive in the mail, it's time I did a fret level on the Stone Roses Tribute build in readiness to string her up and let loose with some sweet tunes. After straightening the neck with the truss-rod, I protected the frets with some painters tape and marked the top of each fret with a sharpie.

I could then use my levelling beam - coated with 320 grit adhesive sandpaper - to sand all the frets until every fret had a strip of sharpie removed from its top edge. Some of the frets came right down let me tell you!

I then went on and did an additional level on the last 7 frets at an angle down towards the pickups. To do this I laid 3 pieces of tape across the 7th fret and used this as a rest for the end of my short levelling beam. Sanding this way creates a ramp down for the very last frets and allows a much lower action to be achieved.


With all the levelling done, I proceeded to use my trusty fret files to re-crown each of them. I use a combination of el-cheapo Double-edge Fret File from Stewmac and a Little Bone file from Rectify Master. Each has it's place depending on which fret you are re-crowning. The Stewmac files are useless down near the pickups if there are horns on the guitar as there are in this case. Before using the files to re-crown, I re-applied the sharpie to each fret as a guide to how much material I was taking off each side. You don't want to file so far that you change the height of the fret!
Anyway soon the frets were re-crowned and polished to a chrome lustre. Beautiful! I then gave the neck a soak of Dr Duck's Axe Wax and it looks spectacular.

Finally, the neck needed only a new bone nut to be perfect. With my trusty Stewmac nut files and my bench sander I soon made quick work of the new nut. The action at the nut is really nice now and the whole neck feels great.

With the nut superglued in place, it was time to string her up and apply my beautiful custom truss rod cover. I received the decal for the cover from Andy at City Signs and Print in SA yesterday and couldn't wait to apply it. It looks absolutely amazing and is the perfect cap to a wonderful

Now just that output jack to go and I can call this worthy tribute guitar finished! It's looking so awesome I'm lost for words. Can't wait to get her strapped on and noodle away!

I could then use my levelling beam - coated with 320 grit adhesive sandpaper - to sand all the frets until every fret had a strip of sharpie removed from its top edge. Some of the frets came right down let me tell you!
I then went on and did an additional level on the last 7 frets at an angle down towards the pickups. To do this I laid 3 pieces of tape across the 7th fret and used this as a rest for the end of my short levelling beam. Sanding this way creates a ramp down for the very last frets and allows a much lower action to be achieved.
With all the levelling done, I proceeded to use my trusty fret files to re-crown each of them. I use a combination of el-cheapo Double-edge Fret File from Stewmac and a Little Bone file from Rectify Master. Each has it's place depending on which fret you are re-crowning. The Stewmac files are useless down near the pickups if there are horns on the guitar as there are in this case. Before using the files to re-crown, I re-applied the sharpie to each fret as a guide to how much material I was taking off each side. You don't want to file so far that you change the height of the fret!
Anyway soon the frets were re-crowned and polished to a chrome lustre. Beautiful! I then gave the neck a soak of Dr Duck's Axe Wax and it looks spectacular.
Finally, the neck needed only a new bone nut to be perfect. With my trusty Stewmac nut files and my bench sander I soon made quick work of the new nut. The action at the nut is really nice now and the whole neck feels great.
With the nut superglued in place, it was time to string her up and apply my beautiful custom truss rod cover. I received the decal for the cover from Andy at City Signs and Print in SA yesterday and couldn't wait to apply it. It looks absolutely amazing and is the perfect cap to a wonderful
Now just that output jack to go and I can call this worthy tribute guitar finished! It's looking so awesome I'm lost for words. Can't wait to get her strapped on and noodle away!
No comments:
Post a Comment