With some more hardware arriving and a little time on my hands, I was finally able to get going on the mock build of Jeremy's Mahogany Les Paul. The first order of the day was getting the pots sorted out. Jeremy supplied me some authentic Gibson 500K pots that are a little bigger than the mini-pots supplied with the kit. To get them to fit, I needed to enlarge the pot holes from 8mm to 10mm - taking it easy with successively larger drill bits. With the holes enlarged, I also needed to extend the cavity around the two high-side (volume) pots using the Dremel and a sanding wheel.
 |
| A little time with the Dremel and the Gibson pots now fit in the cavity. |
After verifying that the pots fit nicely through the body (which they did!), I got the nuts tightened down just to make sure the heights looked good (which they also did!). I chucked Jeremy's gold top-hat knobs up onto the shafts and they fit OK, although the split shafts deformed a little and aren't turning perfectly. Might need to think about specific knobs for split shafts in the future.
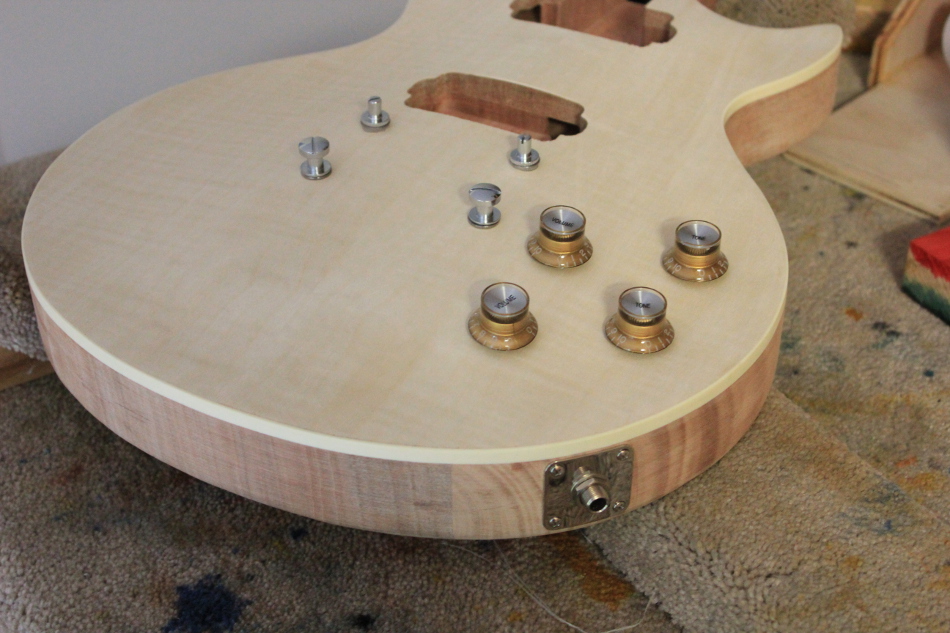
 |
| Pots fit nicely through the body and the top-hat knobs kinda work on the split shafts. |
With the pots mounted, it was time to fit the output jack and jack-plate - drilling the holes for each of the 4 screws, and making sure it sat nice and straight with respect to the binding. The hole for the jack has not been drilled dead centre by the factory, but it still looks reasonably good. All in all a piece of cake once I got the plate oriented correctly - it's nice and square and you can see the results in the photo above.
With smaller hardware fitted, it was time to test fit the important pieces - the stop bar, bridge and neck. Jeremy bought a beautiful TonePros nickel tune-o-matic bridge and stop bar for this build and it really looks the business. Even with the "export" sized mounting posts however, the holes drilled by the factory are just a smidge too large for both the stop bar and bridge posts.

Interestingly, the TonePros (adjustable) bridge screws were able to successfully fit into the stock bridge posts. I quickly decided to go with this configuration, as the stock part can't be seen with the bridge in place. The stop bar, however, is another story. The stock posts and the nice nickel stop bar supports are completely incompatible. In the short term I used the posts and the supports from the kit to mount the TonePros stop bar. The trouble is, the chrome posts are glaringly obvious against the nickel TonePros part. At the end of the day I'm going to have to dowel and re-drill the existing holes to accommodate the TonePros posts.
Anyway, with the bridge and stop bar in place (for now), the neck was clamped down and the E strings used to gauge the straightness of the neck.
 |
| The neck looks straight and the E-strings equidistant from the fretboard edges. |
With my previous ministrations cleaning up the neck heel, the neck clamped down nicely in the pocket and the E strings travelled straight and equidistant from the edges of the fretboard right up to the nut. As usual, it's another nicely built kit from the guys at Pitbull. Phew!
So, with this done, there are still a couple of issues to be solved before the finishing can begin. Firstly, Jeremy's set of awesome Kluson tuners need to be fitted - and that's going to require the dowelling of the existing factory tuner holes and re-drilling them to fit. After that, the stop-bar posts holes will need the same treatment. So, a little bit of pain before the fun of sanding, sanding and more sanding can begin in earnest. Stay tuned!


No comments:
Post a Comment