Tuesday, 28 January 2014

Stone Roses Tribute: Headstock Finalised

As you may have seen in the second instalment of my build diary, I finally got my headstock shaped for the Stone Roses RC-1 build. A little jig-saw and belt sander action left me with the headstock almost complete - just a few burn marks to take care of with some 180 and 240 grit sand paper.


In no time I had the original 'shark-fin' look that the Rickenbacker 330's are known for. Pretty sweet. I'm going to go for a clear Wudtone finish on the neck and back of the headstock, so it was important to get rid of all the burn marks from the belt sander before going any further. It was worth it! The maple neck and headstock looks real puurdy and should contrast well with the white headstock face. Now for more sanding!


Monday, 27 January 2014

Stone Roses Tribute: Video Build Diary #2

The second instalment of my video build diary for the RC-1 Stone Roses Tribute is now on YouTube. This instalment deals with the shaping of the headstock for the Pitbull RC-1.


Not sure my presentation skills are improving. If anything they may have gotten worse ;). Apparently, all my tools are "trusty". Hmm....

Tuesday, 21 January 2014

Stone Roses Tribute: Video Build Diary #1

Since my Stone Roses Tribute build has been a dream of mine for quite some time, I have decided to make a video build diary over the course of the project! The first installment is now on YouTube and has been added to my brand new YouTube Channel: "Fires Creek Guitars". This first installment deals with the mock-up phase for the Pitbull RC-1 on which the build is based.


It's not as good as it could be, but I'm hoping my presentation chops will improve as the series progresses. In no time I'll have my news-reader voice and patter down to a fine art. Enjoy - if you can! ;).

Wednesday, 15 January 2014

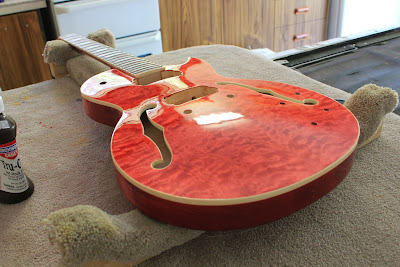
Les Paul Florentine: Thinning Tru-Oil with Shellite (Naptha)

A few weeks ago I posted a quick article about how to resurrect your Tru-Oil when it gets old and cruddy. The secret was to stick a bit of Shellite (Naptha) in it and give it a shake. Well, today I decided I'd try to thin my Tru-Oil down using Shellite rather than the usual Mineral Spirits. I wet-sanded for a couple of hours with 1500 grit (it needs more but that's another story) and then thinned some Tru-Oil about 70:30 with Shellite.


The thinned oil wiped on smooth and had soon settled into a new streak-free layer. I would even say that the thinned oil went on easier (smoother?) than when using Mineral Spirits, but I'm not 100% sure. Let me do it a bunch more times and I'll let you know the conclusion. All I know right now is that it went on nicely and the results speak for themselves! The shine is really starting to pick up on this sucker now. Just wet-sanding with 2000 grit to go.

Postscript 16/01/2014
Well, the oil dried and guess what? There were streaks in it where it hadn't settled. With hindsight this is not surprising given that Shellite (Naptha) evaporates much faster than Mineral Turpentine. Obviously the Shellite is evaporating way too fast. So in conclusion, thinning with Shellite is a very bad idea! Stick with Turps instead and save yourself the agony of having to wet-sand all over again...!

Saturday, 11 January 2014

Les Paul Florentine: Installing a Tune-o-matic Bridge

For my Les Paul Florentine project, the Pit bull ES-2T kit came with the option of a fixed or floating bridge. Since I am after a fixed tune-o-matic bridge, it was up to me to install the bugger - including finding its proper location and drilling the holes for the bridge posts. For anyone who is interested in how to do this, here are the steps I take to do a tune-o-matic bridge installation.

Step 1. Mask off the body and Extend Neck Line: To make sure your measuements and line marking doesn't impact the body of your guitar, first mask it off with painters tape. Then, using your ruler, mark lines on the tape extending the line of your neck down past the bridge pickup cavity.

 
Step 2. Measure the Scale Length & Calculate Bridge Post Position: As we all know, the bridge must be positioned correctly (witin 1-2mm) so that correct intonation can be achieved in each of the 6 strings. The correct position of the bridge posts, on both the treble and bass sides, is determined by the scale-length of the neck +- some compensation for each string that takes into account string gauge and so on.


The scale length of a guitar neck is equal to twice the distance from the fret side of the nut to the very middle of the 12th  fret. On my guitar, as on many Les Paul style kits, the distance to the 12th fret is 313mm, giving a total scale length of 626mm. Once the scale length is known, to find the position of the bridge posts it is a simple matter of consulting the Stewmac Fret Position Calculator. For a 22 fret neck with scale length 626mm and tune-o-matic bridge, Stewmac tells us that:

"From the nut to Treble Side Post should be 627.534mm, and that we should allow another 1.5mm to 3mm further on the Bass side post".


Step 3. Measure Bridge Post Position and String It Up: Once the bridge post positions are known, it is a relatively simple task to measure the distance from the nut and mark each position off on the tape (across the neck line we drew). For the bass-side post, I tend to measure into the middle of the suggested range (adding in this case 2mm to the treble side distance).


Once the posiiton is known length-wise, we need to locate the bridge posts across the body - ie. with respect to the neck and the tailpiece so that the E strings are positioned correctly up the neck. The easiest way to do this is to string the guitar up with the two E strings and pass them over the bridge (that is sitting flat on the body). If the strings are touching the frets, then washers can be used to raise the bridge off the body until the strings sit off.


The bridge is then moved side to side until the correct string placement up the neck is achieved.

Step 4. Mark the Post Holes: Once you have the position of the bridge just the way you want it, you need to mark the position of each hole ready for drilling. It is important that the correct location of the posts is maintained through this process, and the best way to ensure this is to use a set of transfer punches to mark each position.


Select a punch which is the largest possible that still fits through the hole in the bridge, and then tap lightly with a hammer to mark the center of the hole. Make sure the bridge doesn't move when you tap that first hole!

Step 5. Measure Depth and Drill Test Hole: With the locations for each post marked with the punch, you can move on to drilling the post holes. To minimise gauge-out around the edges of the holes, I recommend using a brad-point drill bit. I bought an imperial set from Stewmac and they have been my best tool investment yet. However, before you reach for the drill, you should measure the required depth of the post holes, mark this distance on the drill bit using some tape, and drill a test hole to make sure you have the correct drill bit size.


Step 6. Drill..!: Once you are satisfied that everything is correct, you can go ahead and drill your holes in the guitar top. Try to hold the drill as straight as possible in both directions (or better still use a drill press). Drill down to the indicated depth only and make sure all the crap has been cleaned out of the holes.


 If you use a brad-point drill bit as suggested, you should end up with nice clean post holes like mine!

Step 7. Tap in the Posts: After you've successfully drilled the post holes, all that remains is to test-fit the posts and the bridge. To do this you simply tap them in using some wood to even out the force and protect the bridge's finish.


I usually do this step on both posts simultaneously, with the bridge fitted to make sure the posts go in straight and still allow the bridge to sit astride them once fully seated. But that's just me - paranoid about everything!


And viola! There you have it - a tune-o-matic bridge fitted to your guitar with the correct placement, taking into account correct comensation and the like. Of course we have made use of expertise from those nice folks at Stewmac, but hey - no point re-inventing the wheel!

Friday, 10 January 2014

Les Paul Jnr Double Cut: It's Finished!

Well, the Les Paul Jnr Double Cut was finally finished today - Woohoo!! I am very happy with how this one came out. In terms of the wiring mods discussed previously in this blog, in the end I used only a single push-pull pot to bypass the tone circuit. The tone bypass is the default - you have to pull the tone pot up (out) to enable the tone. In the down position you get the full dynamic range of the P90 without any modifications.


Apart from the custom scratchplate & truss-rod cover, only a small number of further changes were made above and beyond the stock Pitbull kit. I added an Orange-drop tone cap to the aforementioned push-pull tone pot for the tone circuit, and added a switchcraft output jack with an oval base plate. Lastly, a pair of black speed knobs finished off the look.


I couldn't be happier with how she has turned out. Even though the tuners, bridge and P90 are all stock standard from the Pitbull kit, she plays very nicely indeed with plenty of grunt and oodles of sustain. I would still like to get a P90 from GFS for this bad boy when funds become available, but what's there now sounds amazingly good anyway (go figure!). With a bone nut and the action dialed in, she's low to the deck and silky smooth! Man, I can't put this baby down - especially with the distortion cranked way up! Heaven..

Wednesday, 8 January 2014

Stone Roses Tribute: Test Fit

Well, Christmas has come and gone and I can finally start my Stone Roses Tribute build! Right off the bat, I gotta say that I'm very happy with the quality of the Pitbull Guitars RC-1 kit that will form the basis of this build. The f-hole is nicely finished, there's only a couple of glue spots (not that this will be a problem for this particular build), the binding is clean and well seated, and there's some gorgeous grain on the rosewood fretboard.


I did a mock fit to check that all the pieces fit together correctly and the guitar looks really, really good! It's not as large as my actual Rickenbacker 330, but it's still got those distinctive curves. Suffice to say that after seeing the mock-up, I'm raring to go on this project!


I would really like to swap out the pickups with some GFS Retrotron mini-humbuckers, and replace the kit's knobs with some more "Rickish" black numbers, but I'll have to see how the budget stands up on this one. Looking at the mockup it did strike me just how nice this baby would look in a natural (colourless or slightly amber) finish. Oh well, tough shit! It's destined to have paint splashed over it in true Squire fashion - and that's final!

Les Paul Florentine: She's Got Neck

So, who says that I can't glue a set-neck? Not me. Well, not anymore at least. Today, after 2 days of waiting, I released the clamps holding the neck joint on the Florentine. The Titebond glue seems to have produced a very strong join, although to be honest I haven't driven my car over it.


One thing that did worry me is that upon inspection the angle of the neck seemed quite shallow compared to my Epiphone Les Paul. Worried that I might end up with action out the wazoo, I immediately fitted the trapeze tailpiece and the E strings to check the string height. Thankfully, using the bridge but without the bridge posts fitted, the E strings are just touching the neck at the highest fret. I'm hoping that once the bridge posts are in, this will leave just enough wiggle room to allow a nice action to be achieved. That's the big trouble with these set-neck builds - once it's in, it's in! Not being able to shim the neck to fix the action brings me out in a cold sweat..

Anyway, apart from the neck angle (which is, well, fine actually) everything else looks good. With correct bridge post placement, the two E strings can be aligned so that they sit over the outermost pickup poles and travel nicely up the neck to the nut. Yippee!! The next job is to drill the bridge post holes (carefully, carefully!!) and then finalise the finish so that the wiring can begin. She's slowly nearing completion, although her wiring promises to be a real pain in the grunions. Fun times ahead - stay tuned for that one!

Sunday, 5 January 2014

Les Paul Florentine: Gluing the Neck

Today marked another first for me. I finally glued the neck onto my Les Paul Florentine - the first set-neck that I have built. I was a bit worried about it, having never glued in a neck before, but the neck fit was reasonably tight on the kit and I didnt really expect problems. I used a liberal amount of Titebond glue on all surfaces (the cavity and the neck) and then held the neck in place with two clamps.


Titebond is reportedly much stronger than PVC for neck setting, and is still water based. I was able to wipe off excess glue with a damp rag. The nice thing about this particular set neck project is that the bridge posts havent been drilled yet. What that means for me is that I could just glue the neck into place without having to worry too much about string alignment from the bridge, over the pickups and down the neck. In a couple of days I'll remove the clamps and see how well I've done.

Once the neck is dry I can position the bridge, taking the string alignment and pickups into account, and then drill the post holes when everything is lined up nicely. That will be the next step for this bad boy!

Wednesday, 1 January 2014

Les Paul Jnr Double Cut: Wiring for a Single Pickup

Looking at the wiring for the Les Paul Jnr, I came across this interesting schematic from the Guitar Wiring Blog which provides for multiple tone options from a single, single-coil source. The circuit uses two on-on switches to provide both a tone bypass function and the choice of 2 different capacitance values when the tone circuit is engaged.

Here's how it works. Firstly we start with a standard single-pickup circuit with a volume pot and tone circuit:


We then add two cutoff switches (both controlled from the same physical switch) to provide the ability to completely remove the tone circuit when required:


To this we then add a second switch that selects between 2 separate capacitor values when the tone circuit is active:


And there you have it. Cool huh? A big thanks to the Guitar Wiring Blog for this idea.

For me this is an especially great idea for the Jnr as it only has the single P90. I have two push-pull 500K pots waiting on my workbench for just such an application, and so this seems too good an opportunity to pass up! I really think this baby is going to sound great with the tone bypass engaged. Makes me wish I could afford a new P90 pickup for this baby as well (I've had my eye on the GFS Dogear P90 for a while now) but the boss has frozen all guitar upgrade funds for the time being. This said, I'm planning on wiring in a wire terminator so that I can swap out the pickup very easily in the future :).